"Rocky" - 1981 F250 Restoration


|
Here's a tiny one.
I wanted to finish the seatbelts today but had to work fast, there was a snowstorm on the way. I got the bench seat pulled out and managed to loom up the wiring for the seat heater kits I'd bought: 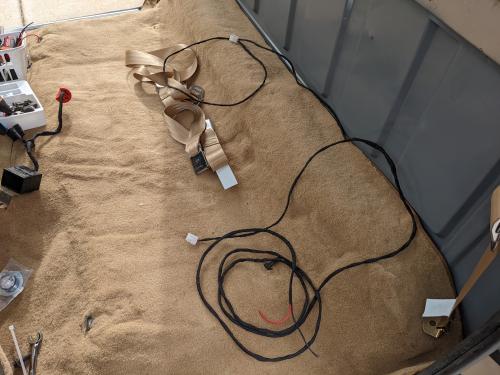 But I stalled there trying to reinstall the seat. I couldn't figure out where the outer (retractable) seat belt bottom brackets went, trying to find a way to use the seat frame bolts with them and forgetting the seat belt brackets have their own bolts closer to the doors. There's an hour of my life I'll never get back. Tomorrow once the snow stops I hope to finalize the seats and take a look at the top cover of the T18 tranny. My backup-switch wire is broken off the sensor, and I SWEAR I bought a new sensor and cable to replace it. TWICE. But if I did it hasn't arrived and I can't find any order where that happened so I'm going to try to jerry-rig it so I can close the transmission access panel and put the carpet down finally.
--
1981 F-250 Custom. 6.6L V8, 4 barrel Holley carb, ARA aftermarket A/C. |
Re: "Rocky" - 1981 F250 Restoration
|
Administrator
|
Looks neat. You do good work.
 You are installing seat heaters in the stock bench seat? How much current do they pull?
Gary, AKA "Gary fellow": Profile
Dad's: '81 F150 Ranger XLT 4x4: Down for restomod: Full-roller "stroked 351M" w/Trick Flow heads & intake, EEC-V SEFI/E4OD/3.50 gears w/Kevlar clutches
|
|
|
Thanks :) That is a VERY good question. I'm not sure yet. I bought this product https://www.lmctruck.com/1980-96-ford/seats/seat-heater-kits from LMC and in typical LMC fashion their product page is pretty vague on details, even the maker. It turns out to be a "WarmSeats" brand product. Their instructions list their Web site as http://warmseats.com/ but that doesn't load for me. I'm going to go ahead and attach their instructions here in case anybody else is curious about the product. 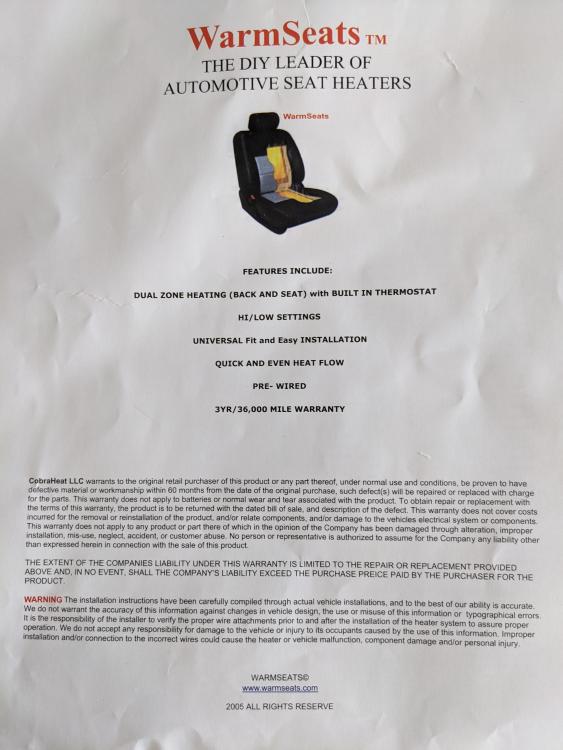 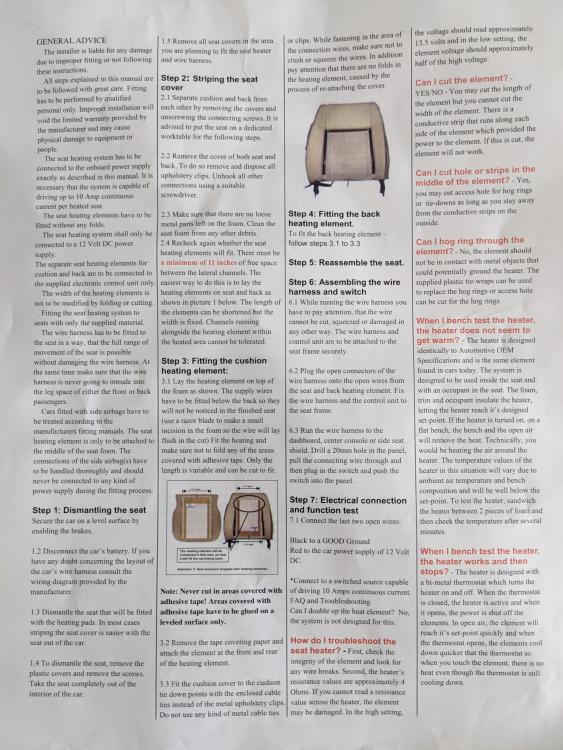 Hopefully they're somewhat readable. Gary I can send you high res versions if you want to post them under docs somewhere but I'm not sure it's worth it. It's an OK product, but I'm not sure I'd recommend it over the many alternatives on Amazon. There's no "specifications" section and that's all there is to the docs. Their instructions say you must connect it to a "switched source capable of driving 10 amps continuous current". They later say the resistance value is "4 ohms". They aren't specific, but this is a two-element setup (pads for bottom and back) and I suspect that's per-element. Let's say your alternator is really cranking and your V+ is around 15V. That would be 3.75A per seat. Fine and good, a 10A (per seat) fuse is probably appropriate, or a 20A (dedicated) circuit for a pair. But the wire it comes with is only 18AWG. IMO that's a little on the thin side because the way they set this up, there's a relay unit you install under the seat that's switched on/off by a remote switch. Smart thinking, but it means you're doing a home-run from your fuse panel to your seats where the relay goes. (For some that may be in the engine compartment.) For me that's about 10'. Southwire's calculator recommends 14AWG for that length at that current draw for a max 3% voltage drop. Now you just KNOW that inexperienced installers, installing both driver/passenger seat kits, are going to just tie those two together. I worry a lot of folks would be running their power wires pretty hot. In my case I ran 16AWG silicone (it's what I had on hand, but it's rated higher than 14AWG anyway) back from the fuse panel to a splice behind the seats, then cut the WarmSeats supply wires short so there's only a foot or two of that. The next frustration is they give you this "smart" relay / remote switch setup, right? But the wire/connector from the relay to the seat heater unit is only about a foot long, so the relay really needs to go under the seat. But the connector for the SWITCH is only about 2' long. So unless you want to cut/splice that, you have to install the SWITCH in the seat somewhere too, not on your instrument panel. I have everything to do that of course but it's extra work I could have done without. Finally, the installation itself was frustrating. I trucked on with it because I wanted to get my seats finished, but the pads are audibly "crinkly" under the seat covers, and the tape they give you to attach them has very weak adhesive, basically post-it note strength. It makes it very hard to keep the pads in place while you put the covers on. Long story short this kit is cheap but you get what you pay for. I wouldn't really recommend these to anybody else.
--
1981 F-250 Custom. 6.6L V8, 4 barrel Holley carb, ARA aftermarket A/C. |
|
|
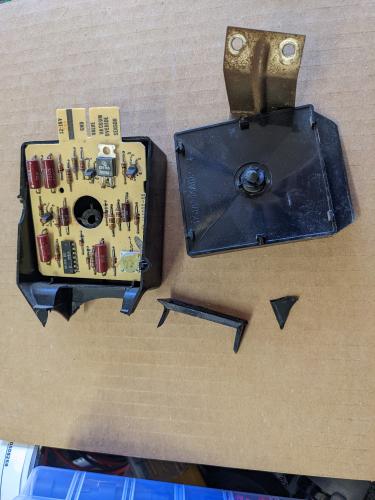
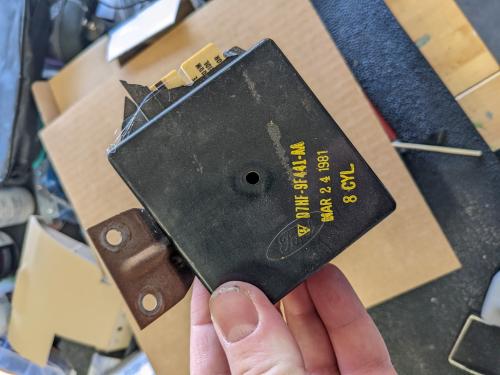
On an unrelated note we've had about a foot of snow here in the past week and progress has been slow. But I've also done a few things I haven't had time to post because I've been distracted. The other day, I spent an hour getting friendly with a hot-melt gun fixing two things. First, my "throttle kicker" basically fell apart in my hands as I was taking it out. I decided I did want to reinstall it, just because "it was there and working, why not" and the only damage was to the case so I hot-melted that all back together.
      Also one of my instrument panel turn signal inserts was missing when I bought the truck. I found it behind the panel when I disassembled everything, so I hot-melted that back on too. 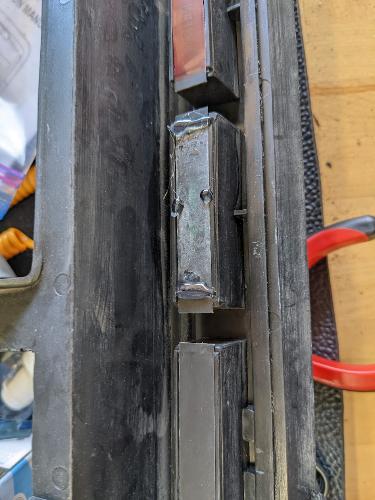 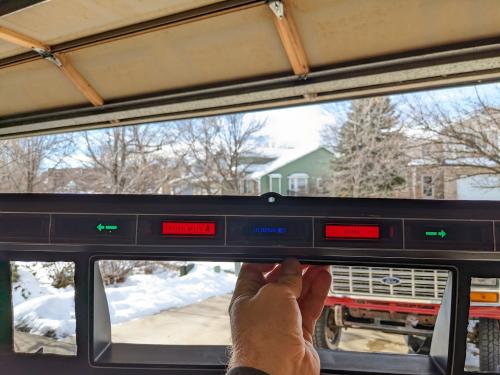 This is high-temp hot melt so it behaves better than usual even in a hot car on a sunny day. I'd never use it for anything critical/load bearing but for these two tasks I think it'll do fine.
--
1981 F-250 Custom. 6.6L V8, 4 barrel Holley carb, ARA aftermarket A/C. |
|
|
Minor progress today. Too snowy and cold to do more. But I did get my seat bolted back in, this time with the seat belts attached.
Then promptly discovered that the lap belt kits LMC sells have buckle-side straps that are too short. Have to figure out how to extend them somehow. Grrrrrr..... On the plus side I also got some super cheap plastic bed rail caps. Sometimes it's the little things. They really dress it up: 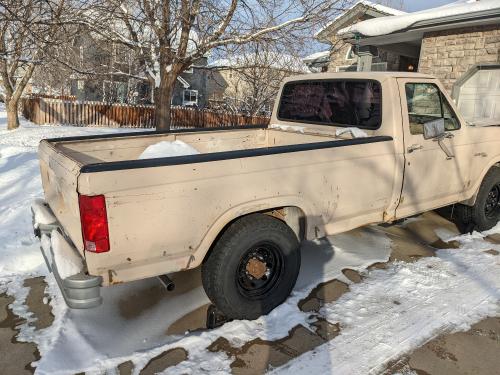
--
1981 F-250 Custom. 6.6L V8, 4 barrel Holley carb, ARA aftermarket A/C. |
Re: "Rocky" - 1981 F250 Restoration
|
Administrator
|
We just had a discussion about belt extenders, but there are three different versions depending on the manufacturer of the belt. And since yours came from LMC there's no way knowing which one, if any, would fit.
Anyway, the bed caps do look good.
Gary, AKA "Gary fellow": Profile
Dad's: '81 F150 Ranger XLT 4x4: Down for restomod: Full-roller "stroked 351M" w/Trick Flow heads & intake, EEC-V SEFI/E4OD/3.50 gears w/Kevlar clutches
|
|
|
Yeah so frustrating. One belt is long enough, the other two are short:
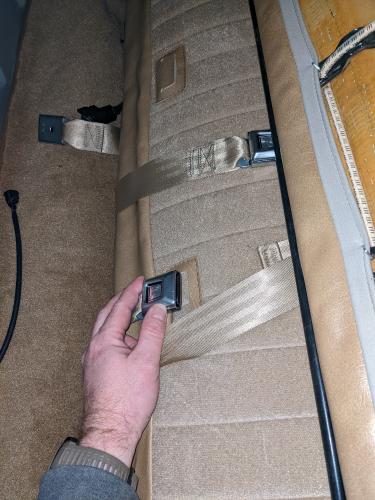 As you can see this is me routing the seat belts around the back of the seat - I had hoped to not have to cut the cover, despite there being a bit of a "cut here" tab sewn in. If I do, it would buy maybe an inch- just enough to be worth it, not enough to be "pleasant". What I might do is fashion a pair of 90-degree tabs out of a piece of 1"x2" angle iron, which is how the retractable shoulder belts attach. The receiver portions of the belt mount via a flat plate under a bolt, so rotating them 90 degrees gains you a bit, shifting them up onto the angle iron gains a bit more, and with routing them through the seat cover as well I think I could gain as much as 3" total. That's probably enough...
--
1981 F-250 Custom. 6.6L V8, 4 barrel Holley carb, ARA aftermarket A/C. |
Re: "Rocky" - 1981 F250 Restoration
|
Administrator
|
I think I'd do the angle iron instead of cutting the cover. You can always remove the angle iron, but can't un-cut the cover.
Gary, AKA "Gary fellow": Profile
Dad's: '81 F150 Ranger XLT 4x4: Down for restomod: Full-roller "stroked 351M" w/Trick Flow heads & intake, EEC-V SEFI/E4OD/3.50 gears w/Kevlar clutches
|
|
|
I agree. Actually I went a little overboard. I noticed Jegs has a right-angle seat belt mounting bracket kit. It's way too expensive at $14 (each) for what amounts to a piece of 1x2 angle, two holes, and a bolt but... I must be exactly the kind of sucker they make these for because the time savings was worth it to me. Once again, setting the seats aside at "almost done" for another project while I wait for the parts to arrive...
It's supposed to be warmer today but it isn't there yet. I think I may try to tackle two small projects: upgrading the dome light to the dome/map light unit, and hacking together my reverse-sensor-switch wire somehow so I can close the transmission cover and get the carpet laid down. The one thing holding me back is I'm noticing some water on the floor of the driver's side. I think it's dripping in as the snow melts through the hole I used to add the wire loom for the door, so I guess I need to seal that better. It may be time to break out the Lexel...
--
1981 F-250 Custom. 6.6L V8, 4 barrel Holley carb, ARA aftermarket A/C. |
|
|
On the back up light switch / wire what is it you are dealing with?
You have the switch but not the wire with the plug or got the wire but the plug is busted? I ask because I had the switch and wire but the plug on the end of the wire was bad. I hunted down what I had on hand and found a weather pack 2 prong plug would fit the switch. Yea it did not have a clip to hold it in place like the factory had but it stays in place and has been good for 2+ years and 17K miles. It worked with the T18 the truck first had and now with the NP435 transmission. Guess they use the same switch? Now because I had the wire from the frame harness to the transmission I dont know what type of plug is used at that end if you had to make a harness from the frame harness to transmission, sorry. Dave ----
Dave G.
81 F100 flare side 300 six / AA OD / NP435 / 2.75 gear http://cars.grantskingdom1.com/index.php/1980-Ford-F100?page=1 81 F100 style side 300 six/SROD parts truck -RIP http://cars.grantskingdom1.com/index.php/1981-Ford-F100 |
Re: "Rocky" - 1981 F250 Restoration
|
Administrator
|
In reply to this post by taskswap
I think you made the right choice. You can't buy time, but buying parts that save time is sort buying time.
Good luck on the other projects. And I hope you get the leak sealed easily.
Gary, AKA "Gary fellow": Profile
Dad's: '81 F150 Ranger XLT 4x4: Down for restomod: Full-roller "stroked 351M" w/Trick Flow heads & intake, EEC-V SEFI/E4OD/3.50 gears w/Kevlar clutches
|
|
|
Welp. It was the wiper motor after all (wipers not parking). I put a new switch in first, and that didn't help, but I don't regret it. My old switch was so fragile it fell apart in my hands as I pulled the plug on it to install the intermittent control module. Today I gathered my courage, made sure there was beer in the fridge, and decided to tackle the wiper motor.
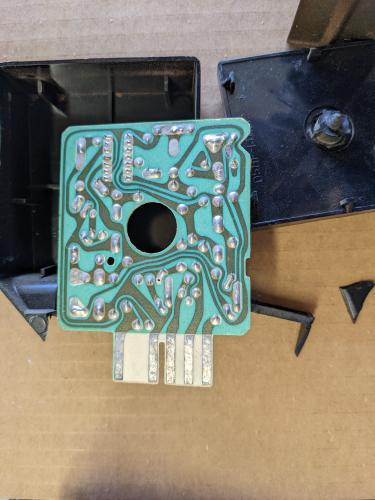
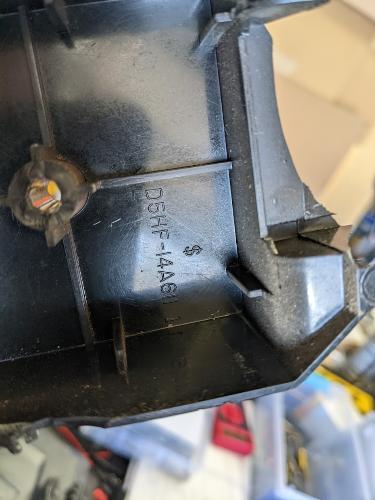
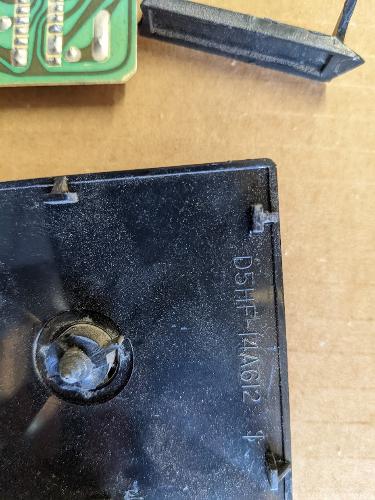
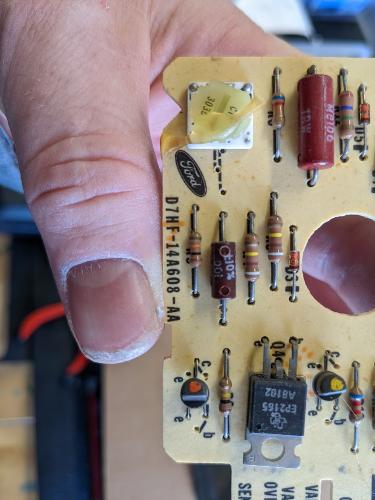
Man, getting that cowl cover off is a PAIN. I can see why some people remove their whole hood to do it. Is there any specific "trick" to reinstalling it without scraping it underneath the hood (other than removing the hood)? I was thinking of painting it while it's off and hate to ruin it when I reinstall it... Anyway I got that all removed and discovered basically a household-rain-gutter full of pine needles, decayed leaves and other wet junk in the channel underneath. It's tempting to try to add some metal screening on the bottom side of the cowl before I reinstall it - anybody ever try that? I think I also figured out how water was getting into my driver's side floor pan as the snow melted. Looking down the A pillar channel, I can clearly see the back end of the drivers left-leg air vent peeking out into that space. The air vent used to have a foam gasket but I figured it was just to provide a better air/sound seal. I don't think it would have done much for water, so I didn't try to replace it. But maybe I need to add some weatherstripping. Or maybe I just need to find a way to "delete" the vents entirely. IMO they're just asking for trouble in a lot of ways, and I'm still set on making this ARA A/C system work. Installing the wiper motor went mostly OK. The reviews on this unit all said "drop in replacement for my truck!" which must be mostly fake because it sure wasn't a drop-in. The pin on the end of the armature/crank that goes into the two wiper arms wasn't the right length. There's no way it would work as-is. Fortunately I still had my old motor and the motor spindle was basically the same size/shape, so I was able to transfer over my old armature. And now my wipers park! The intermittent still doesn't work though. On Gary's advice I disassembled my control unit to look for cold/broken solder joints and it all looked pretty good, but I could have missed something or just have a bad unit (it was an eBay find). Intermittent wipers aren't actually a huge deal to me so I'm going to set this task aside and come back to it later, but at some point I'll probably replace the controller or at least re-inspect it. As usual, now waiting for more parts! That beer helped 
--
1981 F-250 Custom. 6.6L V8, 4 barrel Holley carb, ARA aftermarket A/C. |
Re: "Rocky" - 1981 F250 Restoration
|
Administrator
|
Peeling the onion. Peel, cry, peel, cry, but soon you'll have a Bloomin' Onion!
 Glad you got the wipers going. Not sure what to say about the intermittent part. Other than "good luck". As for the vents, I'd put weatherstripping on them. If you RTV the you'll never get them off - at least w/o breaking them. But you might want to keep the vents for air flow when you don't need the A/C. I added them to Big Blue and really like them.
Gary, AKA "Gary fellow": Profile
Dad's: '81 F150 Ranger XLT 4x4: Down for restomod: Full-roller "stroked 351M" w/Trick Flow heads & intake, EEC-V SEFI/E4OD/3.50 gears w/Kevlar clutches
|
|
|
In reply to this post by taskswap
Yes I believe some have put screens under the cowl openings. And some and I’m pretty sure Gary did, put the later style cowls on with the smaller holes like my 92 Bronco.
The cowl is hard without removing the hood, I got mine loose and lifted a side at a time to clean it out. Then found a bunch in the panels where the vents are. I have A/C so no vents, but panels. The debris was about level with the lower part of the panel. Also found a lot when replacing the blower motor. All around the resistor. I think next time hopefully this summer, I’m going to try and blow the debris down and get it through the panels.
Dane
1986 F250HD SC XLT Lariat 4x4 460 C6-Sold 1992 Bronco XLT 4x4 351W E4OD 1998 GMC Sierra SLE K1500 350 4L60E Arizona |
|
|
Yes if you have water coming in at that panel then you have dirt / leaves blocking the drain that is below that point. Pull off the kick panels and remove the 4 screws holding the metal block off panel in place and clean it out. Water should flow from the cowl down the pillars on either side and out the "duck bill" seal and out the bottom of the fenders. Now you may find after cleaning everything that the seam sealer is all dried up and failing so once dry that will need to be addressed. Some have used Flex Seal put a plastic nozzle with plastic straw so they can put the sealer where it needs to be. It comes in clear / white and think black maybe other colors? Because I had the nose off my truck I was able to use seam sealer after I removed the old bad sealer and reseal it with 2 coats. Dave ---- ps: if you can find good vent kick panels you can leave the metal panels off, install the vent panels and have flow through air. My truck did not have factory AC so it had the vents. When I added factory AC I left the vents as it was going to be a bit before I could get the AC system up & running. I have had issues with the system holding a charge so the vents come in handy LOL
Dave G.
81 F100 flare side 300 six / AA OD / NP435 / 2.75 gear http://cars.grantskingdom1.com/index.php/1980-Ford-F100?page=1 81 F100 style side 300 six/SROD parts truck -RIP http://cars.grantskingdom1.com/index.php/1981-Ford-F100 |
Re: "Rocky" - 1981 F250 Restoration
|
Administrator
|
Yes, Big Blue has the 1987 and later pin cushion cowl, and it is keeping that area free of debris. But I'm going back with the original cowl on Dad's truck and will put plastic mesh on the back side.
As for getting the cowl on/off without damaging it, I loosened the hood bolts and slid the hood to the farthest forward position and then snugged them down. That got me close on clearance, but it didn't get as much as I wanted. So I then left the bolts loose so the hood would angle a bit on the hinge to get even more clearance. But in that case you can't open the hood much or it'll slide back down, and you have to prop it open with something at the front end. And make sure to mark the position of the hinge before you do that. However, all of that is a major pain and chipping the paint is a real possibility. I think if I had new paint I'd protect it with tape. Or pull the hood completely off.
Gary, AKA "Gary fellow": Profile
Dad's: '81 F150 Ranger XLT 4x4: Down for restomod: Full-roller "stroked 351M" w/Trick Flow heads & intake, EEC-V SEFI/E4OD/3.50 gears w/Kevlar clutches
|
|
|
Thanks, guys. Good input here. Any opinions how you might attach screening to the underside of the cowl? I want it to stay put but I don't want to do rivets (nothing visible from the top) or adhesive (I doubt it'd stay put). I thought about maybe JB-welding some thing right-angle brackets all around the vents on the underside, so I could "pop in" a piece of metal screening. Not sure that would hold but I could try it...
--
1981 F-250 Custom. 6.6L V8, 4 barrel Holley carb, ARA aftermarket A/C. |
Re: "Rocky" - 1981 F250 Restoration
|
Administrator
|
My paint/body man said we'll use an adhesive, but I didn't ask exactly how.
I think you want it up against the bottom of the cowl so stuff can't get between the screen and the cowl. And if you just glue it to the edges I'm afraid it'll droop. I wonder if you can squeeze adhesive through the screen and into the back side of the louvers? Or, maybe JB Weld studs into the back side of the louvers and push the screen down over them and put nuts and washers on the studs to hold the screen up. And you could put a "spreader" on each stud and hide it under the louver.
Gary, AKA "Gary fellow": Profile
Dad's: '81 F150 Ranger XLT 4x4: Down for restomod: Full-roller "stroked 351M" w/Trick Flow heads & intake, EEC-V SEFI/E4OD/3.50 gears w/Kevlar clutches
|
|
|
I know it seems a little crazy but I like the idea of some type of studs... but also don't love the long-term life of adhesives on the underside of there, I just don't have a lot of confidence it will stay put. So I'm thinking of soldering something on. McMaster has these "elevator bolts" at $8 for a 25pk in the smaller sizes:
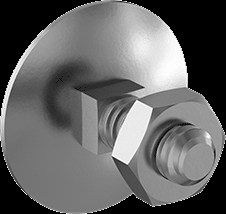 I think I can get away with silver-soldering them on the underside of the cowl without warping it (I'm not worried about the paint because I'm going to strip and repaint it anyway). If I do that I think I could put metal screening under the cowl vents and fasten them to these studs with washers and lock nuts. I'll have to measure the clearance but I think if I'm careful I can get away with it. That's a project for another day though. Right now I'm gathering my courage to do some work in the cold. I pulled my shifter cane out for what I hope is the last time so I could fix my reverse switch plug. Today I need to reinstall that and make the final hole in the carpet where the shifter boot goes so I can install that. Fingers crossed.
--
1981 F-250 Custom. 6.6L V8, 4 barrel Holley carb, ARA aftermarket A/C. |
Re: "Rocky" - 1981 F250 Restoration
|
Administrator
|
You are braver than I am with the silver soldering. But why not put a later model "pin cushion" cowl on? It'll solve the problem without a screen.
However, if you stay with the Bullnose cowl I wouldn't use large washers as I think they'll be seen from above. I'd make long "spreader bars" that are about the same width of the metal of the cowl so they can hide under the cowl.
Gary, AKA "Gary fellow": Profile
Dad's: '81 F150 Ranger XLT 4x4: Down for restomod: Full-roller "stroked 351M" w/Trick Flow heads & intake, EEC-V SEFI/E4OD/3.50 gears w/Kevlar clutches
|
| Edit this page |