"Hook 'em Up Loose" - 1986 F-150 Restoration/build
Re: "Hook 'em Up Loose" - 1986 F-150 Restoration/build
|
Administrator
|
Sure looks good! The next to last pic almost looks like you soldered the terminal, which is what I do. But, the ratcheting crimpers can do a really good job.
But, for clarification, after you got the several layers of heat-shrink on you put one more on to tie the sleeve to the previous heat-shrink tubing. Right? And, on a different subject, the back of the cab lets in a lot of noise. Are you going to treat it like you did the floor?
Gary, AKA "Gary fellow": Profile
Dad's: '81 F150 Ranger XLT 4x4: Down for restomod: Full-roller "stroked 351M" w/Trick Flow heads & intake, EEC-V SEFI/E4OD/3.50 gears w/Kevlar clutches
|
They do a good job but have their down falls here and there, always need to do a pull check or use proper wire diameter build ups (CAUs). Most all aircraft connections are crimped now a days. Even the giant power feeders which use a cop-alum swage that is compressed so hard it melds the crimp and the conductor into one piece of metal. Imagine taking two pieces of copper and compressing them so hard its welded permanently. Yes to make it look as one continuous piece I shrunk extra sleeve over the whole thing and the braid. I am still out on how to do the back of the cab. I seen some color match decorative panels somewhere, maybe on LMC but they were for 87+. Not sure why they wouldn't work on this model year. I could then hide some kilmat behind that. Another option is to put kilmat on the rear wall then build that storage unit to hide it. As far as the b pillars my mind is still turning on that one. I either need some full length belt covers or to build something to cover that area up. Then I can put butyl deadening material on pillar like kilmat.
1986 F-150|Standard Cab|4x2|300Six|C6Transmission w/3.08 rear|Name:TBD
2021 Ranger XLT Super Crew |
|
In reply to this post by Danny G
Ok time to fix that broken wire
The Ford connectors use "wedgelock" pins. Clips and Fasteners sells these in boxes of 25. There is a gray lock tab that clicks over a bulge in the pin then a red "wedge" that locks over that. To remove this red wedge you need to depress the tab on the side of the connector while pushing it out from the top with a small thin flat head screwdriver. To remove the pin you need a depin in tool to release the lock tab without breaking it 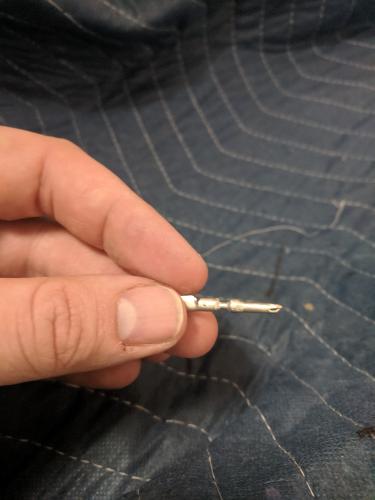 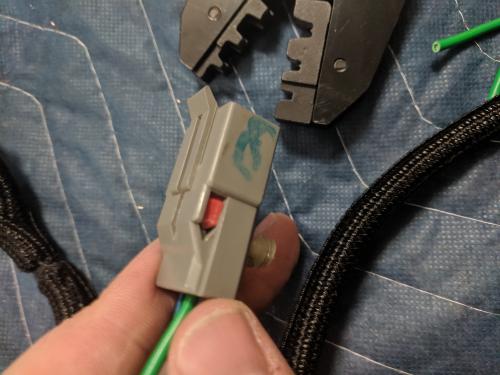 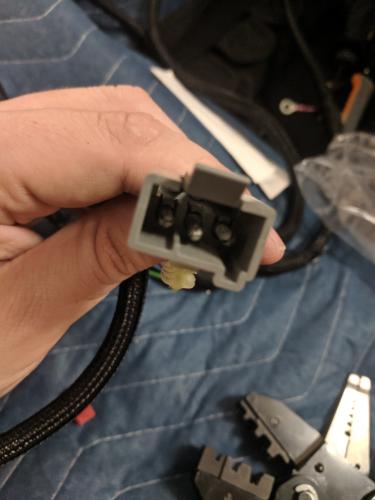 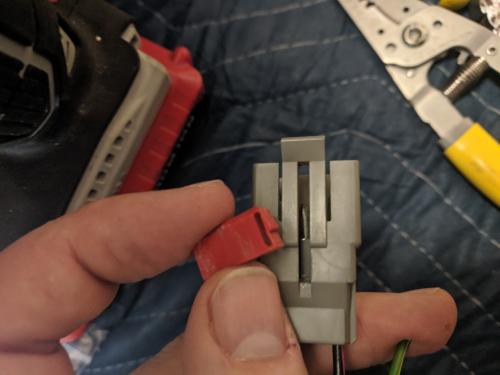 The removal tool fits over the pin and releases the lock 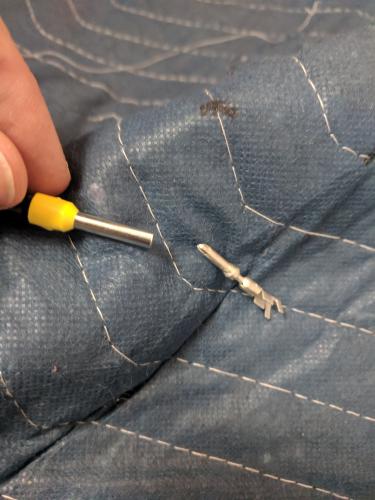 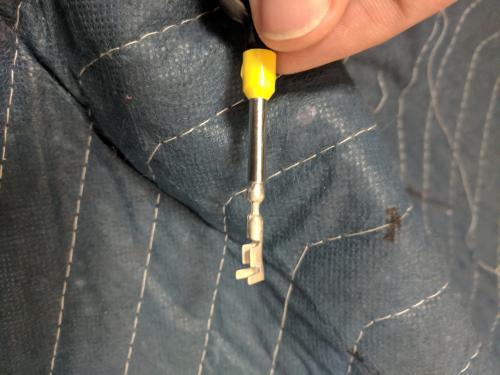 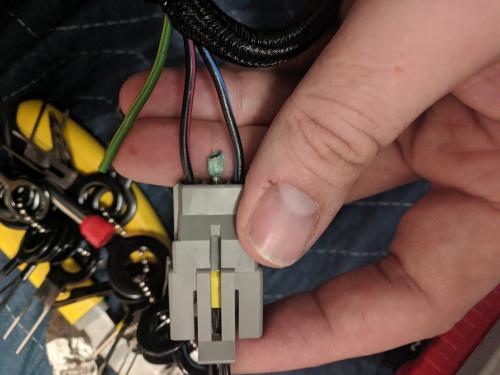 You can see how corroded this pin was. The tab holding the wire corroded completely off leaving the pin/cavity behind. This got down into the wire too I ended up cutting off a few inches. I had some 16awg laying around to splice in. I think the truck is running 18awg but it will do the job. 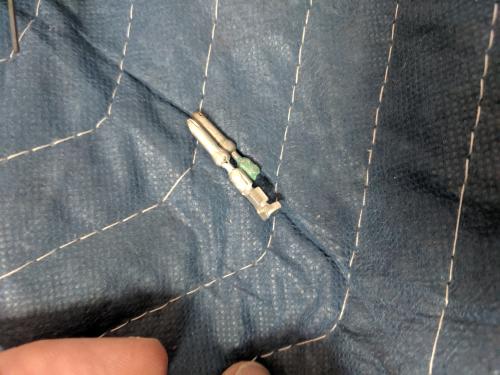 When using a but splice work it just like a terminal. The strip length is from the inspection slot/stop in the middle to the end of the metal. When you put the wire into the splice the jacket should be butted up against the metal and the wire visible in that slot. 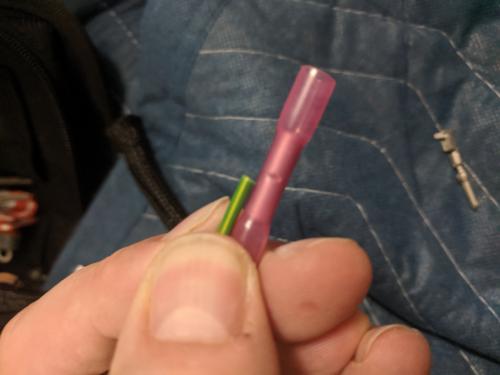 Onto the pin. We need to change out our crimp dies. these are open cavity contacts and these dies are designed to curve the "wings" of the pin aka insulation grip, back into the jacket of the wire. I will crimp this twice once in the large cavity then once in the middle cavity. You can lube the dies with silicone dry lube or IPA. The first set of "wings" (smaller set) is intended to grab bare metal conductor, the second pair grabs the jacket. It's hard to see so I crimped a piece of scrap in without the jacket removed so you could see what happens. I know some guys also like to put solder into the cavity and use the first set of wings as a second insulation grip.(I'll add annotated picture later). 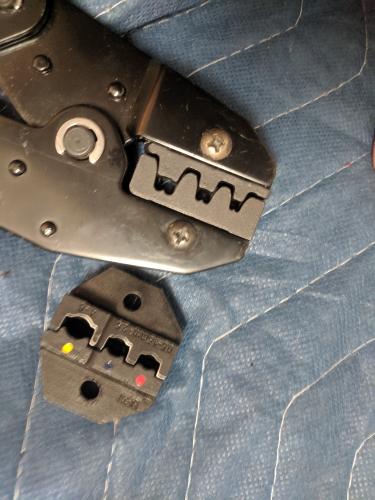 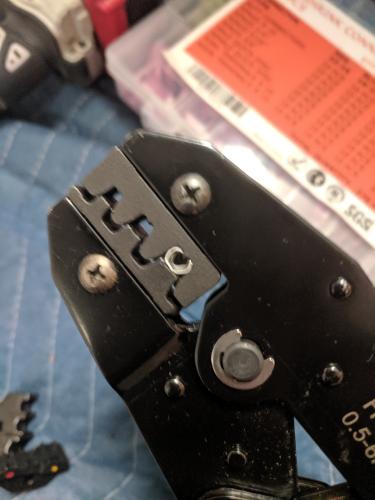 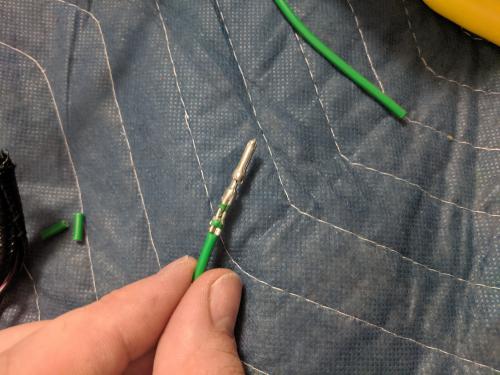 You can put heat shrink over this as well. I may pull all the pins later and put double wall shrink on them to keep corrosion out. I also recommend using dielectric grease in these connectors to keep corrosion down and well.
1986 F-150|Standard Cab|4x2|300Six|C6Transmission w/3.08 rear|Name:TBD
2021 Ranger XLT Super Crew |
|
This post was updated on .
Last step for tonight. Installing the ground stud.
The truck was painted and we have that flat terminal so we need to get to bare metal. The cleaned area needs to be slightly bigger than the terminal so we know we have no paint under it. If you have used them before or are feeling the need for a new tool you can buy a piloted bonding brush. If you have never used one you could gall the metal and also this being a tapped hole you could mess up the hole So use a combination of red and grey scotch brite or Coarse and 0000 steel wool. I would avoid sand paper,it is not pliable enough.  After the metal was clean, gloves on and cleaned it and the terminal with IPA. I didn't have my sealing spoons so I improvised a sub par one with a cut ziptie. Polysulfide sealant was applied to the threads.and pushed through the terminal and into the structure. As the screw turns in the sealants beads up on the structure. It's a super thin amount needed. This seal then goes between the structure and the terminal. What!?! Yes I put seal between the bonding surfaces... But why! Corrosion. What happens when you tighten down the screw the poly sulfide will squeeze out around the edges. It will fill any tiny voids and dimples in the metal but where the metal is smooth it makes contact. This is why galling is bad. And we step up from coarse to smooth removal media(scotchbrite). You can see here the squeeze out from under the terminal and under the head of the fastener. 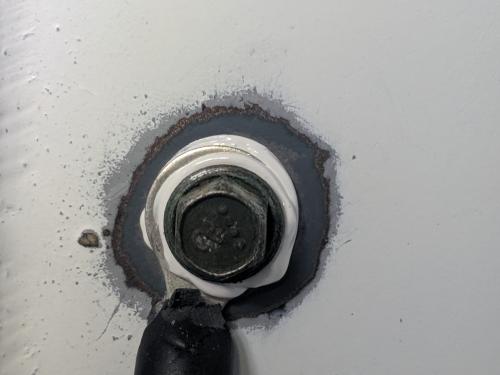 I failed to mention I used a razor to trim the heat shrink so it would sit flush. This method now keeps water or moisture working up the threads or nutplate under the terminal, and from the head side as well. Now to check continuity. To measure the actual resistance value of this you would need a special unit capable of measuring milliohms. The bond will be that good. I don't have one at home so I am just using a digital multi meter to do a basic check in the ohms range. But how? Well after the meter is on touch the ends together. In my case I get 0.1 ohms. This is the natural resistance of the leads. If my bond is less than this it will read 0.1ohms or 100 milliohms. If it reads higher, we got a problem. In actuality. I expect this bond to be in the 0.05 - 0.1ish milliohm range. Probe the terminal to nearby bare metal... Should still have some exposed. I got 0.1 so I know I've got solid connection with resistance under the range of my meter. 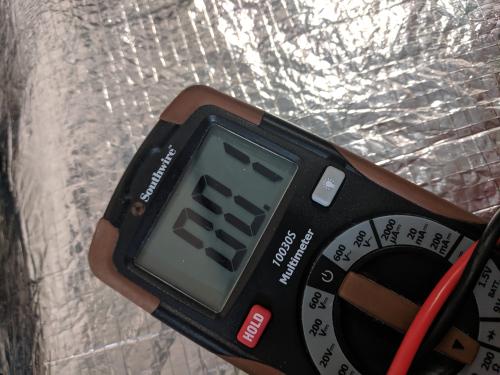 You could smooth the squeeze out around the periphery and be done. I decided to encapsulate, because why not. It's a little rough, but I used a ziptie, not a sealing spoon. Will touch up the paint later. This sealant can or painted over as well. 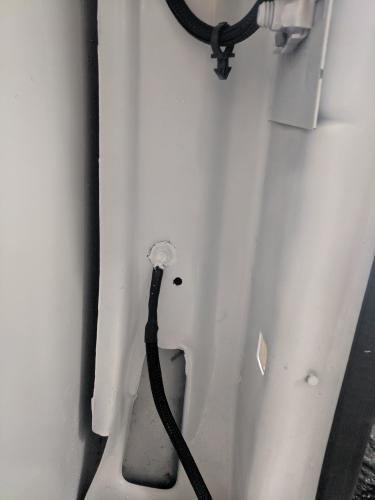
1986 F-150|Standard Cab|4x2|300Six|C6Transmission w/3.08 rear|Name:TBD
2021 Ranger XLT Super Crew |
Re: "Hook 'em Up Loose" - 1986 F-150 Restoration/build
|
Administrator
|
WOW! And I thought I paid attention to details. No comparison!
What I've done on connections like that bolt is to put Dow Corning 4 Electrical Insulating Compound on it. That excludes oxygen and moisture. And then I might coat it with liquid electrical tape. Thoughts?
Gary, AKA "Gary fellow": Profile
Dad's: '81 F150 Ranger XLT 4x4: Down for restomod: Full-roller "stroked 351M" w/Trick Flow heads & intake, EEC-V SEFI/E4OD/3.50 gears w/Kevlar clutches
|
|
If it works I works I guess lol. Have you ever taken one off after doing that and seen how it ended up? The one thing to be careful of is if the compound has a vinegar smell to it, do not use it on electrical contacts, it is corrosive. This is more prevalent amoungst rtv silicones..
1986 F-150|Standard Cab|4x2|300Six|C6Transmission w/3.08 rear|Name:TBD
2021 Ranger XLT Super Crew |
Re: "Hook 'em Up Loose" - 1986 F-150 Restoration/build
|
Administrator
|
I haven't taken anything apart where I used the Dow compound. But, I've used it on several battery cables that I crimped with my 16-ton hydraulic crimper, and those cables have been in service for several years with no problems.
And, it doesn't smell like ascetic acid. 
Gary, AKA "Gary fellow": Profile
Dad's: '81 F150 Ranger XLT 4x4: Down for restomod: Full-roller "stroked 351M" w/Trick Flow heads & intake, EEC-V SEFI/E4OD/3.50 gears w/Kevlar clutches
|
|
Gary,
Found this amusing after you had mentioned restoring a Bronco with my dad, found this 85. Would need a lot of interior work, new tailgate by the looks of it, new ac etc. https://columbia.craigslist.org/cto/d/west-columbia-1985-ford-bronco-xlt-miles/6975683280.html
1986 F-150|Standard Cab|4x2|300Six|C6Transmission w/3.08 rear|Name:TBD
2021 Ranger XLT Super Crew |
|
also looks like a steel on this truck for anyone in georgia
https://augusta.craigslist.org/cto/d/augusta-1982-ford-f100/6970473712.html
1986 F-150|Standard Cab|4x2|300Six|C6Transmission w/3.08 rear|Name:TBD
2021 Ranger XLT Super Crew |
Re: "Hook 'em Up Loose" - 1986 F-150 Restoration/build
|
Administrator
|
Very nice, indeed!
|
|
Figured I would drop the "To Do" List for the next little bit or more. incomplete and tentative.
Near Future -Install carpet -Install thresholds -Install seat belts -Install head light switch -Install door switches -Install Intermittent wiper assembly -Install Trim -Install new gauge lenses -Install Dash -Pull truck out of the garage and reinstall old bench seat -Reassemble passenger door. -Paint driver door -Reassemble driver door. -Pull truck outside and hang both doors. -I am told I need to pull fenders to do this.... not looking forward to this part especially doing it solo. I might as well pull them completely off? if so maybe I leave them off until ready for paint and paint them individually? Longer Term -Pull tool box -Pull tailgate -Remove bed -pull back into garage -Remove fuel tank and fuel lines -remove brake lines -repair rear cab cross member -install new cab mounts -Remove rear bumper (trash) -clean frame -paint frame -repair heat shields -fab and install new brake system -fab and install new fuel system and tank -Rework rear end -Install receiver hitch -Remove hood -Clean hood and treat with internal chassis saver -repair and paint hood -Repair and paint fenders -Repair and paint cab -remove windshield trim and attempt to buff/repair -remove grill and attempt to buff/repair replace if necessary. -replace ford emblems on fenders and grill -Remove old and Install new battery tray -remove tire mount from bed -pull dents on bed -final repair and paint bed -pull dents on tailgate -remove sub par paint job by PO -final repair and paint of tailgate (Thinking of painting "FORD" black, may leave white). -install bed back on truck -replace tailgate internals and bumpers as necessary -reinstall fenders -reinstall hood -rhino line truck bed -reinstall tailgate -Install and wire new rear bumper -Install new front bumper -mark and drill roof for clearance lights -install clearance lights and wire strobe controller -install NMO mount in center of roof if possible -install after market headliner and accessories -Drive family to the 2020 show next Sept.
1986 F-150|Standard Cab|4x2|300Six|C6Transmission w/3.08 rear|Name:TBD
2021 Ranger XLT Super Crew |
Re: "Hook 'em Up Loose" - 1986 F-150 Restoration/build
|
Administrator
|
I like the list - and especially the last entry!
 Any interest in doing a to-do list that you can easily update? Check out the first post in Big Blue's Transformation. Or the first post in Dad's Truck Build. The latter is good from the standpoint that it documents a lot of the background on the truck, and provides links to something like 20 threads or posts on FTE that provide the background. I've used that feature many times in the few months since I created it to find info that had been previously lost, or at least hard to find. Anyway, if there's an interest in doing something like that then let me know and I'll walk you through it.
Gary, AKA "Gary fellow": Profile
Dad's: '81 F150 Ranger XLT 4x4: Down for restomod: Full-roller "stroked 351M" w/Trick Flow heads & intake, EEC-V SEFI/E4OD/3.50 gears w/Kevlar clutches
|
|
That's a great idea I use excel a lot... like A LOT. It's usually formulated out etc. Just this morning I was updating my excel file that tracks my solar panel output vs cost vs energy company, with BEP's etc. And also my pay and taxes one that automatically calculates what my paychecks will be, what will come out of my pay and projects end of year taxes so I can zero myself out with no refunds ( no free loans to the feds) as well as some other things. Hell I have one that uses probability and statistics of winning lottery numbers to predict future pulls. My tickets for the biggest powerball ever had the winning numbers, vertically on the ticket.
1986 F-150|Standard Cab|4x2|300Six|C6Transmission w/3.08 rear|Name:TBD
2021 Ranger XLT Super Crew |
Re: "Hook 'em Up Loose" - 1986 F-150 Restoration/build
|
Administrator
|
Do you have a OneDrive account? Or Google Drive? Not sure if it is possible from Drop Box.
Gary, AKA "Gary fellow": Profile
Dad's: '81 F150 Ranger XLT 4x4: Down for restomod: Full-roller "stroked 351M" w/Trick Flow heads & intake, EEC-V SEFI/E4OD/3.50 gears w/Kevlar clutches
|
|
This post was updated on .
In reply to this post by Danny G
OK so last night started getting trim back into place.
Got the glove box back in and aligned. If you are doing this just keep all the hinge screws barely loose so you can adjust the gaps then tighten down. Replaced the old crumbling gauge assembly lens with a new one. And despite using a zip lock managed to loose one of the screws to the ether. It must have gotten caught on my cloths and lost when I got out of the truck. I cannot seem to find replacements for these, may need to get creative here. Steering column bezel is back in as well. I did take note that there are some cracks forming in the corners of the dash and the support piece the screw goes through is cracked off. This is the same for my gauge cluster bezel and radio bezel. I ordered some 1/16 and 1/8 thick abs plastic sheets. I am going to try to cut supports and epoxy weld this into place. If this does not work I am going to try Kydex. I have never used kydex but I hear it is easy to work with, strong, and molds easy with a heat gun. This is my second time writing this as my phone refreshed as I as adding pictures. So typing this on the computer and adding pictures as an edit later. The shop lights are very bright so it made these pictures come out dark. Does not do the new look any justice. I have a calculus test today, if I get through that quickly I think I will go ahead and put the dash pad back in today. I ordered a box of the free spinning washer head screws but I should have enough to get this guy started and on there. I accidentally ordered the wrong carpet (again) somehow ended up with extended cab, I double checked my end so I think something went sideways. Need to wait for Rock Auto to accept the return from fedex and issue store credit before i get replacement.... third time is a charm right? My heater/fan/ac control unit could use some love. The metal on the sliders is rusty, and it looks like the red for heat is kinda faded. I was looking at the face plate and I think i can get it off but I am worried I would break it or cause more harm. If I could get it off I could potentially restore those colors and get access to clean up that metal. Has anyone done this? anyone have the PN of that unit? I may make a separate post on that. 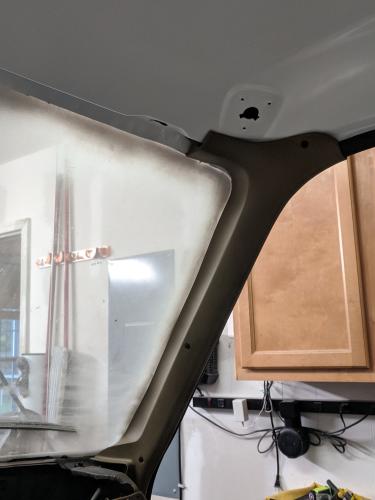 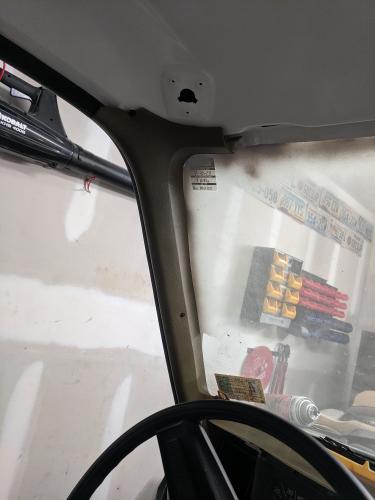 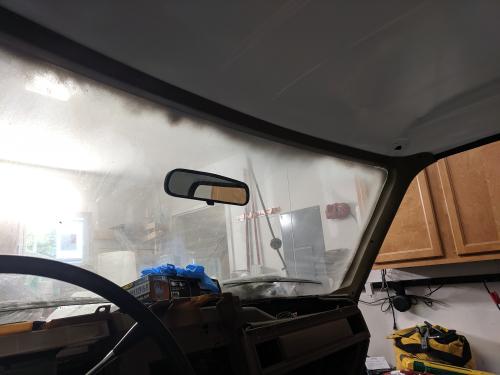 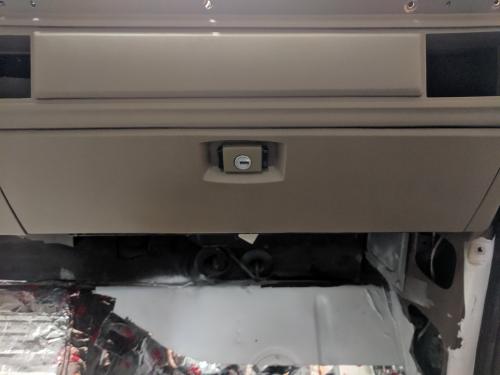 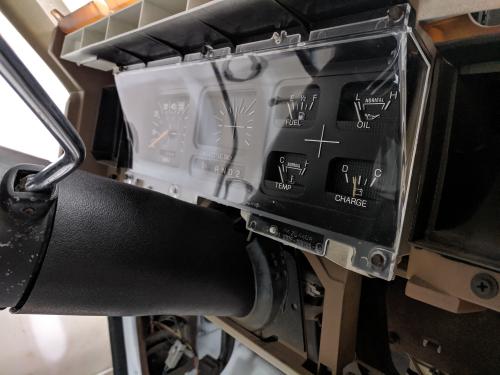
1986 F-150|Standard Cab|4x2|300Six|C6Transmission w/3.08 rear|Name:TBD
2021 Ranger XLT Super Crew |
Re: "Hook 'em Up Loose" - 1986 F-150 Restoration/build
|
Truck is coming along nicely!!
That lens cap looks especially nice! Where did you pick that up from?
1984 F-150, 302 CID (5.0 L) Windsor V8, 2 BBL carb, power windows added, remote entry added. AC. Automatic Transmission.
|
I got the new lens for the gauge cluster from LMC. I think i noticed ford part/engineering numbers and logo molded into it. It may be NOS, or molded on tooling someone bought.
1986 F-150|Standard Cab|4x2|300Six|C6Transmission w/3.08 rear|Name:TBD
2021 Ranger XLT Super Crew |
|
In reply to this post by Gary Lewis
I have both. I have a running excel file ready to go as well 
1986 F-150|Standard Cab|4x2|300Six|C6Transmission w/3.08 rear|Name:TBD
2021 Ranger XLT Super Crew |
Re: "Hook 'em Up Loose" - 1986 F-150 Restoration/build
|
Administrator
|
Assuming you are running Windows and have the file on your OneDrive, click the cloud icon in the lower right and click View Online. That brings up a browser tab with your OneDrive showing. Navigate to the file and click the radio button on it, then click Embed. (You might have to click the three dots ... to find Embed.) Then click Generate and copy the code that is created.
Go to the post in which you want to embed it and tick the "Message is in HTML Format" box above the Quote button. Then paste the code into the edit window. If you've not played with HTML on here, line feeds don't work, so click the Formatting button and then the Line Feed button. But Excel is tricky to set up. Below the code that was generated on the OneDrive browser tab you'll have the option to Customize How This Embedded Workbook Will Appear To Others. (This is one reason I use more Word docs than Excel.) On that you get to set the range of cells you want displayed, which cell to be in when the page opens, etc. Have fun!
Gary, AKA "Gary fellow": Profile
Dad's: '81 F150 Ranger XLT 4x4: Down for restomod: Full-roller "stroked 351M" w/Trick Flow heads & intake, EEC-V SEFI/E4OD/3.50 gears w/Kevlar clutches
|
|
This post was updated on .
OK so Sunday was the first day off of work I have had in a couple weeks and I got some work done.
The ABS sheets came in Saturday I ended up using the 1/8 inch thick piece. I wish I had taken pictures of this process but my phone was dead. OK so how did I do this. First I laid the dash bezel over the ABS on the smooth side. I traced the damaged section onto the ABS with a sharpie to include the flat portion prior to and after the break. 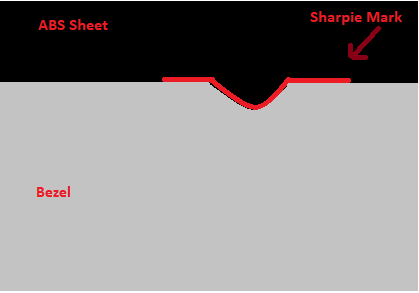 I have one good screw mount left so I then laid that over the marks on the ABS using the horizontals I drew as guides to line it up correctly. 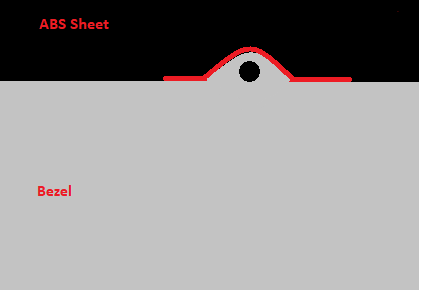 This left me with a mark like such. 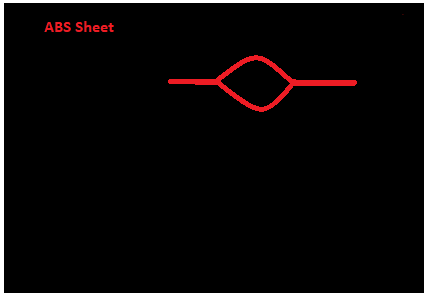 I took my sheet of ABS and cut it on a scroll saw at low rpm to try to minimize melting. It still melted a bit but was able to use a pair of pliers to gently break it loose. With the rough cut done I resorted to using a razor and a dremel to clean it up. Applied 5ton epoxy, held it in place, turned on some music and waited... and waited. I was left with something that looks like this: 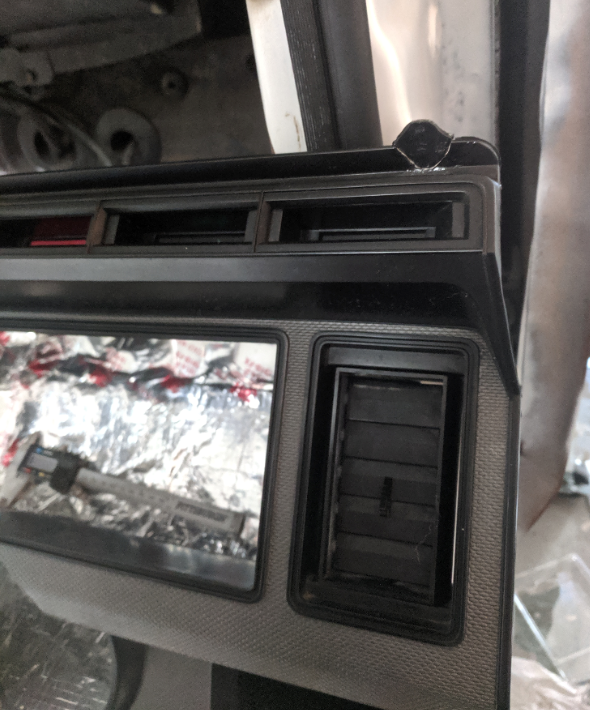  I profiled the hump down a bit with a dremel. I am letting it cure for 24 hours before attempting to drill the hole out. a similar process was followed with the dash mount, except in this case I used a micrometer to get the measurements of the damage and just hack sawed out a piece to match the break. After it was dry I then used a dremel to round out the top to match the metal plate it attaches to and drilled out the hole. 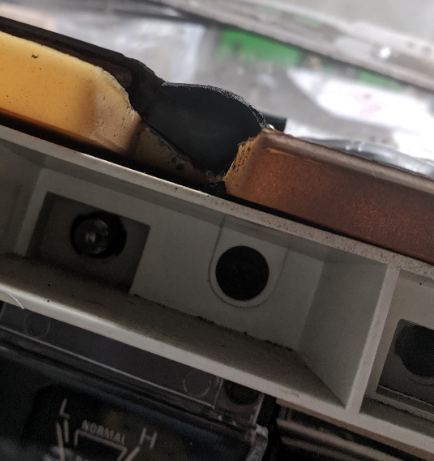 Then onto the dash, this is where it really is going to look like it is coming together. I bought the dash from JBG and by the paper work it is made by dashes direct. I dont remember if the old dash had nut clips on it or not. I hope someone can clarify but I think it did. This dash seems rather thick where the screws go almost like its intended to just be screwed into directly. Can someone verify this, and possibly provide a link/PN for the nut clips? Also there are no holes in the defrost vents for the screws you have to make them yourself. Locating holes here will be tricky Went ahead and did a dry fit on the dash and to locate holes in the vent side. 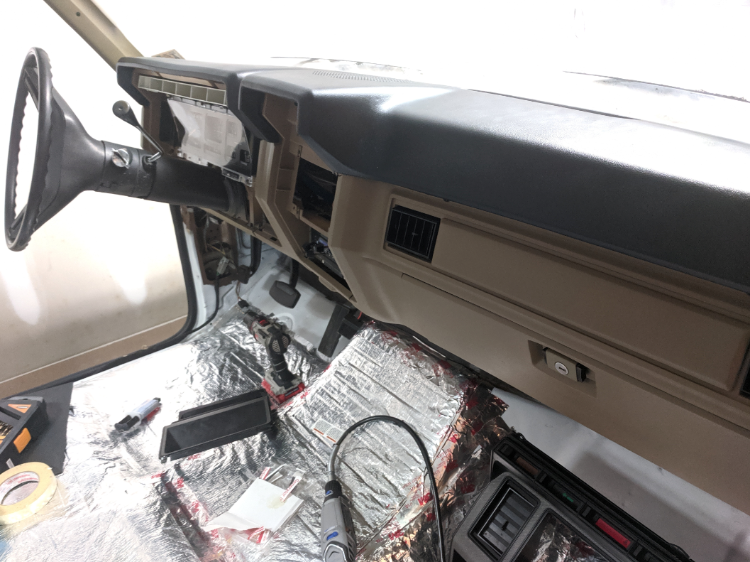
1986 F-150|Standard Cab|4x2|300Six|C6Transmission w/3.08 rear|Name:TBD
2021 Ranger XLT Super Crew |
| Edit this page |

