"Hook 'em Up Loose" - 1986 F-150 Restoration/build


|
This post was updated on .
OK so plugs, corrosion sealing and waterproofing. I used a combination of the pricier OEM plugs and the cheap 95 cent plugs from LMC.
Lesson learned the cheap 95 cent plugs worked fine, even bigger lesson learned you can get them super cheap in kits on Amazon if you search body plugs and probably get 50 for what I paid for a handful. We don't want our newly installed carpet pad to become a sponge like the last one due to weeping water etc. NO MORE RUST. Enter the poly sulfide sealant. Poly sulfide sealant is used in corrosion proofing, fuel tank sealing, and water proofing in military, aviation and marine applications. It creates a strong seal resistant to chemicals and water that can be removed if necessary with some scraper work and solvents to soften it. It is used pretty much on every body join, every bolt installation and electrical seal like ground studs on aircraft (Yea these commercial planes have a 50 year warranty for a reason... take that 36month 60,000k miles). I found Boat Life poly sulfide sealant on Amazon for $22 a tube. Pricey but not as pricey as a sem kit of PR-1776 or PR-1826 like used commercially. Those range from $30-$130 respectively for a 6 oz tube. It also cures in 2 hours. So there is no "leftovers" if you don't use that sem kit. Boat life makes more than one sealant and it looks the same, if your going polysulfide, make sure to read the fine print. 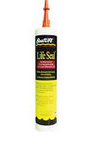 There are a few application methods referring to placement of the seal. Fay sealing is where you apply sealant between the two mating sides of a joint. In this case the underside of the plug and the floor of the cab. When you do that excess will squeeze out and you can smooth it out around the periphery. You don't need a lot of sealant, imagine if you bolted two pieces of metal together, how much space is there? More sealant =more squeeze out = more mess. Granted these plugs are not fastened so it wont be as bad. If my door hinges were fay sealed, there would be zero rust issues under them. Here is a rough sketch of a fay seal. Orange being the sealant, black the structure and grey the plug not fully installed.  Fillet sealing is where you go around the periphery with seal and fair to a fillet typically a 45 degree angle. Think of your typical caulking job. When you apply a bead here push the bead do not pull the bead, this pushes out air pockets. i shudder when I see people pull or draw caulk towards the gun, that is how you get corrosion and bad seals.  I used a combination of both, then encapsulated the plug completely by smoothing it over the top. This method pushes some sealant into the hole (why I mentioned earlier that I don't like gasket maker as it would put contamination into your engine etc), gives me a fay seal, then the squeeze out can be faired around the edge into a filet. This offers the maximum protection and bonding. A gloved finger works fine to do this. I did not have my sealing spoons/tools, or this would look a lot smoother and factory. Final seal surfaces will be like this.  Actual plug on truck. 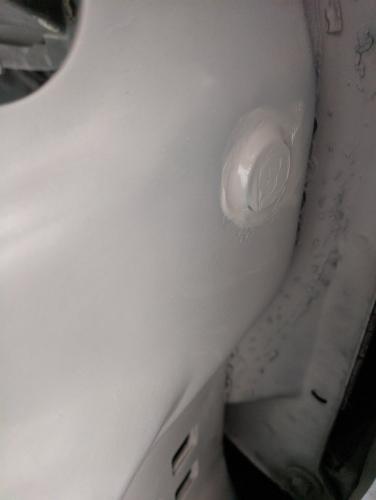 A similar method will be used on the bolts and screws, its called a wet install where you brush some seal on the threads so it seals the threads, nutplate, hole and under the head of the fastener. When all is said and done it will look like such. Grey is the bolt, orange seal, black structure/nutplate. 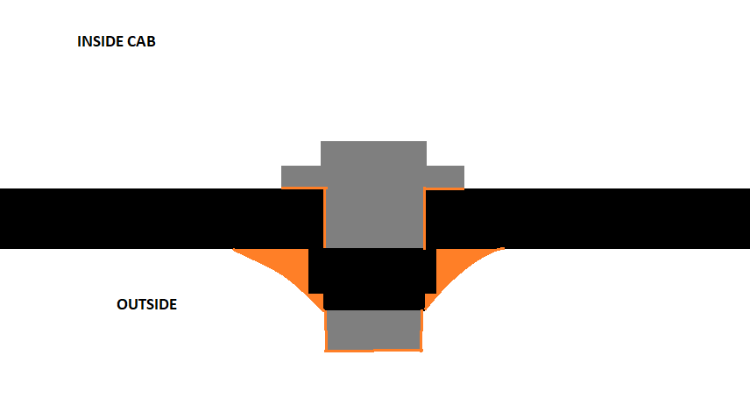
1986 F-150|Standard Cab|4x2|300Six|C6Transmission w/3.08 rear|Name:TBD
2021 Ranger XLT Super Crew |
|
|
In reply to this post by Danny G
Since I can’t restore mine just yet, it’s always encouraging to read how others do it. Like a kid’s face up against the glass of an old-timey candy store.
What do you think about the quality of the LMC repro doors? Are they flimsy like the repro tailgates, or as solid as the original?
1984 Bronco 351 Holley Sniper EFI, 3 Speed Ford Auto.
1986 Bronco 302 EFI, AOD, Eddie Bauer, with 3G alternator. |
|
|
In reply to this post by Danny G
Thanks for the sealing tutorial. Will removing the plugs in the future be easy, hard, or destructive?
1984 Bronco 351 Holley Sniper EFI, 3 Speed Ford Auto.
1986 Bronco 302 EFI, AOD, Eddie Bauer, with 3G alternator. |
|
|
In reply to this post by Vic Roma
They seem to be alright. They come from a ISO9000 facility. They were packed very well. They feel to be about the same weight and structure as the originals, I can't really tell a difference. I have read that some did not like them, but LMC does't advertise what brands they sell so it could be they used different sources as there are several companies that make them. The big difference that may make them seem "flimsy" is the replacements do not have that reinforcing sound deadening layer in them. If you look in your old doors there is a layer of material added to the inside of the shell. I have a feeling the "flimsy" feel comes from this. I plan on adding sound deadening to my door I am not sure what was OEM but I have a roll of jute an foil from LMC but I think I will be using Kilmat in the doors. It is a foil backed butyl material and is water proof. you can get it in 50mil and 80mil thicknesses.
1986 F-150|Standard Cab|4x2|300Six|C6Transmission w/3.08 rear|Name:TBD
2021 Ranger XLT Super Crew |
|
|
In reply to this post by Vic Roma
The seal will scrap off with a plastic scraper. It should not damage any finishes what soever. Stubborn seal soaked in IPA/MPK/MEK will soften and come off easier but be careful on paint with those. The likely hood of having to pull these plugs in the future is slim to none. These have been installed for 33 years. I may punch a hole in one for routeing cables for a radio or power and then seal that up (with another method ill show if I do it) but I want to leave the plug in place in that application to prevent damage to the wire from the cab body. 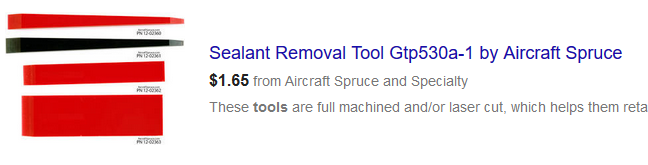 They actually make rotary bits that pull it off and don't damage anything.  I will be resealing the cab seams and rain channel at some point and doing a tutorial on fine line tape and smooth seal application so others can do it with that seem looking cherry.
1986 F-150|Standard Cab|4x2|300Six|C6Transmission w/3.08 rear|Name:TBD
2021 Ranger XLT Super Crew |
|
|
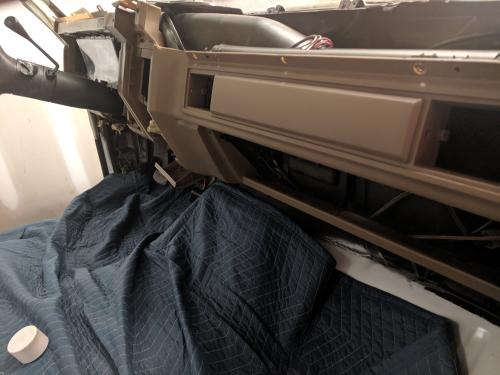
With the all that out of the way lets talk interior. Black and saddle tan two tone is the idea. But I have chestnut and some rough pieces.
Both A pillars are broken. The drivers side is usable, the passenger side I was lucky to have the broken piece. I used locktite epoxy to repair this. You can still see the crack but its functional now. These guys are so hard to find good replacements for. If anyone has A pillar trim let me know. Here is what the carpet looks like, Completely the wrong color and its made for a manual...Oops That is for sale if anyone wants it. 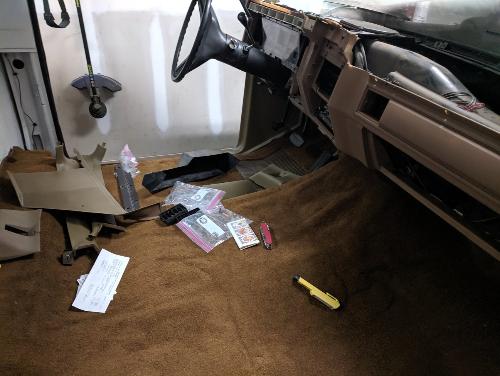 I removed the door panel, and vents. Be sure to save everything in its own separate ziplock back marked for what it belongs to. Don't want to loose or end up with parts leftover. Here is a shot of what my seat belt covers and glove box latch looked like. Chalky and bad I didn't think I could save these. Everything else is ok the passenger kick panel has a few spots of chalkiness that will need to be repaired. 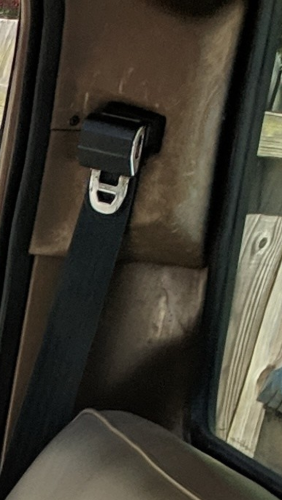 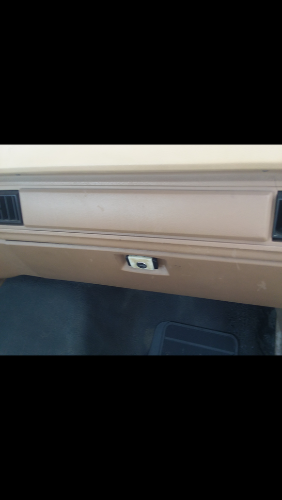 OK this process is tedious but pays off very quickly. Nearly instant gratification. Learn from my mistakes. *This is an important note* I had application issues and you may see some roughness on the seat belt covers around the screw hole. My application issues I learned was not technique but environmental. I was going on the porch to spray these then letting them dry inside on the table. BAD MOVE the humidity factor outside caused the clear coat to literally loo like water droplets or frost up at one point and some other issues I got it look good but had a lot of touch and go moments. Doing this in an Air conditioned garage solved those issues. You need to allow for proper dry time between each step even the cleaning. You need to wash you hands and wear gloves, go to harbor freight with a coupon and get some 5 mil nitriles for $5. You need to change them out with each step. No oils from your hands, no cross contamination. I save a couple bad clear coat spatters simply buy smoothing the area with a clean glove. I cleaned each piece with Windex (ammonia), followed by color bond surface prep (spray mineral spirits mix) twice, then if necessary SEM texture, adhesion promoter, color( 3-5 coats as necessary, don't try to do it in 1 it will look bad), then 2-3 coats of satin clear coat. All steps were given 10 minutes of time to set, to include the cleaner steps. I am currently working on the dash. I used car guys super cleaner for the initial clean... that stuff is amazing with the amount of crap it took off. BUT I will still go back with Windex then the steps above. There are years of dirt oil and silicates from things like armor-all potentially on these surfaces. You want to have none of it or your final product will look blotchy. Enough chit chat here are the goods. The covers, sanded with 250 grit to clean of the chalk, finished with 1000g: 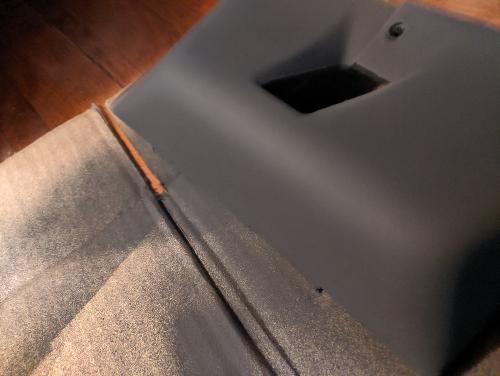 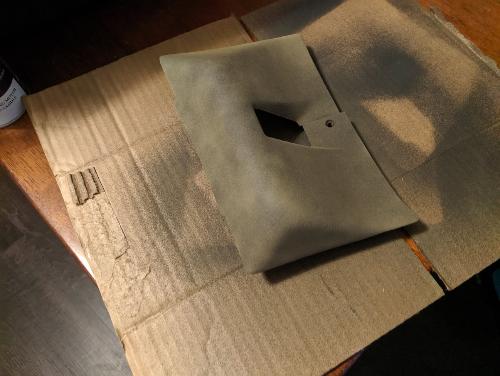 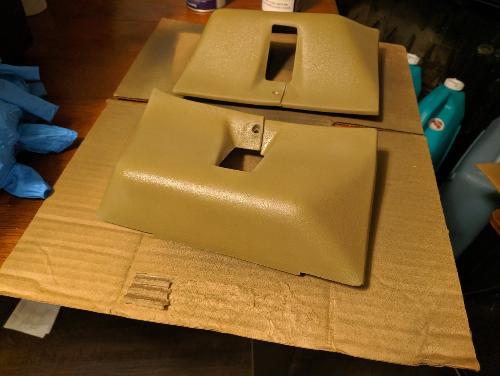 Pillars and piece for under the steering column 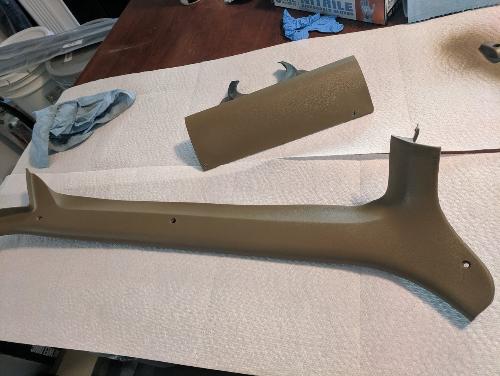 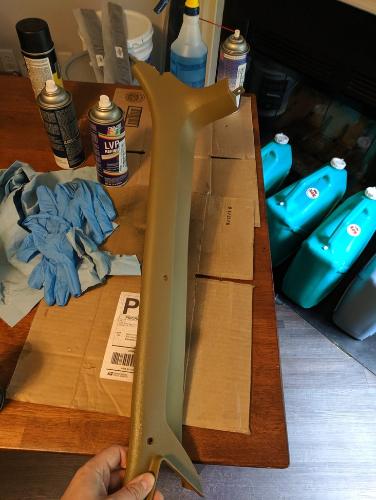 Kick plates first picture is an in progress one. the second is the passenger kick plate that had the chalk rot in a few places liek the leading edge. I ended up sanding it in those spots like the belt covers then blending in the SEM texture coat. SEM texture is not the same as the "leather grain" factory texture but it gets the job done and the light coat is not noticeably distinguishable from the rest of the panel. 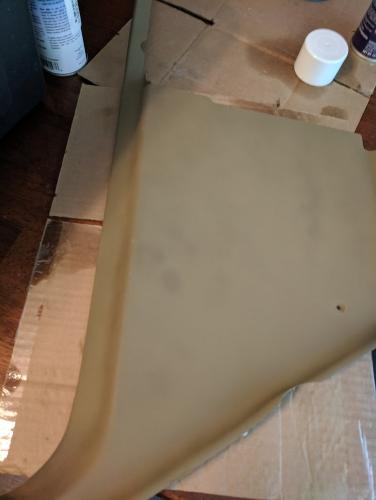 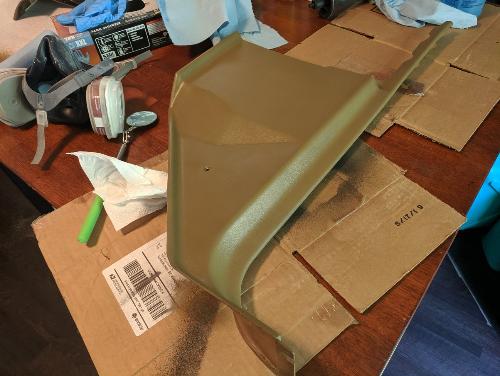 Glove box, latch, and windshield trim Before: 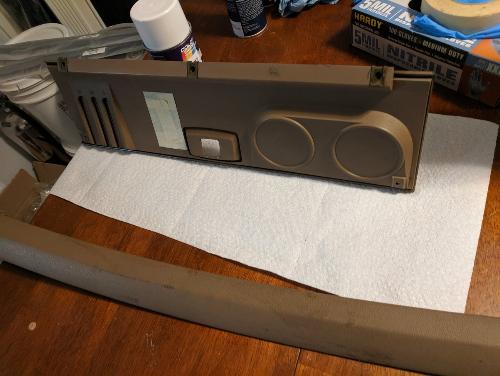 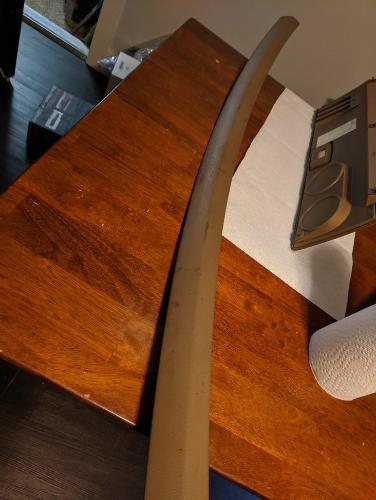 After: 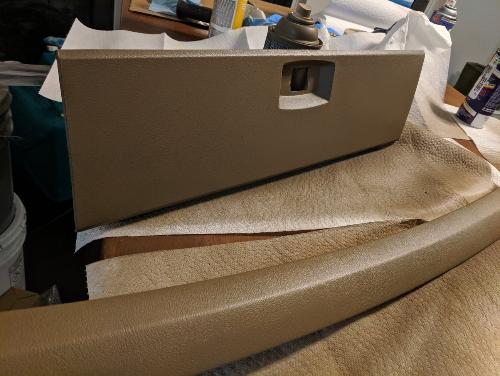 BIG difference here: 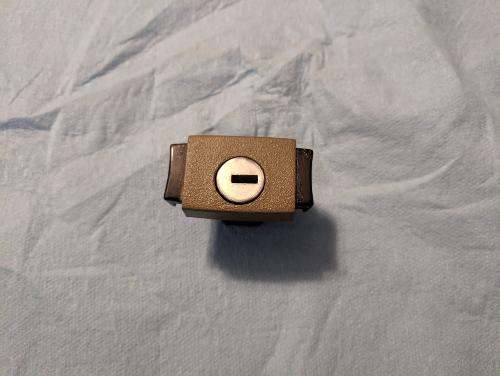 Coat hook and light reinstalled 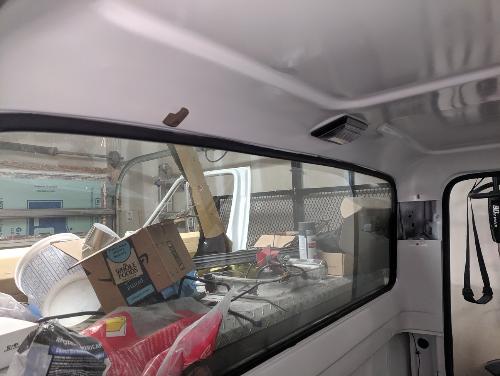
1986 F-150|Standard Cab|4x2|300Six|C6Transmission w/3.08 rear|Name:TBD
2021 Ranger XLT Super Crew |
|
|
I had an issue where the dome light did not come on. I bought new door switches one was missing anyway and I took the harness out to inspect it and rework it.
I removed the crusty old tape and went to work Found a green wire pulled out of the connector and thought I found my light issue... Until I realized it was for map lights. Ordered some pins and a depin tool so I can fix it. Hopefully I got the right size, but I don't think I did. For the harness as I unwrapped the old junky dirt ridden tape I used colored electrical tape to mark each clip and it's location on the harness so I could put it back screw clips got yellow, push clips blue etc. After I was satisfied with the condition of the harness they were put back on with lacing tie and tape. The breakout for the seat belt wire was laced at 0.5in on all 3 legs. High temp expando sleeving replaced the tape, properly spliced at each Branch for a smooth transition and finished with more lacing tie. She is ready to go back in. Even though it's a hidden wire I know it's now bullet proof. Where it isn't hidden in the cab it will look more presentable as I do not have B pillar covers. 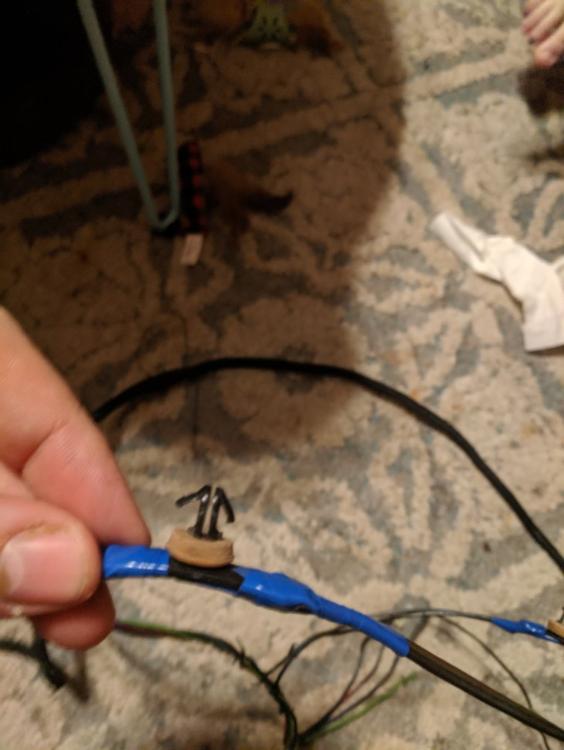 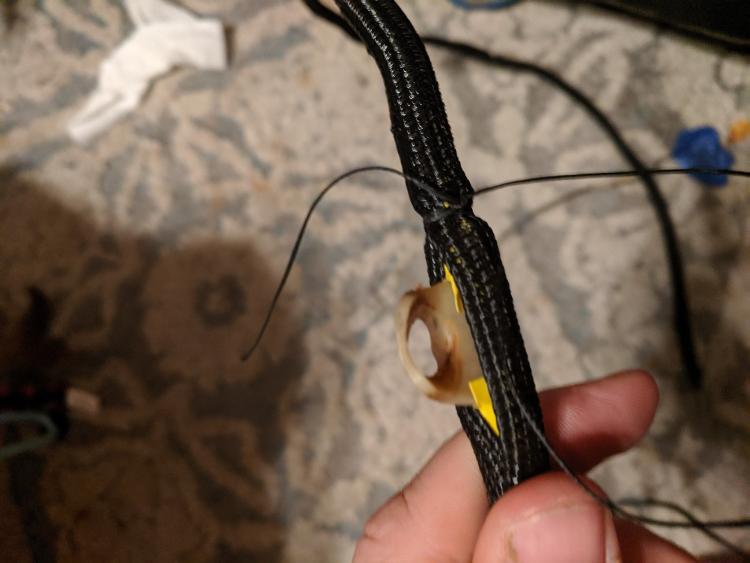 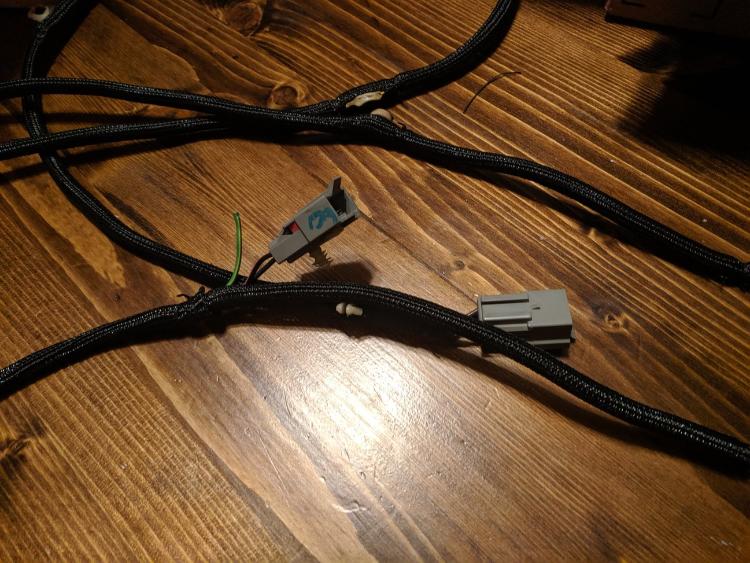 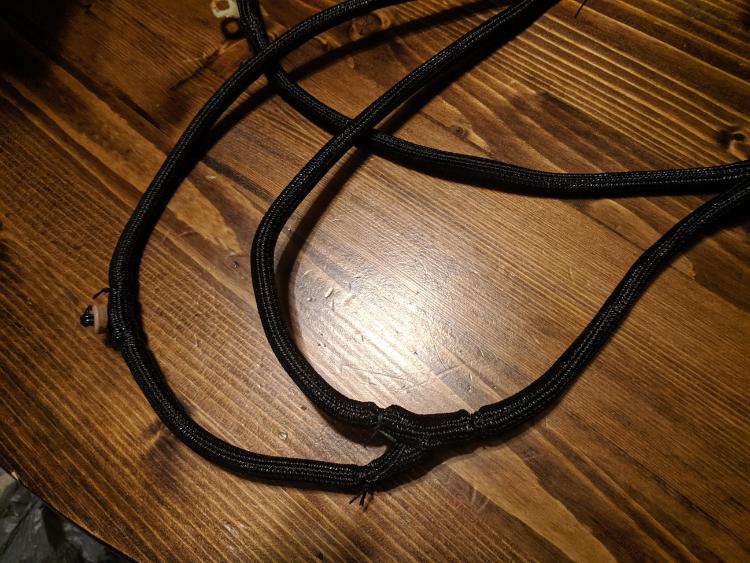 That catches me up to today. Once I finish a couple essays today I will do the dash. I will use tin foil to mask column etc. after that its carpet, then I can put in this harness and install the sill plates, then roll it out of the garage and put the bench seat back in. Eventually i will replace this seat with some after market buckets I have picked out or maybe the new seats from LMC. I hate they don't advertise the dimensions so ill have to email them. With the doors comes speaker and radios. I am highly considering that headliner that holds speakers, like 85% sure im putting that in the truck. Then the new dash pad, then visors and done. After the interior is done the plan is to pull the bed off and move it outside onto some saw horses. This allows me to work on the frame, brakes and lines, fuel system etc sitting on a roller chair rather than laying under it. I have new fuel tank and sending unit already. It should also give me access to the rear cab mounts to prop up the cab enough to fix the holes in the crossmember and install new mounts without doing anything crazy with the cab. As well as good access for paint. For the bed it will give me access to pull dents and work the body over with more room. If the heat shields are attached to the bed it will be easier to replace those as they are rotted and half gone. I think I just need some plate steel to correct that. With all that done then the plan is reassembly, get it running again after sitting, then drive it over to the window guy and get a new windshield, then paint and outside touches. Then clearance lights and other goodies. At some point ill need to start researching 4x4 conversions and do that hopefully with a OD transmission. I am also thinking about an aftermarket EFI system on a offy dp intake. So a duraspark conversion, 3g alternator etc will have to happen. Even if I don't do EFI I want to do the conversion and drop the 1barrel carb and get new manifolds on this guy, they are looking rough and are probably leaking. If at any time it appears the 300 is toast, I may consider just doing a diesel conversion.
1986 F-150|Standard Cab|4x2|300Six|C6Transmission w/3.08 rear|Name:TBD
2021 Ranger XLT Super Crew |
Re: "Hook 'em Up Loose" - 1986 F-150 Restoration/build
|
Administrator
|
In reply to this post by Danny G
Thanks, Daniel. That helps my understanding a bunch.
 You sure are doing a nice job on the truck. And while others may never know that, you will. And, you will thoroughly enjoy it. Plus, once you are done perhaps you and your father can do a Bronco together?
Gary, AKA "Gary fellow": Profile
Dad's: '81 F150 Ranger XLT 4x4: Down for restomod: Full-roller "stroked 351M" w/Trick Flow heads & intake, EEC-V SEFI/E4OD/3.50 gears w/Kevlar clutches
|
Re: "Hook 'em Up Loose" - 1986 F-150 Restoration/build
|
Administrator
|
In reply to this post by Danny G
I'm loving the tutorials! Keep them coming!

Gary, AKA "Gary fellow": Profile
Dad's: '81 F150 Ranger XLT 4x4: Down for restomod: Full-roller "stroked 351M" w/Trick Flow heads & intake, EEC-V SEFI/E4OD/3.50 gears w/Kevlar clutches
|
Re: "Hook 'em Up Loose" - 1986 F-150 Restoration/build
|
Administrator
|
In reply to this post by Danny G
Looking good on the interior, Daniel! Your process is similar to what I've done although I use SEM's cleaner to start. But I've not used their texture as that is a fairly new product. And, I've not used the clear for a finish, so may add that to my routine.
Gary, AKA "Gary fellow": Profile
Dad's: '81 F150 Ranger XLT 4x4: Down for restomod: Full-roller "stroked 351M" w/Trick Flow heads & intake, EEC-V SEFI/E4OD/3.50 gears w/Kevlar clutches
|
Re: "Hook 'em Up Loose" - 1986 F-150 Restoration/build
|
Administrator
|
In reply to this post by Danny G
Could you give us a source for things like high temp expando sleeving, lacing tie, etc?
I'm doing a MAJOR electrical revision on Big Blue (EEC-V EFI with the underhood power distribution box, 3G, Arduino, etc) and would like to do it "right". In fact, if you'd be interested in doing a how-to on splicing wire and using the expando sleeving and lacing tie I'd be thrilled to put up a page on it. The best approach is if you send me a Word doc as well as the pics in an email. (Pulling pics out of a Word doc has been a problem for me.)
Gary, AKA "Gary fellow": Profile
Dad's: '81 F150 Ranger XLT 4x4: Down for restomod: Full-roller "stroked 351M" w/Trick Flow heads & intake, EEC-V SEFI/E4OD/3.50 gears w/Kevlar clutches
|
|
|
Amazon has been my best friend for stuff like this.
This is the sleeving brand I used. It has an operating temp of -103F to 257F with a melt temp of 446F. you can get it in multiple diameters and colors for your specific application  if you search wire lacing cord or lacing tie or lacing tape you will find spools of what you need. I prefer the waxed flat. This is what I bought but it ended up being very thin gage, I'm not happy with it but it works. Wider works a bit better, ties easier, and looks better.  To properly tie these you do a clove hitch secured with a square knot. Or a Lariat, then wrap the ends in opposite directions again secured with the square knot. on my next wire run maybe ill take some in process pictures. For the ends of the loom you fold it under and secure with tie, break outs are inside each other and secured with tie at .5" from the break out on all branches. Routing ties are spaced as needed depending on how much vibration is expected or bends there are. High temp high pressure tubeing for vaccum lines can also be found there as well. God Bless the internet.
1986 F-150|Standard Cab|4x2|300Six|C6Transmission w/3.08 rear|Name:TBD
2021 Ranger XLT Super Crew |
|
|
In reply to this post by Gary Lewis
I could also do a wire splice how to when I get to my next run. I use white heat shrink for labels.
You need to use environmental (sealed) splices (crimp or solder) or a combination of plain/environmental splices with double walled heat shrink over it. Planning ahead and making sure everything is on the wire that needs to be before you start, unless your David Copperfield. Clean jacket strips, no cut strands, no excessive exposed conductors, and no pliers crimps. I've pulled a lot of twisted wires with electrical tape on them out of cars lol. You can calculate splice size based on combined AWG, especially if using say two wires in one side and one in the other like on the 2g alt. In this case you cut a stub wire to mimic two wires in the other side, uses a sleeve to dead end it then proceed as normal. Another method for splicing different AWG wires together or just as good practice to build up smaller wires is to strip about twice as much as needed, then fold the conductor over. This effectively doubles the gauge of the wire and results in a more secure crimp on the splice (who's ever had wire pull out of a butt splice or terminal?)
1986 F-150|Standard Cab|4x2|300Six|C6Transmission w/3.08 rear|Name:TBD
2021 Ranger XLT Super Crew |
Re: "Hook 'em Up Loose" - 1986 F-150 Restoration/build
|
Administrator
|
Yes, a how-to with pics would be good. Especially since I'm not following everything you are saying. Part of it is that I don't understand the terminology. Part of it is a lack of experience.
Anyway, I do solder - everything. Been doing that since I was an amateur radio operator in high school in the early 60's. And I use adhesive-lined heat shrink. But I'm new to lacing as well as that sleeve. Instead I've used tie wraps and the convolute. But I'd like to learn about the lacing and sleeve.
Gary, AKA "Gary fellow": Profile
Dad's: '81 F150 Ranger XLT 4x4: Down for restomod: Full-roller "stroked 351M" w/Trick Flow heads & intake, EEC-V SEFI/E4OD/3.50 gears w/Kevlar clutches
|
|
|
You don't need to lace the heat shrink on a solder splice. I typically use mechanical splices at home for general splices because I have the tools and a bunch of them. I do have a Weller bench unit to do spliced like you mentioned as well.
I use lacing tie in place of zip ties, zip ties can slide, cut or they become brittle over time. The lacing tie is used to dress a bundle of wire, secure a break out, attach sleeving etc in place of tape or zip ties. I also prefer silicone tape to traditional adhesive backed electrical tape. In the picture of my alternator harness that yellow run is yellow silicone. You can use silicone tape for build up under clamps or ties etc, better for sealing and protecting. 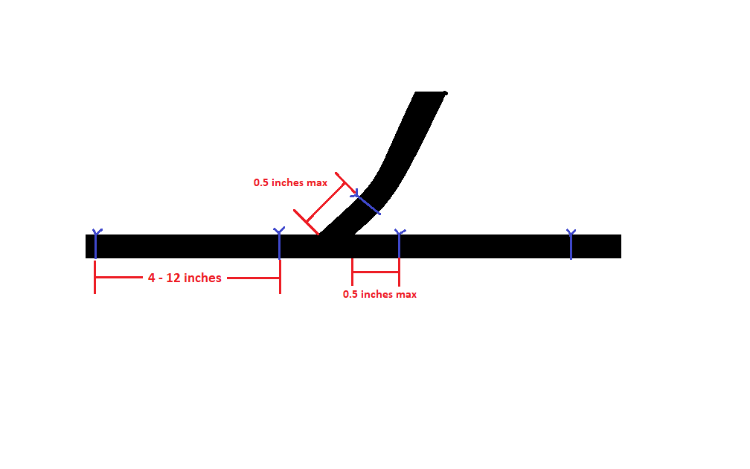 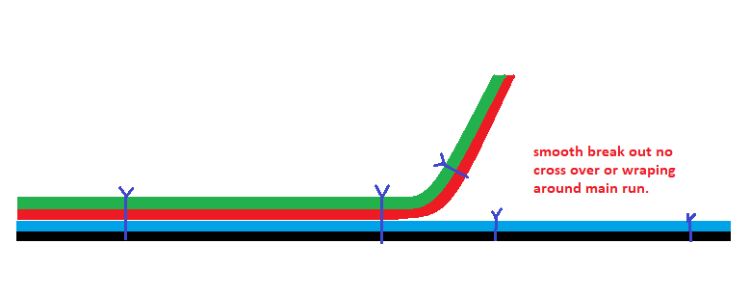 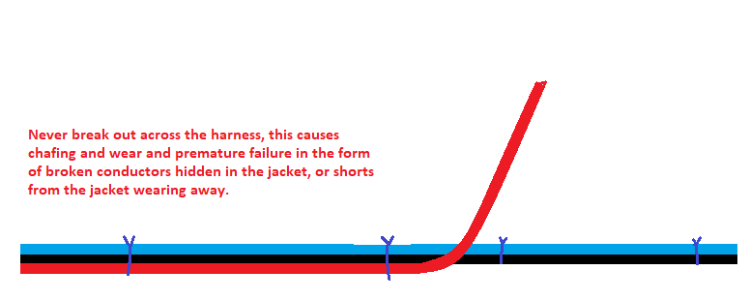  Do you still operate radio? A uhf/vhf set up is going in this truck. Call Signs are: WREB270 and PG00022798 (Commercial)
1986 F-150|Standard Cab|4x2|300Six|C6Transmission w/3.08 rear|Name:TBD
2021 Ranger XLT Super Crew |
Re: "Hook 'em Up Loose" - 1986 F-150 Restoration/build
|
Administrator
|
That's really good stuff, and deserves to be on a page in the documentation. If you can add some more bits in this thread then when you think you have everything then I can consolidate it to one page.
And things that would help include a source/example for the silicone tape. Definition of what you mean by a "mechanical splice". On the lacing, are you using one wrap and tying it? What knot? (I think you said above, but I lost it.) Lots of little details that all add up to a great page on how to do wiring.
Gary, AKA "Gary fellow": Profile
Dad's: '81 F150 Ranger XLT 4x4: Down for restomod: Full-roller "stroked 351M" w/Trick Flow heads & intake, EEC-V SEFI/E4OD/3.50 gears w/Kevlar clutches
|
Re: "Hook 'em Up Loose" - 1986 F-150 Restoration/build
|
Administrator
|
Oh, I missed the radio question. No, I was WA0FFF back in the day. But when I got married I didn't want to sit in a room by myself talking to others instead of my wife, so I gave it up. Now I sit on the couch next to my wife and type to others.

Gary, AKA "Gary fellow": Profile
Dad's: '81 F150 Ranger XLT 4x4: Down for restomod: Full-roller "stroked 351M" w/Trick Flow heads & intake, EEC-V SEFI/E4OD/3.50 gears w/Kevlar clutches
|
|
|
In reply to this post by Gary Lewis
Yep when all is said and done and time permits between commitments I can consolidate it all into one set of examples.
I have some pictures coming from last night. Re-pinned that connector, did a strain relief build up, have mechanical splice, did a ground installation with the seal methods mentioned before etc. May make a thread on it and then if people ask questions I can update the parent post.
1986 F-150|Standard Cab|4x2|300Six|C6Transmission w/3.08 rear|Name:TBD
2021 Ranger XLT Super Crew |
|
|
In reply to this post by Gary Lewis
The GROL+Radar lets me operate stations in excess of 1500w not for personal use. I do not have my HAM, I have thought about getting it here and there but I have no time to study for that bad boy right now and the need does not outweigh the want factor yet. What we do have is a GMRS license (WREB270) so we can operate up to 50watt output to communicate between friends and family. I can ping my house when out and about and my 4 year old can talk to me. He gets a kick out of it.
1986 F-150|Standard Cab|4x2|300Six|C6Transmission w/3.08 rear|Name:TBD
2021 Ranger XLT Super Crew |
|
|
In reply to this post by Danny G
Ok did some work on the truck last night. The dash is officially repainted.
 The wire coming down from the dome light is a bit unsightly. I'm going to install sleeve on this run up to the loom in the ceiling. 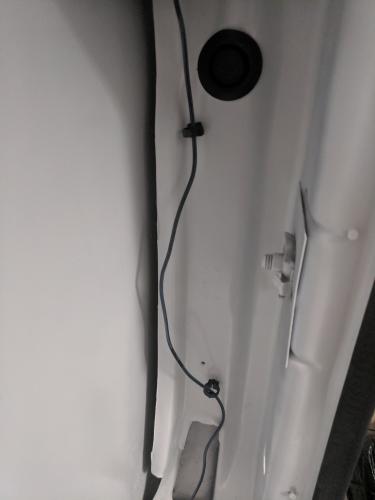 After: 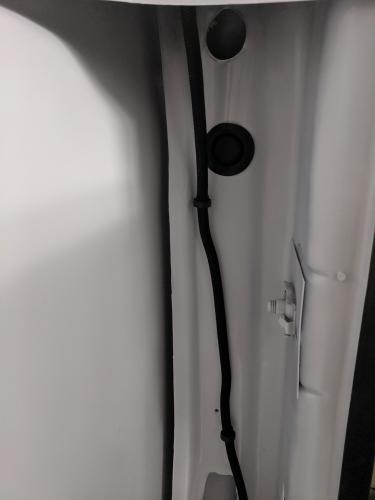 Start with a clean cut, these can be melted together but the next step really makes that unnecessary. 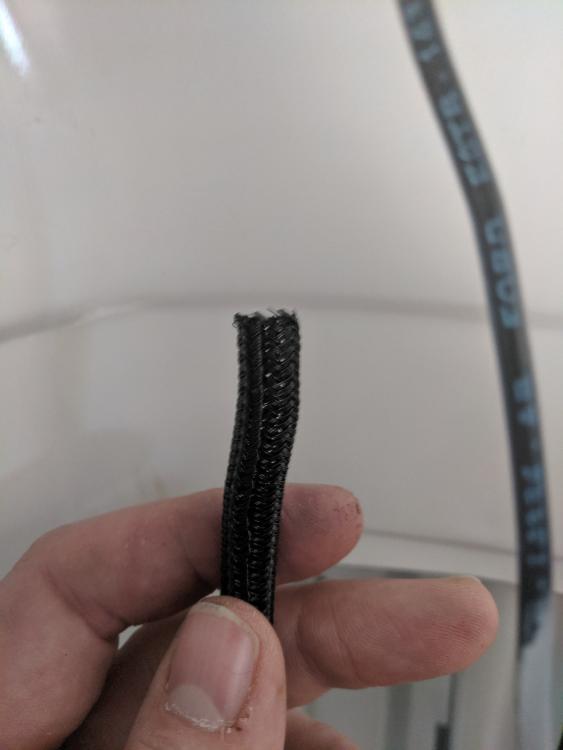 Fold it over inside. This creates a nice smooth round over that will not come unbraided and will not scratch anything. 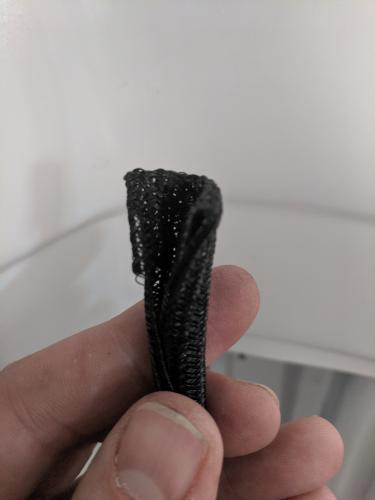 The knot of choice is a clove hitch finished off with a square knot. I like putting two ties on a fold over. 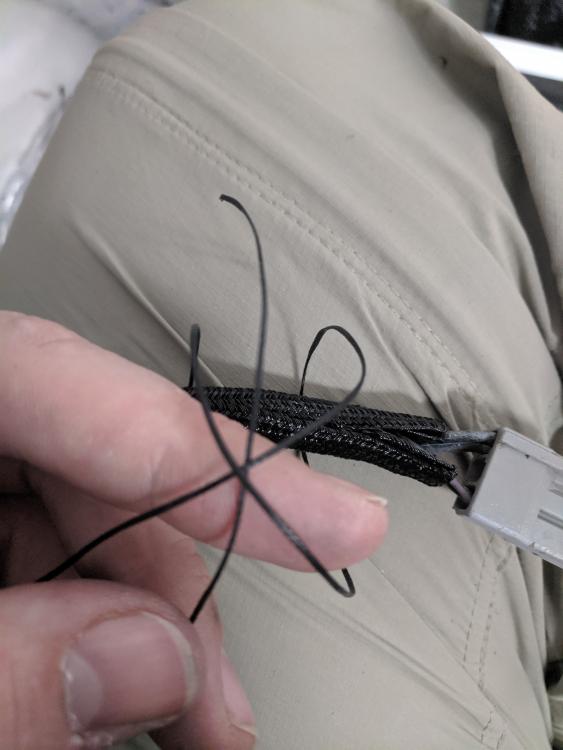 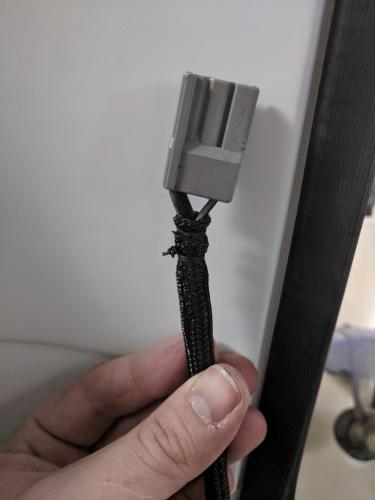 While the coats on the dash were drying I worked on harness from the other day and got her installed. Still needs a little paint touch up around the ground stud.  I was looking at the terminal and the corrosion it had and decided I will replace it and give it a nice strain relief and make the sleeve transition look better in the process. This type of terminal is made to bite into the metal for contact and also acts like a lock washer to keep the screw from backing out. I don't have those so I did a wet install and sealed the terminal to the truck. It looks better when done right and also will keep the terminal from corroding. 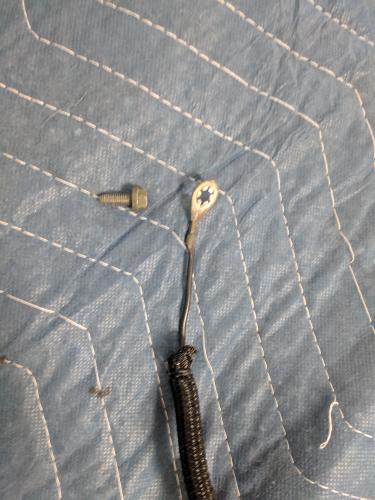 As the new terminal already has built in enviromental shrink and the wire is significantly thinner than the sleeve we need to build up the jacket with layers of heat shrink. When doing a heat shrink build up strain relief the lowest layer should extend father than the proceeding layers. I am using double walked shrink for this part it will seal the wire and provide more strength than normal shrink. Also because the terminal needs to sit flush on the B pillar I can trim the underside of double wall shrink without it falling apart. You can tell double wall shrink by it not being flat and it has a shiny layer inside. This is the adhesive/sealer. 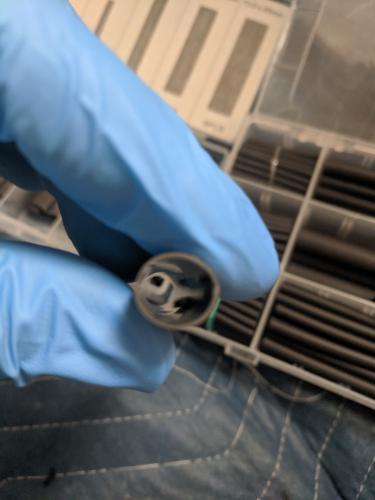 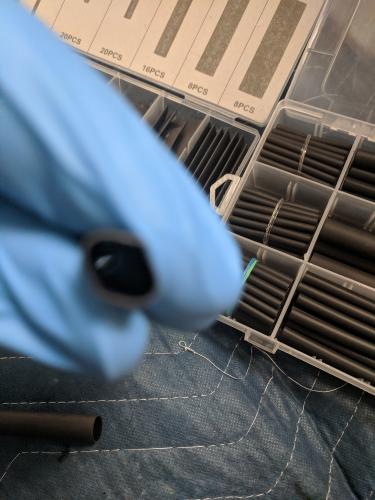 Before I go further here are the hand tools I broke out of the kit for this. Only ONE of these is used for crimping things onto wires. Hint it's not yellow. 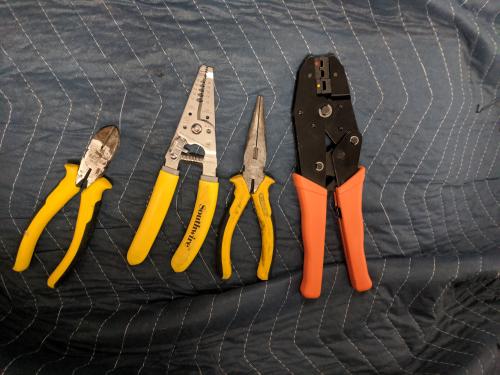 Whack off the old terminal with some alternative lifestyle pliers. 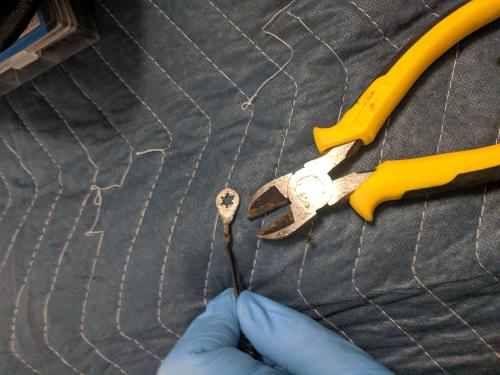 p p
Strip the wire and check for corrosion, broken and mising strands. If necessary trim back again. The strip dimension should sit in the crimp area of the terminal and should be flush to both ends. It is ok to let it protrude about 0.1 inch but that's about it. The jacket of the wire should butt up against the metal crimp portion under the sleeve. This is an example of too much protrusion. 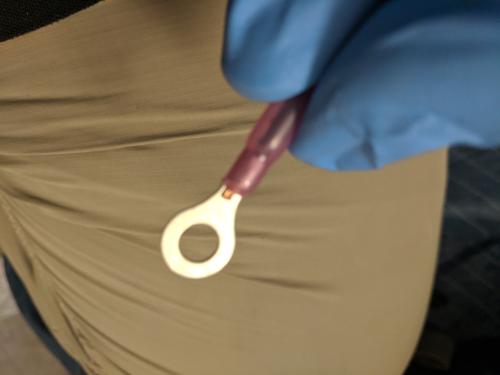 We're going to build up the layers as shown. We need to make sure we put all of this on the wire in reverse order because after the terminal is on it won't fit. If this terminal was not already insulated either double wall shrink the first layer would go from the terminal end back to its current end point  **Tip**. You may not know what your final diameter is on your shrink and thus have a hard time picking build up layers. Shrink one terminal of each size and leave it with your terminal kit. This way you have a reference on hand every time you open the box. 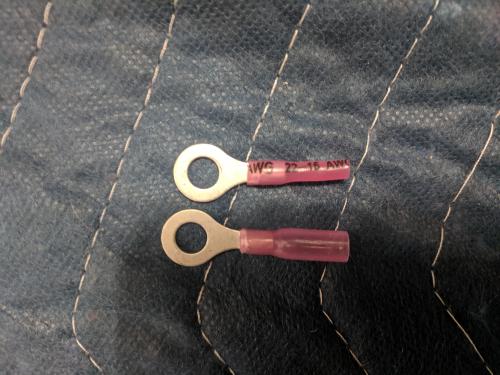 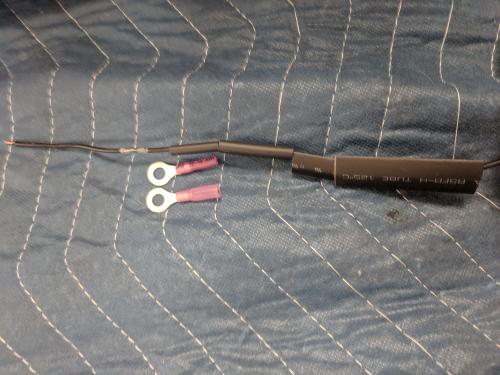 Remember I said only one of those tools was for crimping things on wires. Select the correct dies and have at it. You will see it crimps the terminal and leaves a specific mark on the insulation, a single dot. Some dies will imprint the gauge especially in larger wires for example an "8" for 8awg. 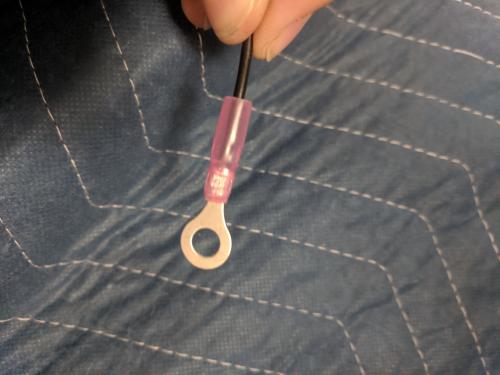 On the topic of proper tools a BIC lighter is not the per tool for heat shrink and more often than not cause more harm then good The melt temp on that braid is about 470 degrees. The BIC-1000 will destroy it. Use a heat gun at just enough temp to melt what you need. Don't set it to max off the bat as some heat guns can get up to 1100 degrees. If you have money to waste get an IR gun... Those things are champs.  On the next layers of shrink you can see the sealer coming out, this is what you want. That wire is now completely encased, no water going there. 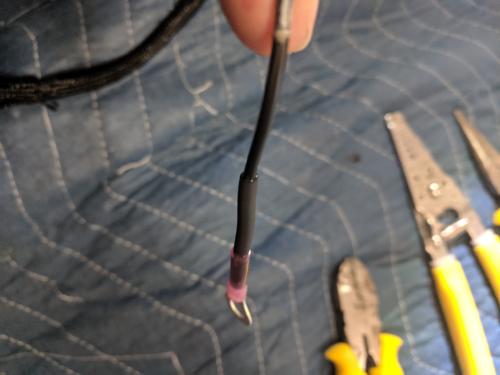 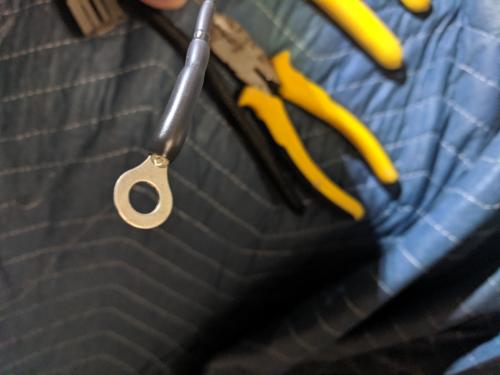 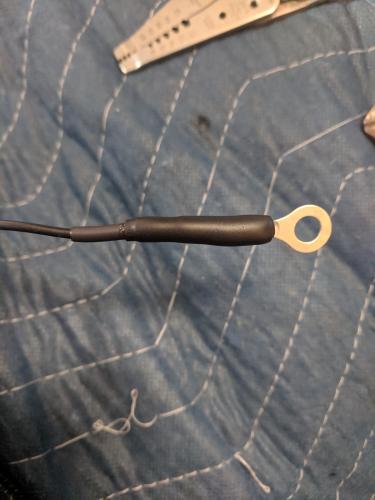 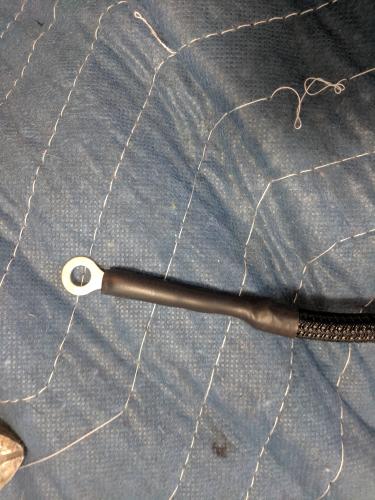
1986 F-150|Standard Cab|4x2|300Six|C6Transmission w/3.08 rear|Name:TBD
2021 Ranger XLT Super Crew |
| Edit this page |