Fuel Injection upgrade


Administrator
|
Yes, it would have been nice to have the pigtail to have the option.
As for the ground, it cannot hurt.
Gary, AKA "Gary fellow": Profile
Dad's: '81 F150 Ranger XLT 4x4: Down for restomod: Full-roller "stroked 351M" w/Trick Flow heads & intake, EEC-V SEFI/E4OD/3.50 gears w/Kevlar clutches
|
|
|
In reply to this post by Rusty_S85
Not much to update, been waiting for a big sale through Summit or Jegs to order some more big dollar items, sale finally came from Jegs but it excluded some 90% of the brands that they carry so I went to summit and bought the Cold-Case radiator that is currently out for delivery today. Saturday I got a couple cans of Eastwood Radiator Black in Satin finish to coat the radiator in.
Besides that I am on the hunt for a new tuner, I was going to use Mad Scientist Motorsport as the guy is highly recommended by Holley but there was a incident today between me and him on social media where he completely over reacted in an uncalled for way. He made a post proclaiming ECMs cant fail and that clearing trouble codes doesnt fix the problem as you have to fix the physical problem. I told him kindly to be careful of making blanket statements like that as ECMs can fail and that clearing trouble codes can fix the problem as there are phantom trouble codes that has no physical issue but the code is still there. His initial response was to out right say "when I want your opinion ill ask for it", then it devolved from there to the point where he accused me of not working in the field propping himself up on his three ASE certifications and eventually making racist remarks towards me by throwing in cutting grass with a few other potential jobs that he thinks I may have ignoring the fact that I was working on cars before he joined the military which he joined in '08/'09 and I was working on cars while I was taking tech classes back in 06/07. I honestly cant over look something like this and told him he lost a customer and his response was that if I knew how to do this I would be doing it vs paying someone like him to do it for me and to record my engine when it pops cause it will since apparently he can prevent an engine from grenade. My final response to him was that I value my time more than he values his time and it is cheaper to outsource the work to him vs spending my time doing the tuning and that the only pop there is going to be when his big ego bursts and I will be there to laugh when he loses everything. There were a million and one ways he could have responded to my inital comment and kept everything civil but he went off the deep end. Sad thing is I was giving him the business cause A) hes a veteran, B) hes local, and C) he came highly recommended by holley. The negatives of him is A) he takes multiple weeks off at a time not working without warning due to "V/A appointments" and that hes just not feeling up to it which is not how you run a business and be successful. B) he is childish and over reacts due to illusions of grandeur. C) hes obviously racist if hes going to see a hispanic last name and throw in cutting grass as a profession of mine after I told him three times that I work on cars for a living unlike him who just tunes cars other people built. So this is a heads up for anyone doing a Sniper install, be fore warned I am no longer able to recommend Mad Scientist Motorsports and I am now looking for a new tuner and will list who I end up going with.
"Old Blue" - '56 Fairlane Town Sedan - 292-4V, Ford-O-Matic transmission, 3.22:1
'63 Belair 2dr sdn - 283-4V, Powerglide transmission, 4.56:1 '78 Cougar XR7 - 351-2V, FMX transmission, 2.75:1 9inch "Bruno" - '82 F150 Flareside - 302-2V, C6 transmission, 2.75:1 9inch, 31x10.50-15 BFG KO2 |
|
Administrator
|
You could tell him that a doctor of motors (me) endorsed your work. The doctor of motors was a multiple guess test by Dana Corporation back in the 70s and 80s. My card finally either disintegrated or got lost in a wallet being replaced.
Mad Scientist sounds like me, I actually did work in a laboratory for 30 years. Every time any sort of mechanical issue, like a set of totally destroyed bearings in a big standby Diesel generator set on an under construction Nimitz class carrier were sent to our metallurgist, I was called in to give my assessment. My call was contamination in the oil (looked like blasting grit had gotten into or left in the oil reservoir). The engines are essentially a dry sump with a large reservoir that the lube pump draws from and scavenged oil is returned to. I have been accused of being a mad scientist and also unorthodox in what I do. Thanks for letting us know, because I may eventually go to a stand-alone unit on my Lebaron convertible when I stick the DOHC converted 2.5L engine in.
Bill AKA "LOBO" Profile
"Getting old is inevitable, growing up is optional" Darth Vader 1986 F350 460 converted to MAF/SEFI, E4OD 12X3 1/2 rear brakes, traction loc 3:55 gear, 160 amp 3G alternator Wife's 2011 Flex Limited Daily Driver 2009 Flex Limited with factory tow package Project car 1986 Chrysler LeBaron convertible 2.2L Turbo II, modified A413 |
|
Administrator
|
In reply to this post by Rusty_S85
Sorry to see that you need to find a new tuner. But it does seem like he's someone to steer clear of.

Gary, AKA "Gary fellow": Profile
Dad's: '81 F150 Ranger XLT 4x4: Down for restomod: Full-roller "stroked 351M" w/Trick Flow heads & intake, EEC-V SEFI/E4OD/3.50 gears w/Kevlar clutches
|
|
|
It is, I got the line however on a few tuners that I can try, haven't heard back from them since I messaged them few months back so I might have to call them when I am closer to dropping the engine in. Im just waiting for getting the Flowmaster Y-pipe and then it's just the 3/8" stainless hardline for the frame from Inline Tube, the fuel tank, making a baffle in the fuel tank, the 85/86 sending unit and a walbro 255 lph fuel pump. Then I have everything I need to do my install.
In other news however, I stumbled across some old Ford Motorsport/Racing/Performance emblems, and I am unable to date them. Below are the photos of them that I am looking at possibly buying to put on my radio bezel where the XL/XLT/XLS emblem would have gone if I had one. The first one to me looks like it might be from the 1980s/1990s with the coloring, but I have not been able to find anything online that provides dating. 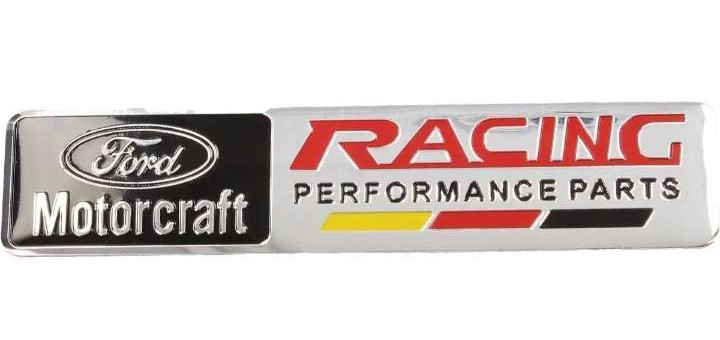 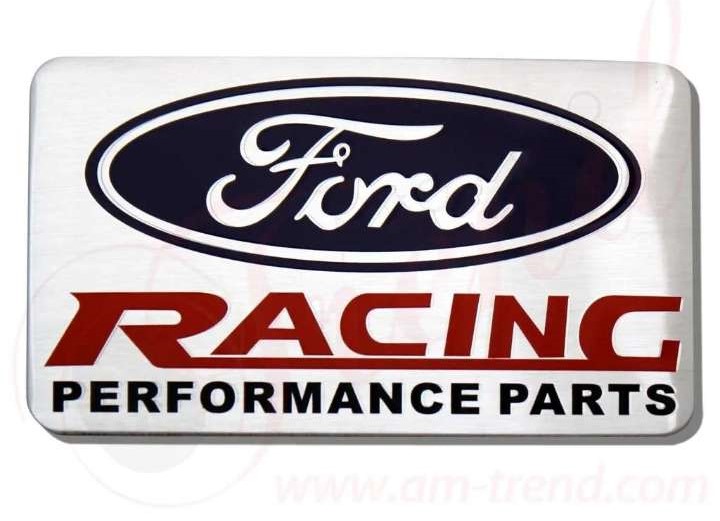    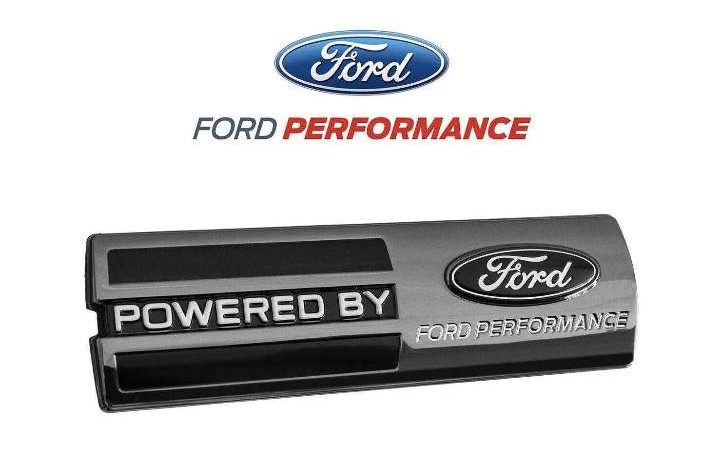 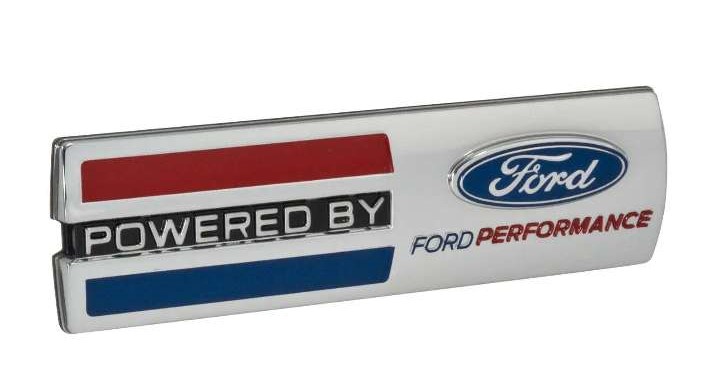 The last two I know are current production emblem, the third from last I think is an emblem for late model mustangs to replace the OE dash plate, but I am not sure.
"Old Blue" - '56 Fairlane Town Sedan - 292-4V, Ford-O-Matic transmission, 3.22:1
'63 Belair 2dr sdn - 283-4V, Powerglide transmission, 4.56:1 '78 Cougar XR7 - 351-2V, FMX transmission, 2.75:1 9inch "Bruno" - '82 F150 Flareside - 302-2V, C6 transmission, 2.75:1 9inch, 31x10.50-15 BFG KO2 |
|
Administrator
|
Glad things are coming together. Hope you nail down one of the tuners.
 But I have no clue on dates for those emblems. Hopefully someone will know.
Gary, AKA "Gary fellow": Profile
Dad's: '81 F150 Ranger XLT 4x4: Down for restomod: Full-roller "stroked 351M" w/Trick Flow heads & intake, EEC-V SEFI/E4OD/3.50 gears w/Kevlar clutches
|
|
|
The one guy I am trying to get in touch with was the first guy I delt with, his website makes it sound like he suspended remote tuning but his remote tuning is a laptop that you give him access to via internet and he will make changes to your sniper while you are driving as he will be able to see what is going on from the sniper program. I hope so on the emblems, I emailed the guy selling them if he happens to know at least for the first one if its a 1980s/1990s styled emblem it seems to be so to me based off the color scheme. I think that would be the one I would go with as I think it would look better on the radio bezel where the XL/XLT/XLS emblem would normally go. Only other option would be to try and find a XLS emblem to put on the dash and have the truck painted in two tone like it left the factory then add the XLS to make my own but I really dont want to do that. My big thing is with the Ford Racing valve covers I really think it would complete the package to have the dash say "Ford Racing" in some fashion. Another option was to have a rectangular emblem that says Ford Racing or Powered by Ford Racing that would fit under the 150 in the F150 emblem like the OE XL/XLT emblems did. But that would require the emblem to also look period as well.
"Old Blue" - '56 Fairlane Town Sedan - 292-4V, Ford-O-Matic transmission, 3.22:1
'63 Belair 2dr sdn - 283-4V, Powerglide transmission, 4.56:1 '78 Cougar XR7 - 351-2V, FMX transmission, 2.75:1 9inch "Bruno" - '82 F150 Flareside - 302-2V, C6 transmission, 2.75:1 9inch, 31x10.50-15 BFG KO2 |
|
Administrator
|
That sounds like a good way to have the system tuned. I had Core Tuning do that when I had a problem with Big Blue and they fixed it easily. And while you can log data while running you can't make changes then on an EEC-V. So his approach should work well.
On the emblems, I think the idea of placing one in the radio bezel that matches the valve covers is the best approach.
Gary, AKA "Gary fellow": Profile
Dad's: '81 F150 Ranger XLT 4x4: Down for restomod: Full-roller "stroked 351M" w/Trick Flow heads & intake, EEC-V SEFI/E4OD/3.50 gears w/Kevlar clutches
|
|
|
It is, I really don't think I need a dyno tune done, I would like to get a dyno done after I get the transmission replaced and swap out the third member to offset the taller than stock tires, just so I know what my combo is making, my goal has always been 300hp but blueprint has a almost identical spec build to what I have with lower flowing heads but a slightly larger roller cam and they claim its 385hp. All I really need is a tune to get the system more efficient than the setting that holley defaults to which is on the rich side to prevent wiping out engines. From this Toyota Motor Sales literature, I have that breaks down A/F ratio it gave me some goals to seek for my tune, like I am looking at around 12.5:1 A/F ratio at wide open throttle full load as that is the best power/torque range and 16.2:1 is the best economy with what we all already know of 14.7:1 being stoich. I know I can set up a target of 12.5:1 for wide open throttle full load but for economy though I would want someone to set that as I wouldn't want to run my engine lean. I could play it safe and just go 15.0:1 which would be just leaner than stoich but then I might leave some fuel efficiency on the table. For me tuning would be the best for getting this done, I will however post the chart below that may help others out. 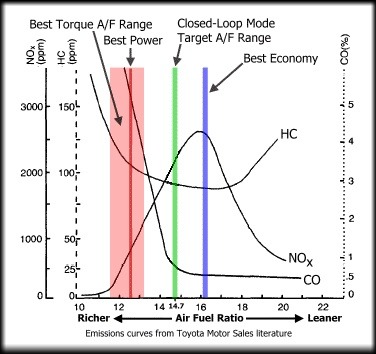 I agree, I picked up three of the following emblems that way I can place one right now on my modified OE bezel that I cut the openings for the clock into, and I will have two spares in the off chance they ever offer reproductions of these bezels. The seller told me he doesnt know when they were made he just got them from a local swap meet. Since I havent seen them before I decided to grab up a few of them just in case they become hard to find down the road.  I also picked up just one of theses, to see if the slimmer look is more flattering for the dash, I can also place it up against the fenders under the 150 to see how that looks as well since its slimmer I think it will not hang below the bottom of the F and might complete the interior/exterior look.  Odds are I probably wont have one on the exterior but doesnt hurt to at least entertain the idea.
"Old Blue" - '56 Fairlane Town Sedan - 292-4V, Ford-O-Matic transmission, 3.22:1
'63 Belair 2dr sdn - 283-4V, Powerglide transmission, 4.56:1 '78 Cougar XR7 - 351-2V, FMX transmission, 2.75:1 9inch "Bruno" - '82 F150 Flareside - 302-2V, C6 transmission, 2.75:1 9inch, 31x10.50-15 BFG KO2 |
|
|
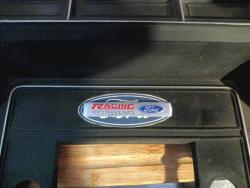
Below are a couple images of the two emblems I purchased seated atop my original dash bezel that was removed. I think I will go with the first one, it looks more 1980s/1990s in appearance so it will go better with the truck, and it fits the area better than the second one which is just way too thin.
Next has to do with the hood, I remember QuietRide Solutions was offering these hood insulation kits that came with the option of having a Ford oval embossed in the ABS plastic cover as pictured below. 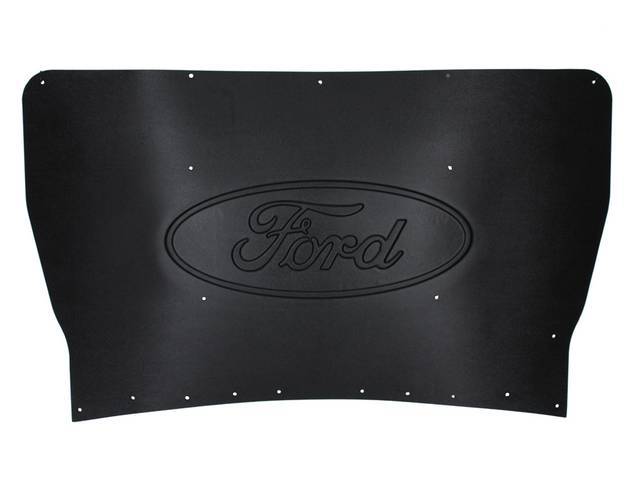 They no longer have this option, and it appears that they don't have the ok with Ford anymore, they only are making Chrysler and gm ones. I did see that you can send them a design or text and they can custom emboss it into the ABS plastic cover which I don't know how good it would look with the name of my truck embossed on it, especially considering I was playing around with the idea of finding a NOS blue bug shield for the hood and then have the name pinstriped on it how it was done in the 1980s/1990s. Either way I stumbled across the KC Cyclone V2 underhood light kit and thought about doing this. Since I will be getting a new steel hood for my truck as mine is rotted out on the under side for some reason, I plan on using the hood insulation kit with the ABS plastic cover, my plan is if I can find one with the Ford Oval logo or if I have my own design put in the middle, slightly below and off to each side I want to mount a pair of flush mounted KC Cyclone V2 lights. Below is the photo of the Cyclone V2 lights that are 2.20" diameter x 0.53" depth and they come with a clear, diffused, amber, red, and blue lenses to change the color. 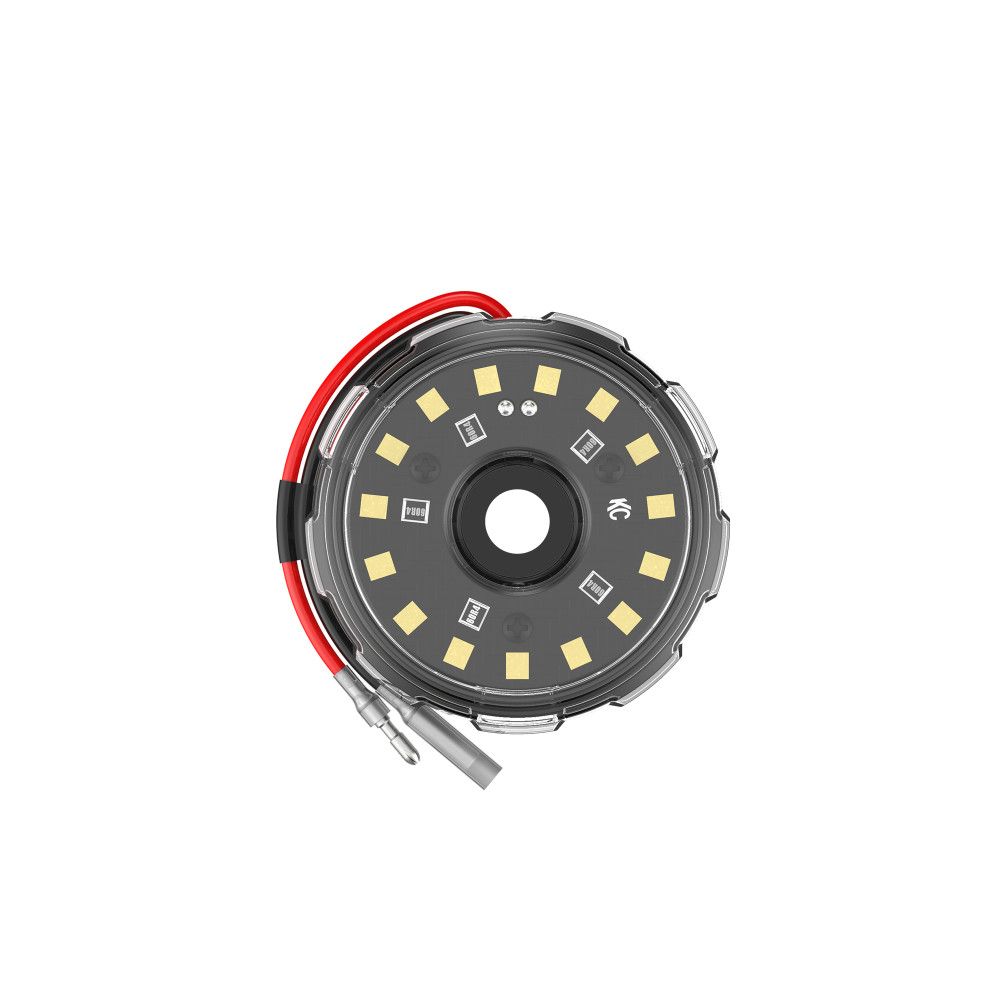 The flush mount that KC offers is photoed below, there is no mention of the install depth but seeing as the 0.53" depth Cyclone light mounts flush with the flush mount which then sits atop your mounting surface I believe 0.50" install depth is a good estimation. I believe this would mount nicely into the black ABS plastic to be used as hood lights. 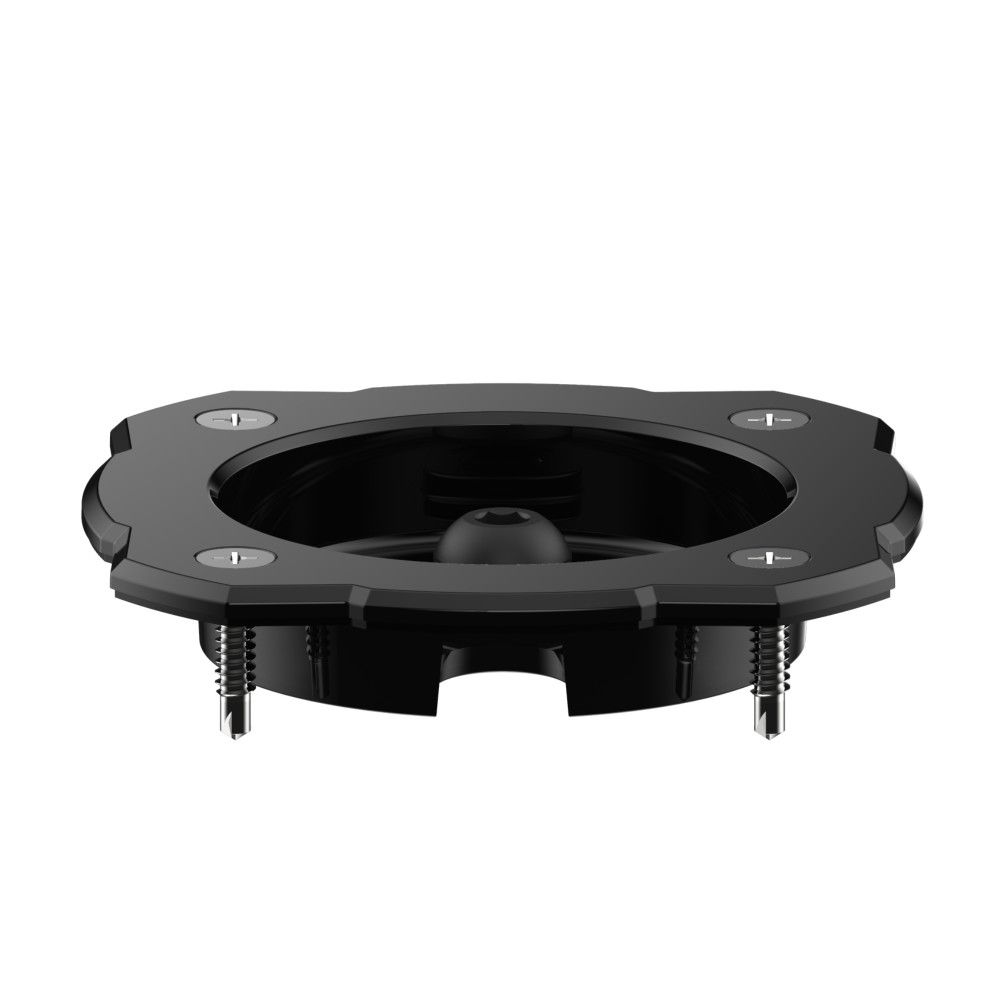 and a photo of the Cyclone flush mount installed. 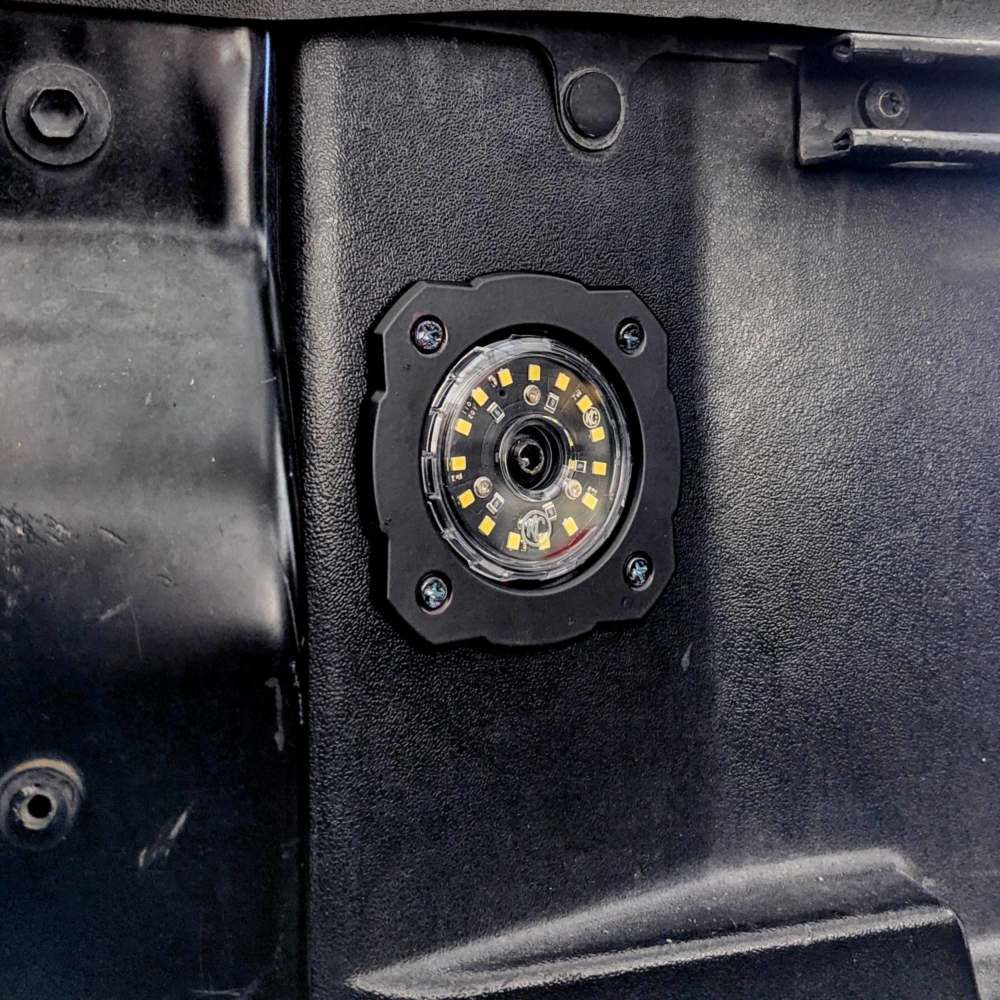 KC does sell a underhood kit that comes with two Cyclone V2 lights, wiring, and a toggle switch for $91.99. I can buy the Cyclone V2 lights individually for $31.99 each or $63.98 for a pair. I also dont want a toggle switch that I have to manually switch on after opening the hood. I found from Street Works that they sell a automotive tilt switch good for 2A, which the Cyclone V2 lights only draw 5w each, 10w per pair which at 12.7v is 0.78A. My plan is to mount this tilt switch to the hood itself behind the plastic cover and only having a main power wire coming out to my auxiliary fuse box. 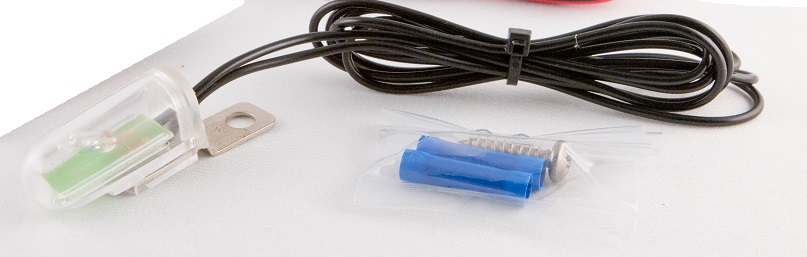 In theory this would allow the two KC Cyclone V2 flood lights to automatically light up when the hood is tilted open providing illumination on each side of the engine bay where light is needed for working. Also drawing under 1A of power means I won't run my battery down if I have to do work for a few hours with the hood up on the side of the road. Likewise, the lens covers are easily snapped off and replaced, I could in theory snap on some blue lens covers if I end up as a show and I have the hood open at nighttime.
"Old Blue" - '56 Fairlane Town Sedan - 292-4V, Ford-O-Matic transmission, 3.22:1
'63 Belair 2dr sdn - 283-4V, Powerglide transmission, 4.56:1 '78 Cougar XR7 - 351-2V, FMX transmission, 2.75:1 9inch "Bruno" - '82 F150 Flareside - 302-2V, C6 transmission, 2.75:1 9inch, 31x10.50-15 BFG KO2 |
|
Administrator
|
I also like the top emblem best.
As for the hood insulation kit, I can see Ford wanting some money or concessions for use of the logo, which probably explains why they are no longer available. But having your own logo on it would be cool. And if you are going to go with those lights, which are cool as well, then no logo or your own logo would be best as there aren't that many places under the hood for the lights to recess into. So you'll have to coordinate lights and logos. And the tilt switch is a good idea, but you may want another switch as well. Big Blue's hood is open 90% of the time when he's in the shop, so I keep the trouble light disconnected at the connection near the brake booster. But it would be easier if there was a toggle switch. Speaking of that connection, you could use it for powering your lights. It is fused already and should be there on your truck.
Gary, AKA "Gary fellow": Profile
Dad's: '81 F150 Ranger XLT 4x4: Down for restomod: Full-roller "stroked 351M" w/Trick Flow heads & intake, EEC-V SEFI/E4OD/3.50 gears w/Kevlar clutches
|
|
|
In reply to this post by Rusty_S85
I am wondering about the blue oval over the radio opening (under the emblem you're planning). Is this a «sticker» you added, or is it moulded on the bezel?
Jeff / 1984 F350 Crew Cab 4x4/5.8L w351 4V/ T18/ D50 4.10 front/ 8' bed.
Restored 2019-2022. Nicknamed «Big Brother 1984», due to its soooo-looong shape & nod to George Orwell's 1984 famous novel. |
|
|
Same here I like the top emblem the best it just seems to fit the area better. Yes, it would be nice for my own logo or even just having the name embossed which I do have a hand full of fonts that I am on the fence about for the name which may or may not be put on a bug shield. At the very least I would have a decal made or maybe get it die cut into a mask and after I replace the windshield apply it in the sunscreen area and chemically etch the glass with the name. I don't have the wire that goes from the OE hood light to the connector down on the driver side, but the pigtail is there though. I could hook up there, but I could also hook up to my auxiliary fuse box that will be for all add on circuits I am building still that will be next to the battery. It would have its own fuse and I could easily pull the fuse for when I don't need the lights on, which those lights wouldn't draw much both of them draw less than 1A. I think I robbed the wiring off another truck from work when we cleaned it up if I did and I have that connector I could check and find out which fuse in the fuse box powers that wire and I can just route the wiring OE and go to the OE wiring. The Ford oval is a sticker, it was put on the bezel to fill it out back in the 90s, it was a sticker bought from the local dealership same time we got the etched glass look Ford oval that goes on the inside of the glass that was put on the vent windows. I bought another three or four sets off Ebay as I needed to replace the ones put on from the 90s as they were peeling off. I need to look and see if there are any still available and buy more cause they aren't produced anymore.
"Old Blue" - '56 Fairlane Town Sedan - 292-4V, Ford-O-Matic transmission, 3.22:1
'63 Belair 2dr sdn - 283-4V, Powerglide transmission, 4.56:1 '78 Cougar XR7 - 351-2V, FMX transmission, 2.75:1 9inch "Bruno" - '82 F150 Flareside - 302-2V, C6 transmission, 2.75:1 9inch, 31x10.50-15 BFG KO2 |
|
|
Been a bit since my last update, finally made a little more progress on part collection as well as electrical.
To start off with, I got my Cold Case radiator late last year to replace the old stock copper radiator with a vastly superior tig welded aluminum radiator. I am still on the fence if I want to scuff it up and shoot it with eastwood radiator black or just leave it as it is. I kind of want to go for the stealth look and paint it black but I kind of dont want to scuff the aluminum up. I havent taken it out of the box yet how ever but this is the best photo I have of the radiator which shows the cores are as wide as the tank itself on the radiator. 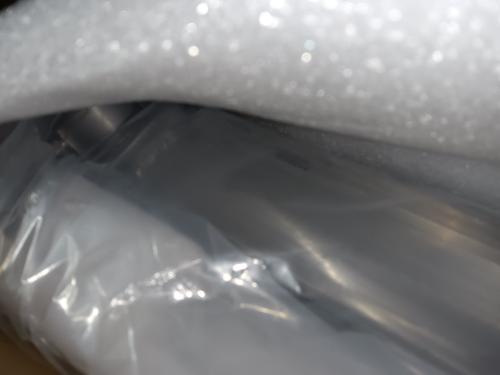 Next up is the Flowmaster Y-pipe I purchased; it came in after a month of back order. I got to test fit it today on the engine and found out that it is about 1/2" off from fitting the flange of the headers. I don't know if I want to attach the bolts and slowly tighten each side up a little at a time and use the cone to pull the Y-pipe out or not. That would be the easiest option, but I am fearful it may damage the sealing cones causing an exhaust leak. Another option would be to simply cut the pipe and use a butt joint band clamp to reattach the two pieces together, I don't like this idea as I don't want a clamp under the oil pan. I could have it welded up but then there's that same issue of having a weld joint right in the middle under the oil pan. Another option I thought about was fabricating some kind of pusher using some all thread and some nuts to apply pressure on the Y-pipe and use heat to heat the tube up and stretch it out till it is spread to fit properly. This would be the best way I think as an alternative to the first option. For the Sniper install how ever I will have to plug the O2 sensor in the balance tube and will have to measure 6" to 8" after the header collector to drill a hole in the exhaust and install a O2 sensor bung. I was under the impression you have to read just one bank with the O2 sensor on aftermarket EFI but in reading page 8 of the large PDF file for the 4150 Sniper Stealth I have states the following Quote: Your vehicle may already have an O2 sensor bung welded into the exhaust. This bung location needs to be verified before using it with the Oxygen sensor included in the Sniper EFI system. ideally the bung will be 6-10 inches after the collector for a true reading of all cylinders and have a minimum of 18" length past the sensor location. So as can see there is no one bank only rule so I will be putting my O2 sensor bung in a spot in the exhaust 6" to 8" past the collector which would put it after the Y merger and read both banks. 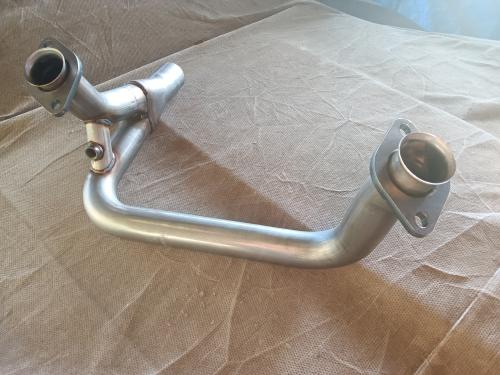 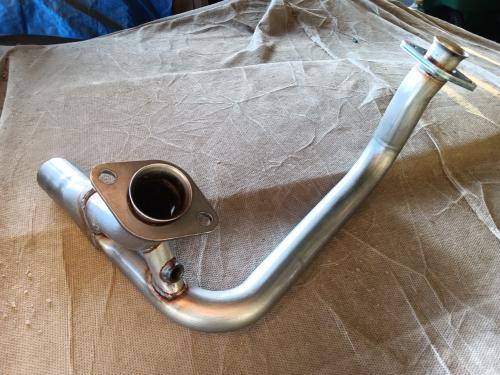 Last thing would be the wiring, I purchased a original factory Ford wiring schematic for the entire truck and found what color wires the factory used for the alternator circuit, I decided to use the same colors to make my connections on my 3G swap. I found out the Stator wire is a white with black stripe, the Armature was a Yellow with a white dot, and the I-terminal was a light green with a red stripe. I wasn't able to source a Yellow with White Dot wire but I was able to source a Yellow with a White Stripe. It took some work to get all the right terminal ends so I could replace the pigtail terminals with mew new wires as I didn't want splices in the wires especially between the stator pigtail and the regulator pigtail. My plan is to run these wires in a woven loom and make the connections at the regulator connector on the fender leaving the OE 1G wiring preserved. 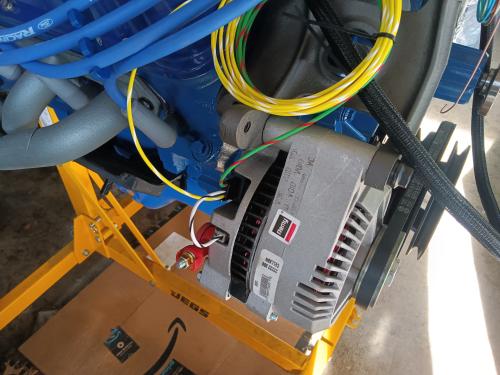 Only one I could not find was a black with orange stripe wire for use as the alternator charge wire like OE. I can find it in smaller gauge sizes but not in 6ga size which is what I plan on running for the charge wire. So, I might just get some 6ga black wire and see if I can devise a way to paint a stripe on it in orange without having the stripe flake off or rub off. For the circuit protection I still am on the fence, I could go with a 150A fuse, or I could get a marine grade 150A circuit breaker. I had a fuse at work 150A somehow failed to fail and actually over heated and melted the plastic of the fuse and the holder as well as part of the charge wire end. Never had that happened before but at work we mainly use 150A circuit breakers. I know many stress not to use a circuit breaker as they can stick and not trip, but after having that 150A fuse fail without blowing the fuse I don't know if I want to trust a fuse now.
"Old Blue" - '56 Fairlane Town Sedan - 292-4V, Ford-O-Matic transmission, 3.22:1
'63 Belair 2dr sdn - 283-4V, Powerglide transmission, 4.56:1 '78 Cougar XR7 - 351-2V, FMX transmission, 2.75:1 9inch "Bruno" - '82 F150 Flareside - 302-2V, C6 transmission, 2.75:1 9inch, 31x10.50-15 BFG KO2 |
|
Administrator
|
Good to hear from you!
Radiator looks good. I left my polished radiator alone, meaning w/o paint. I just couldn't scratch it up to paint it, and I know it'll transfer heat better w/o paint. On the exhaust, I don't think I'd use the cones to pull things together. I'd first talk to Flowmaster and tell them the problem and ask for their recommendation. As for a Black/Orange wire, go to the salvage. A lot of Ford vehicles have a long Black/Orange off the alternator, and I've used those. And in '85ish Ford changed from dots to stripes. The EVTM implies it was between '85 and '86, but it wasn't. Big Blue is an '85 but has stripes where the EVTM says he should have dots or hash marks. So just go with the Y/White stripe wire. As for the breaker vs fuse, I don't think you can go wrong. I'm running a fuse but if I'd had 150A breakers handy I might have gone that way.
Gary, AKA "Gary fellow": Profile
Dad's: '81 F150 Ranger XLT 4x4: Down for restomod: Full-roller "stroked 351M" w/Trick Flow heads & intake, EEC-V SEFI/E4OD/3.50 gears w/Kevlar clutches
|
|
|
Yep, that's what I am thinking I might do; I do have the radiator black paint I might change my mind down the road when it comes time. One of the guys over on the Ford Muscle forums told me to get some exhaust pipe that fits the Y-pipe and make sure the pipe is long enough for leverage and spread the pipes out. I think I am going to try that though, hopefully the stainless-steel tubing is not too hard to spread it out some. I just need to do 1/4" on each side to get a 1/2" spread while keeping it centered. I will have to check out the junkyards and will check out Ebay as well. I don't know what ga the OE is, but I was looking at 6ga but if I can find something that is like new, I'll take it, my goal is to try and use OE color/patterned wiring to properly reflect the colors the wiring schematics shows even if it's an aftermarket upgrade. Yep, I'm going with the stripped wire, and this one here is a spiral stripe not a straight stripe like the OE wire. I like it cause the spiral striped wire is easy to identify vs having to try and flip or rotate the wire to find the stripe. I have both handy through work, just haven't fully decided which one to go with between the two.
"Old Blue" - '56 Fairlane Town Sedan - 292-4V, Ford-O-Matic transmission, 3.22:1
'63 Belair 2dr sdn - 283-4V, Powerglide transmission, 4.56:1 '78 Cougar XR7 - 351-2V, FMX transmission, 2.75:1 9inch "Bruno" - '82 F150 Flareside - 302-2V, C6 transmission, 2.75:1 9inch, 31x10.50-15 BFG KO2 |
|
|
what headers are you using? I have not found headers for a truck that fit as drop ins yet. the y pipe has always been about a 1/2" tight. each time has been inside the truck frame, so I was able to strap the passenger side to the frame after nearly tightening the flange to the header then strapping the driver side to the frame and pull it out to the header. pull past the flange alignment because of spring back and it takes a few times to get it. old y pipes fight more. new unseasoned tubing works best. the outlets of the headers are not as tight to the block as the cast manifolds and 1/4" each is all it takes to cause this. if vehicle fit was for a truck with manifolds than there is the issue. the next is most likely going to be flange match. the flare for a 5.0 manifold is smaller than the flare needed for headers. check that before any mods.
|
|
|
Headers I have are Hedman Street Headers part #89470, they are 50-state Legal headers for '86 - '95 2wd/4wd F150, F250, F350, or Bronco with a 5.0L, it has a stock 2" OE collector for fitting the OE stock Y-pipe without modification. The Y-pipe is a Flowmaster direct fit catalytic converter part #2020057, this has a high flow slip flit converter that I won't be using as all I wanted was the mandrel bent stainless steel Y-pipe. This Y-pipe is a direct fit for '84 - '95 F150 and F250 trucks and '85 - '95 Bronco with a 5.0L V8. This Y-pipe has a OE 2" cone flange that is welded into a 2 1/4" pipe that merges into a Y merger that then goes into a 2 1/2" single exhaust. When looking up the OE exhaust manifolds for our trucks, my truck specifically with a 302 uses exhaust manifolds E0PZ-9430-A for the RH and E0TZ-9431-C for the LH, the RH is listed as fitting 1980 - 1985 302 E-F100/250 and U150 vehicles and the LH is listed as fitting '80 - '85 E-F100/250 and U150 302 as well as 86 and up 302 EFI. This is why I went with these headers and Y pipe as the exhaust manifolds from Ford were the same '80 - '85 for the RH side and '80 and up for the LH side. The only change would have been for addition O2 sensors or air pipes for the converter. It's good to know that even with OE Y pipes they don't fit right and has to be stretched out. What I am going to do is try like this one guy said to do and get some 2" black iron pipe from the local hardware store and put it in each tube and try to spread them apart to get a better fit. Being that it is all new stainless steel on the Y-pipe it should be easier to tweak apart and get to fit. On the sealing, while looking I stumbled across a post about sealing these type of metal to metal exhaust seals, instead of using copper silicone like sanderson headers wants you to use for their header to head gasket, this old timer was talking about applying a thin layer of chassis grease on the cone and connect it, that the exhaust will bake it on like a Schellack that doesn't get hard and would create a good seal. I am going to do that as I don't like the idea of if I ever have to pull the Y-pipe having to try and clean copper silicone off the pipe to apply fresh.
"Old Blue" - '56 Fairlane Town Sedan - 292-4V, Ford-O-Matic transmission, 3.22:1
'63 Belair 2dr sdn - 283-4V, Powerglide transmission, 4.56:1 '78 Cougar XR7 - 351-2V, FMX transmission, 2.75:1 9inch "Bruno" - '82 F150 Flareside - 302-2V, C6 transmission, 2.75:1 9inch, 31x10.50-15 BFG KO2 |
| Edit this page |