The Deuce Build Thread


|
The truck continues to improve. Previously when I went over rough terrain, there were a lot of pops or clanks that sounded like metal on metal. Kind of like the tailgate chains were slapping around, but they are encased in a rubber tube so that wasn't it. I installed the Energy Suspension body pucks on the front 4 positions, and that stopped almost all of the random noises over rough ground.
 I still have the back 2 to do, but they appear to be in "good enough" shape, so because of the difficulty of getting to them, I'll wait until I have the bed off for an upcoming project. I also installed all the '95 donor truck front end accessory drive stuff. 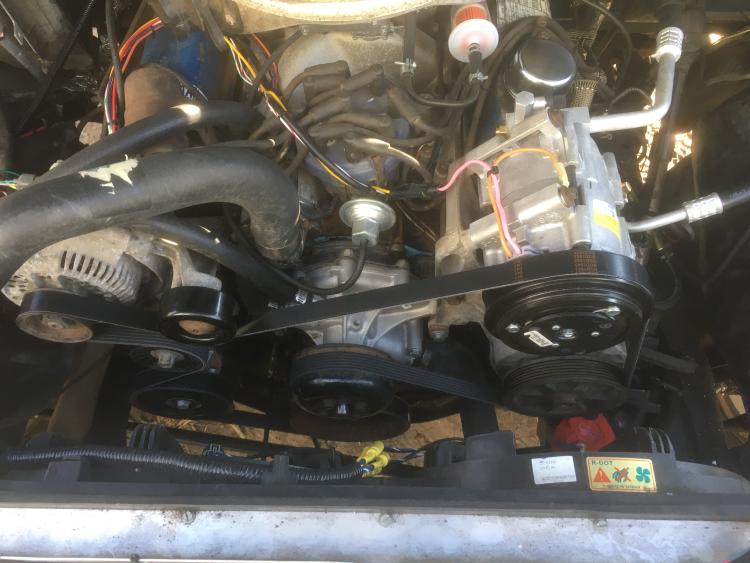  That all went fairly smoothly. I installed a smog pump delete kit (Proform 68110) along with the larger pulley (Dorman 419-644) to have some hope of running a stock-ish sized belt. The Dorman pulley was still a bit smaller than the actual smog pump pulley, so I got some speaker wire and ran it around the belt path and marked the length with the tensioner at rest. Then I pulled back the tensioner all the way and marked again, this produced 2 marks about 2 inches apart from each other. I split the difference and measured that and came up with 102, which appears to be the stock belt size. That belt dropped right on with the tensioner pulled about 60 or 70% back, so that all worked out good. The one "DOH!!!" moment was during the change-out of the front timing cover, when I was removing the fuel pump from the old one. The new one has no provision for a mechanical fuel pump. Well I guess it's time to go electric. I got a little Mr Gasket pump, apparently a clone of the Holley Mighty Mite, and put it on the frame under the steering shaft. Wiring it in was no problem as I have a custom wire panel under the hood, so it was as simple as running a wire from there. 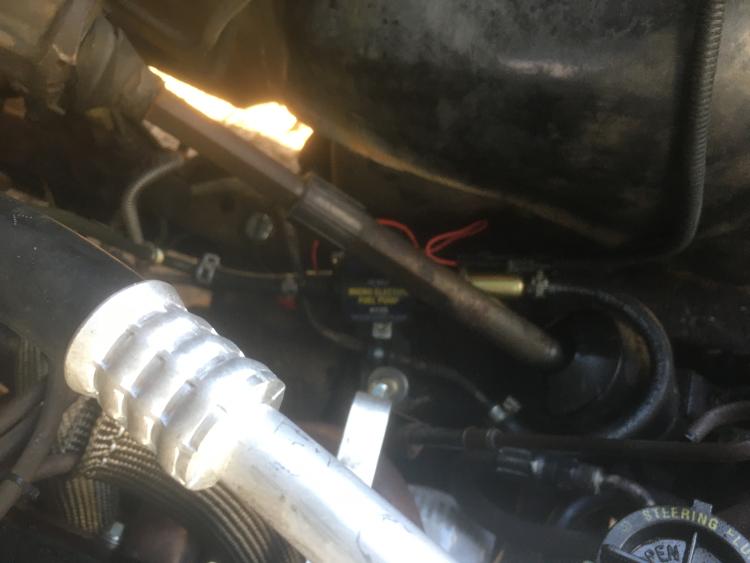 Later today I'll take it over to my mechanic and have the R134a added.
81 F150 Flareside, Edelbrock Pro Flow4 FI, hydraulic roller 351W, E4OD, 4x4, BW1356
92 F150 RCLB 351W E40D BW1356 mostly stock |
|
Administrator
|
Yes, it is improving, and improving quite well! Good job!

Gary, AKA "Gary fellow": Profile
Dad's: '81 F150 Ranger XLT 4x4: Down for restomod: Full-roller "stroked 351M" w/Trick Flow heads & intake, EEC-V SEFI/E4OD/3.50 gears w/Kevlar clutches
|
|
|
In reply to this post by Pete Whitstone
I have been working on a new engine for the truck. It will be another 351w, but this block is from the '95 parts truck and so it is hydraulic roller. Teardown of the engine was pretty much textbook, no broken bolts or anything. I have been getting the bare block cleaned up.
I have an engine rebuild master kit, with all new bearings, oil pump, timing chain, etc. The block is in excellent shape, with cross-hatch honing still present on all cylinders, and everything within spec. I thought about reusing the pistons with new rings, but the top ring on the #5 piston is stuck really good and I would probably damage the piston getting it off. Also, the 20cc dish in the piston would make it really hard to meet the compression goal with reasonable quench, so I have some forged 11cc pistons coming tomorrow. That should put me right at 10:1 compression with quench somewhere between .050 and .060. I'll know more about the final dimensions when I'm able to mock up a piston in the cylinder and measure deck clearance. From there, final CR will be adjusted with the head gasket selection. I have a set of AFR 185 heads ready to go on as well. ARP head bolts will hold them on. I am sticking with the stock cam for now. I ran the combination through a HP estimator, it came up with 377hp and about 400tq. Not sure how accurate those things are, but with goodies like headers, 10:1 compression, Weiand intake manifold, etc it should not be too far off. With the block torn down and the cam bearings removed, I needed a tool to install the new cam bearings. I found the plug that came out of the back of the block to be the perfect size for the start of a tool. I found some 2" tubing and cut off a small section to go inside it. I also took some quarter inch plate and welded (badly) a 5/8" nut over a 3/4" hole in the plate. That will go with the 5/8" threaded rod. Here is all that stuff. 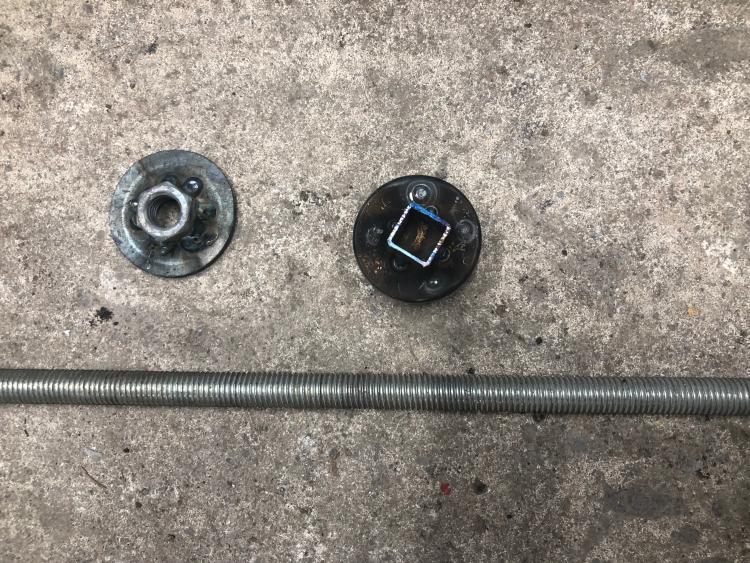 Here is the actual bearing pusher up close. 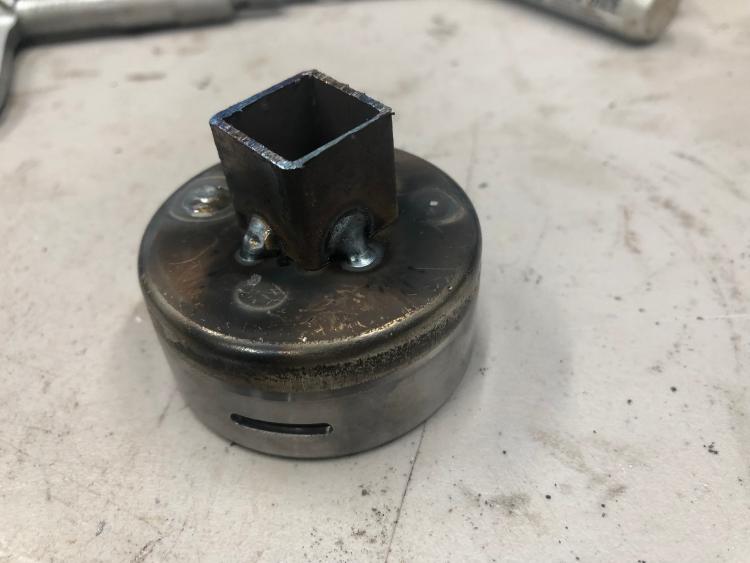 I also made a little "steady rest" to support the threaded rod in one of the holes that does not have a bearing in it yet, it is visible here. 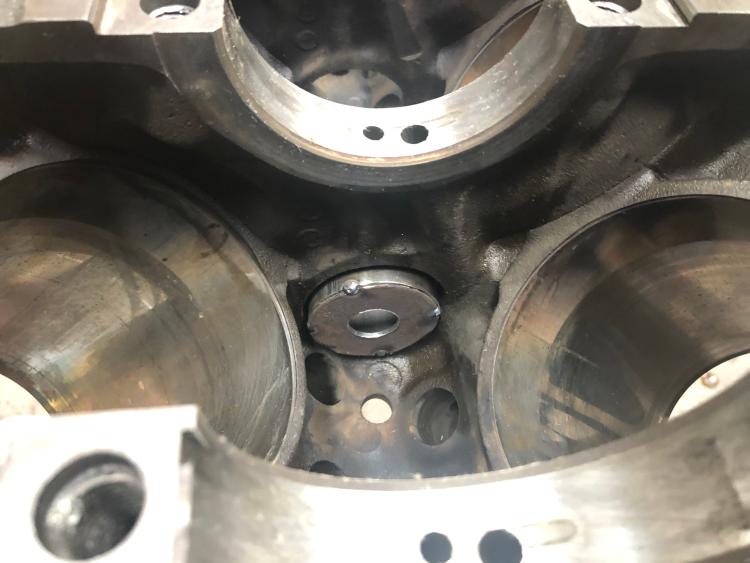 The pushing will be done from the front of the block, where the plate with the nut on it is trapped under the cam retainer. 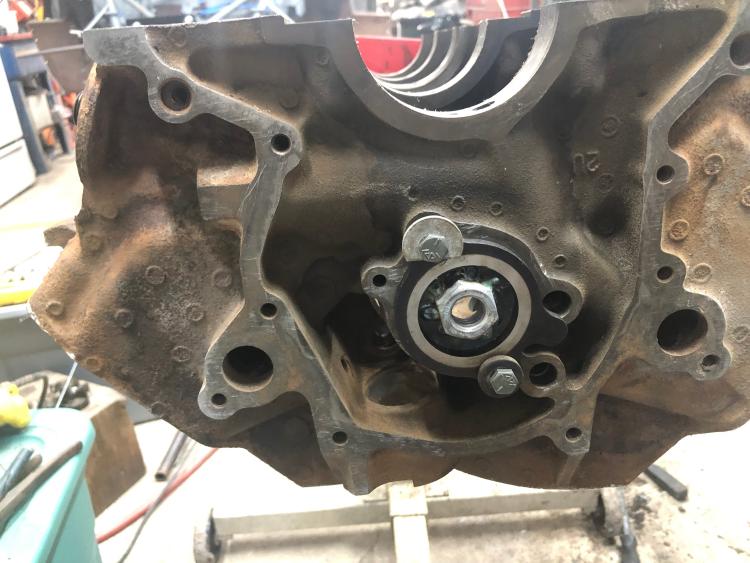 And here is the whole thing, all assembled. 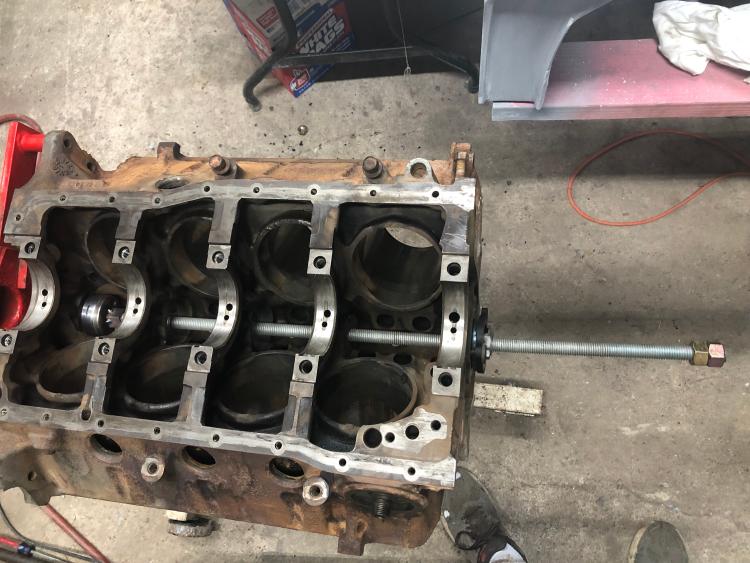 This is just a mock-up at this point. I'm not going to actually press them in until the block has been cleaned better, and painted.
81 F150 Flareside, Edelbrock Pro Flow4 FI, hydraulic roller 351W, E4OD, 4x4, BW1356
92 F150 RCLB 351W E40D BW1356 mostly stock |
|
Administrator
|
That's an interesting approach to a cam bearing installer! All the ones I've used have needed a hammer to drive them in, which is always worrying since it is so easy to go too far. In yours you'll have a whole lot of control.
And your engine should be stout. At first I was worried about the compression ratio until you mentioned the heads. They should tame that compression. 
Gary, AKA "Gary fellow": Profile
Dad's: '81 F150 Ranger XLT 4x4: Down for restomod: Full-roller "stroked 351M" w/Trick Flow heads & intake, EEC-V SEFI/E4OD/3.50 gears w/Kevlar clutches
|
|
|
In reply to this post by Pete Whitstone
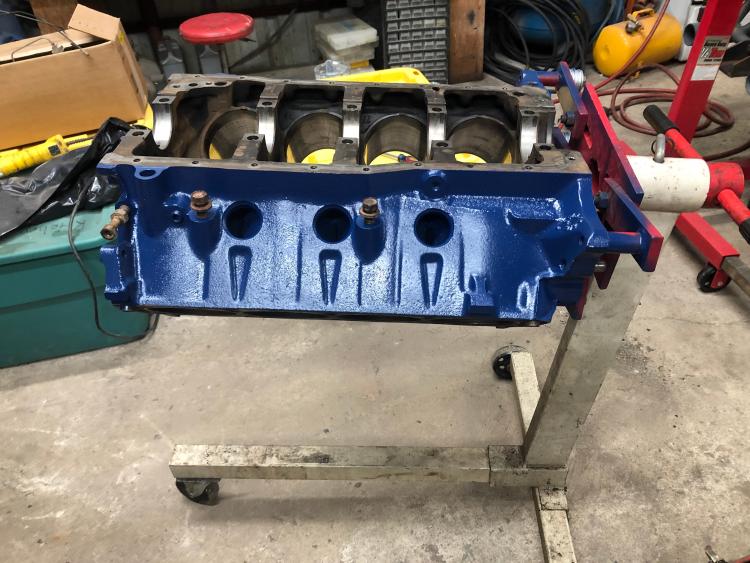
A little bit of progress on the engine build. I got the block completely cleaned and painted.
 I then installed the cam bearings. I decided to slide the camshaft in place to make sure it rotated freely. It went in fine until the last bearing on the front of the engine. It did not really want to slide in the last 3/4" or so. I gently tapped on the end with a mallet, but after it slid a little more in, it was impossible to turn. Something definitely not right here! So I used a prybar to push the cam back out, but as it slid out, the #1 bearing came out on the camshaft. Very curious - that says that the press fit onto the camshaft was tighter than the press fit into the block! I verified the cam bearing was the right one, then gently tried to separate it from the camshaft. I was successful with that, and didn't nick the bearing or the camshaft as far as I can tell. I was wondering if the bearing was the wrong size or something. Measuring it outside the block, it is definitely oval-shaped, but I imagine that will change when it's in the block. It appears to be the right size. Then I started looking closely at the camshaft journal, and found a couple small areas that need some polishing. Nothing major, but if you can catch your fingernail on it, it's probably at least a thousandth. Since the clearance between the camshaft and bearing is between 1 and 2 thousandths, I think that's probably the issue. I'm going to try to polish the camshaft journal tonight and see if I can get it all to fit properly. I am positive the #1 bearing was in its bore squarely, I don't think anything was cocked or anything. More to come. Oh, and a question - what's the wisdom on using a bit of red or blue loctite on that camshaft bearing, in order to make sure it's locked in place? Good idea, or bad?
81 F150 Flareside, Edelbrock Pro Flow4 FI, hydraulic roller 351W, E4OD, 4x4, BW1356
92 F150 RCLB 351W E40D BW1356 mostly stock |
|
Administrator
|
I've not used any loctite on bearings. And you shouldn't need it as the bearing should fit tightly enough not to come out. But if there are nicks you can catch with your fingernail then you are right, that might be the problem.
Gary, AKA "Gary fellow": Profile
Dad's: '81 F150 Ranger XLT 4x4: Down for restomod: Full-roller "stroked 351M" w/Trick Flow heads & intake, EEC-V SEFI/E4OD/3.50 gears w/Kevlar clutches
|
|
|
I also would not use Loctite on the bearings.
Dose that bearing slip on to the cam not in the block as I think it should. If not you think polishing will fix that? I have seen fine scotch bright used on bearings to make them to spec. Dave ----
Dave G.
81 F100 flare side 300 six / AA OD / NP435 / 2.75 gear http://cars.grantskingdom1.com/index.php/1980-Ford-F100?page=1 81 F100 style side 300 six/SROD parts truck -RIP http://cars.grantskingdom1.com/index.php/1981-Ford-F100 |
|
|
It does. I had to knock some high spots off the cam journal, which helped. Then I made sure all the bearings were perfectly straight and not cocked in their bores. Got the cam all the way in, but the breakaway torque required to turn it was pretty high - certainly out of spec, if there is a spec on that. I took the block with the cam in it to my mechanic, he is a racer and has built engines all his life. He took a brass drift and tapped on the cam all around to knock the high spots off the bearings. This helped some, and we finally got it to the point where he said "it's tighter than I would like, but I would run it like that." So no loctite on the bearings, and hopefully the cam will wear in without drama.
81 F150 Flareside, Edelbrock Pro Flow4 FI, hydraulic roller 351W, E4OD, 4x4, BW1356
92 F150 RCLB 351W E40D BW1356 mostly stock |
|
Administrator
|
I think it'll work if it is well lubed for startup.
I've seen blocks with core shift such that the cam bearings aren't lined up perfectly. (And the mains weren't either.) I'm wondering if that's the problem here.
Gary, AKA "Gary fellow": Profile
Dad's: '81 F150 Ranger XLT 4x4: Down for restomod: Full-roller "stroked 351M" w/Trick Flow heads & intake, EEC-V SEFI/E4OD/3.50 gears w/Kevlar clutches
|
|
|
Core shift is the only conclusion I can come to. I put the cam on V blocks and indicated it while I rotated it, it is arrow straight.
81 F150 Flareside, Edelbrock Pro Flow4 FI, hydraulic roller 351W, E4OD, 4x4, BW1356
92 F150 RCLB 351W E40D BW1356 mostly stock |
|
Administrator
|
Assuming the engine is used and the old cam didn't break, the shift apparently isn't too bad. But the bearings will have to wear to line things up.
Gary, AKA "Gary fellow": Profile
Dad's: '81 F150 Ranger XLT 4x4: Down for restomod: Full-roller "stroked 351M" w/Trick Flow heads & intake, EEC-V SEFI/E4OD/3.50 gears w/Kevlar clutches
|
|
|
In reply to this post by Pete Whitstone
Engine assembly continues. I'm shooting for installing over the July 4th weekend.
The crank was measuring just under the spec on both the rod and main journals, although it does not appear excessively worn. Or worn at all, for that matter. I sent it out for polishing and measured everything carefully when it got back. I determined the clearances were large enough that .001 undersize bearings were called for. With those installed, both the rod and main bearing clearances came in at between .001 and .0015. The spec is .0008 to .0015, with up to .0024 allowable, so I'm happy that they are all in spec. I got higher compression forged pistons for it, probably overkill at this HP level, but the selection of forged is a lot better than the selection of cast or hypereutectic. I weighed the pistons, pins and rings, old vs new, and found about 4 ounces of difference between them, not surprising I guess since the old is cast and the new is forged. So the crank was sent out for balancing. It came back on Tuesday so on with the assembly. I did a quick deglazing hone on each cylinder and mocked up the #1 to see how far down in the hole the piston is. Stock is .023 I think, and these pistons had a compression height that was .001 smaller than stock, so I was expecting about .024. However, initial measurements indicated more like .026. I'm going to try to get some more accurate measurements today. Rods were not rebuilt, so no changes there. They were fitted with ARP Wave-Loc fasteners, however. With that measurement (or at least within a couple thou) I could order head gaskets. .027 compressed thickness was as small as I could get without resorting to copper, which isn't really good for the street. Cometic MLS gaskets were ordered from Jegs and should be here the middle of next week. Last night I got all the ring packages installed and put the pistons in. So that's where it sits now.  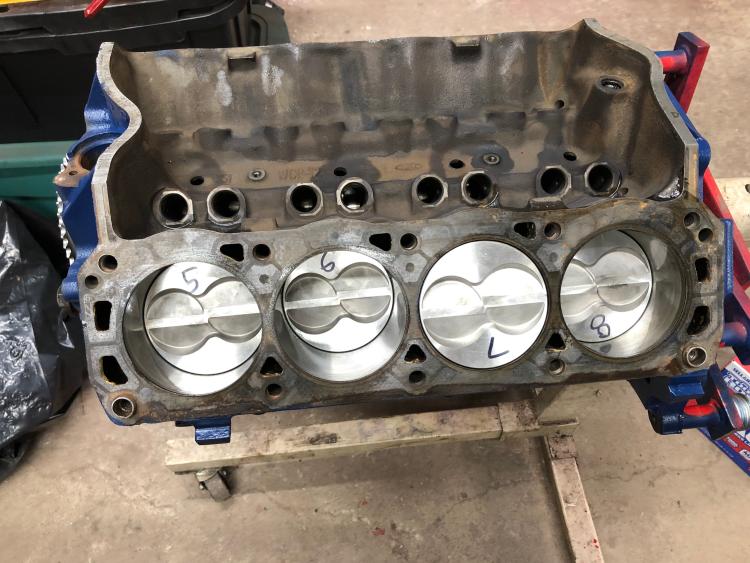 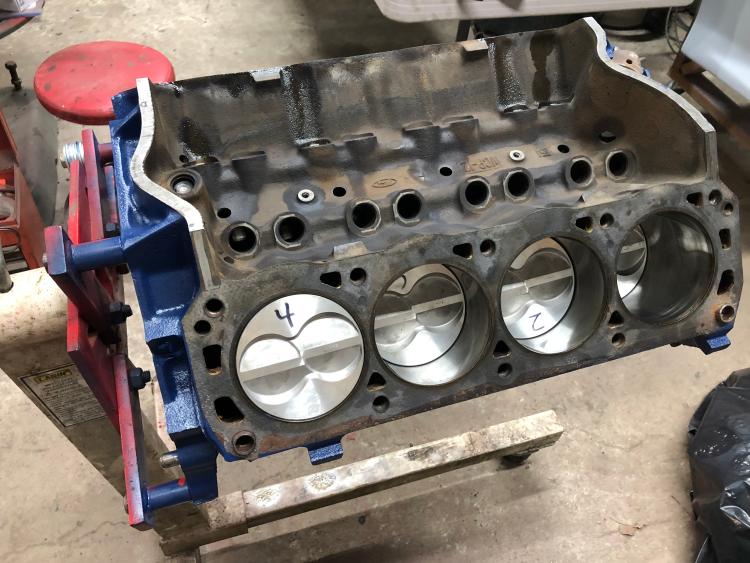 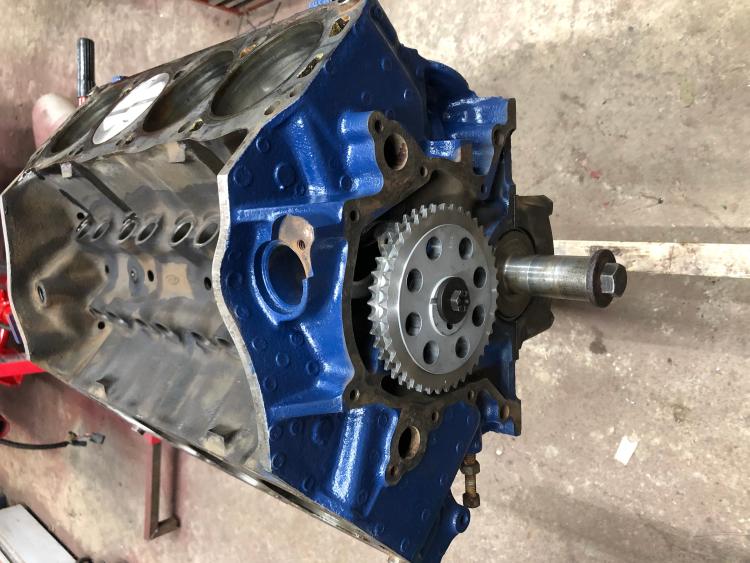 Next up, oil pump & pan, timing chain, then on to the heads. One thing that might throw a kink in the July 4th install date is the need to order custom pushrods. If worse comes to worst, the engine will go in on July 4th, and the pushrods and manifold at a later date. I'm hoping for no downtime for the truck other than the holiday weekend though.
81 F150 Flareside, Edelbrock Pro Flow4 FI, hydraulic roller 351W, E4OD, 4x4, BW1356
92 F150 RCLB 351W E40D BW1356 mostly stock |
|
Administrator
|
Looking good! And those bearing clearances are great. Should have good oil pressure and a long life.
Gary, AKA "Gary fellow": Profile
Dad's: '81 F150 Ranger XLT 4x4: Down for restomod: Full-roller "stroked 351M" w/Trick Flow heads & intake, EEC-V SEFI/E4OD/3.50 gears w/Kevlar clutches
|
|
|
In reply to this post by Pete Whitstone
Yesterday I had a friend over and he helped me install the short-block in the truck. I would have liked to have completed to be a long block before that happened, but I was waiting on head gaskets. Only when those were in could I check piston-to-valve clearance and determine pushrod length.
In retrospect, it was probably foolish to install the short block without checking that stuff first. If the piston/valve clearance did not check out, it would all have to come back out. After I checked it the first time, I realized that a hydraulic lifter might collapse a little and not give a true reading. Some quick internet reading showed that I should be using a solid lifter the same height as the hydraulic rollers I would be using. Great - where was I going to find one of those, and how long would that take? I decided to go about this a different way. I was all set with lightweight checking springs and an adjustable length pushrod. I had the springs installed in the #1 position, where I was doing the checking. It occurred to me if I put something solid on top of the hydraulic lifter, it would essentially turn it solid. So I turned a disk on the lathe that would sit down just inside the top of the lifter, but not where it could compress. I used a drill to turn a rough ball receiver area in it. 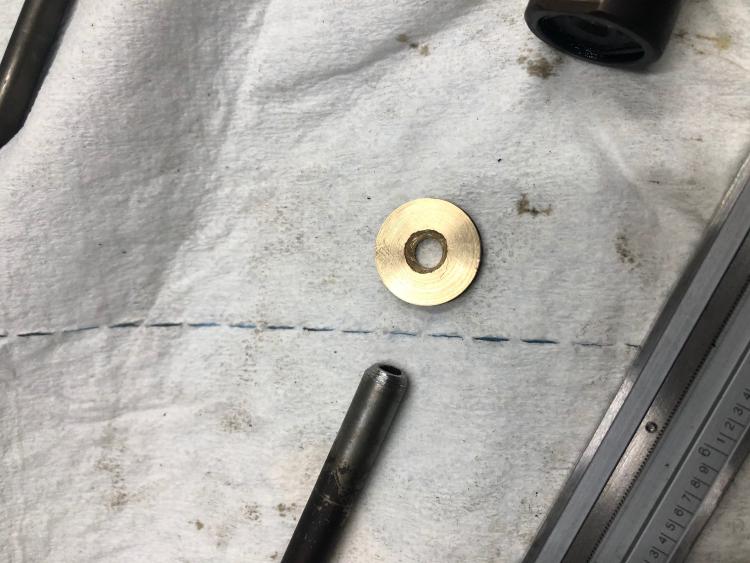 Then I started grinding down the end of a stock pushrod, a little at a time. You can see that next to the disk. Then repeated the cycle of marking the valve tip and running the engine through a cycle, about five or six times. I kept taking a little bit off the pushrod until the pattern finally looked good. 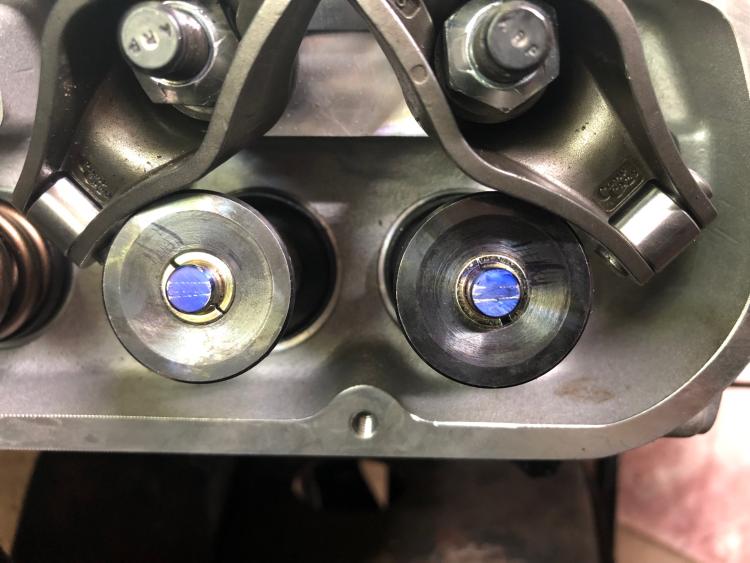 Then I took a stock pushrod and lifter and measured the total stack height. 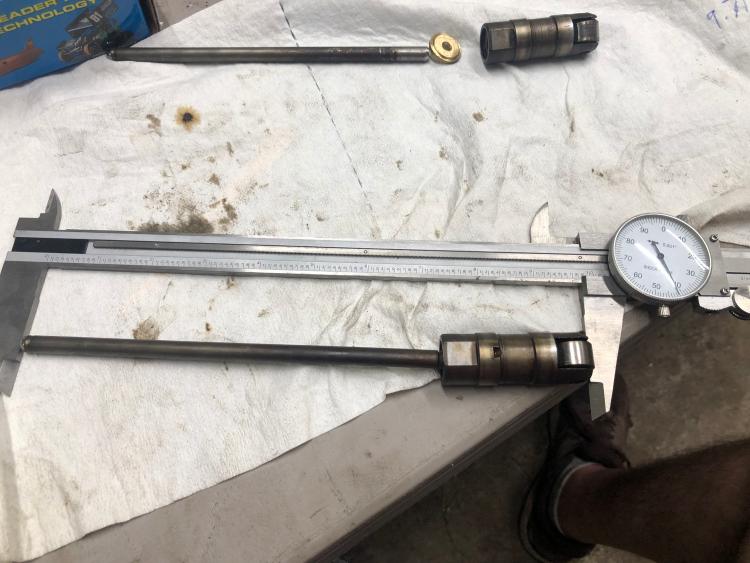 9.840 inches. Then I measured my contraption. 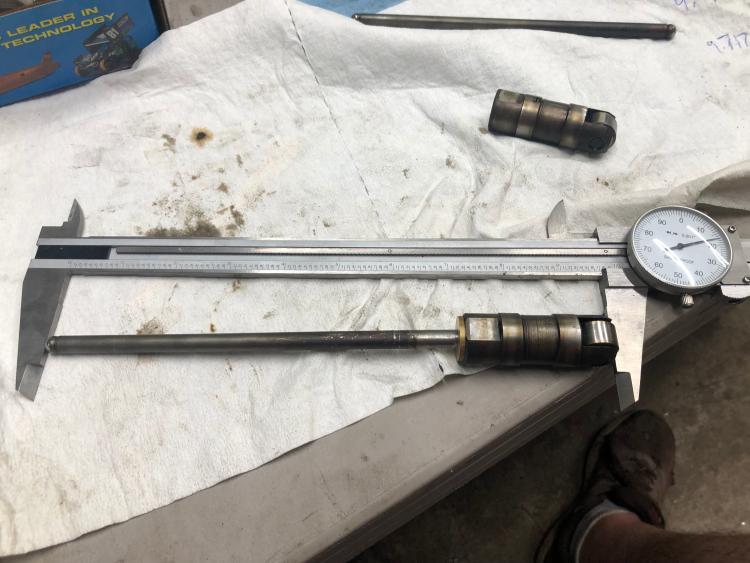 9.717 inches. A difference of .123". So I needed pushrods that were that much shorter than the ones I had. I measured those, then subtracted the .123", and came up with 7.403. So some 7.400" pushrods are ordered and should be here mid-week. A final check of the Play-Doh showed that there is plenty of piston to valve clearance, so all is good there. Tomorrow I will remove the checking springs and install the real thing, and bolt the heads on. Then I can hook up the exhaust, but I will have to wait til the pushrods come in before I can plant the manifold. Not a problem, I bought a much thicker radiator as my 1" core one was marginal, especially with the AC on. So I need to get the fan package adapted to it. More to come.
81 F150 Flareside, Edelbrock Pro Flow4 FI, hydraulic roller 351W, E4OD, 4x4, BW1356
92 F150 RCLB 351W E40D BW1356 mostly stock |
|
Administrator
|
Wow! That's creative. Well done!
Gary, AKA "Gary fellow": Profile
Dad's: '81 F150 Ranger XLT 4x4: Down for restomod: Full-roller "stroked 351M" w/Trick Flow heads & intake, EEC-V SEFI/E4OD/3.50 gears w/Kevlar clutches
|
|
|
Most take the lifter apart and stuff the guts solid so it will not compress.
Now if I understand right the disc was sitting on top of the lifter? If that was the case did it raise the push rod up some and if so by how much? Dave ----
Dave G.
81 F100 flare side 300 six / AA OD / NP435 / 2.75 gear http://cars.grantskingdom1.com/index.php/1980-Ford-F100?page=1 81 F100 style side 300 six/SROD parts truck -RIP http://cars.grantskingdom1.com/index.php/1981-Ford-F100 |
|
|
It did raise the pushrod up, probably by a quarter inch or so. That was compensated for by grinding that amount of material, plus another eighth inch or so, to arrive at the correct "stack" height. You can see in the first photo that the pushrod no longer has the ball end on it. That has been ground off when shortening it the first quarter inch.
81 F150 Flareside, Edelbrock Pro Flow4 FI, hydraulic roller 351W, E4OD, 4x4, BW1356
92 F150 RCLB 351W E40D BW1356 mostly stock |
|
|
In reply to this post by Pete Whitstone
Buttoned the engine and everything else up this morning and went for first startup. It barked straight to life. I adjusted the base timing to 10 BTDC, figuring that the aluminum heads would not need so much advance at the top end. But I haven't checked where it is up there yet.
I let it completely warm up to the point of turning the fans on, then shut it down to look for leaks. Didn't find any. Then I took it for a short, gentle drive and put about 6 miles on it. It stayed resolutely at 180, and the oil pressure was very strong, about 50 while cruising. I replaced the 1" core radiator with a much thicker all-aluminum one so that was definitely helping the temp situation. Checked for leaks a second time and did not see any. Now I'm waiting for it all to cool down so I can pull the valve covers and make sure the valve lash is good everywhere. Seems like a success so far. The transmission likes the new engine a lot better. The old engine was weak and I think the torque production was below what the transmission would have liked. The result of that was that the 1-2 shift felt very very firm, nearly to the point of harshness. Now with the new engine it feels much more normal.
81 F150 Flareside, Edelbrock Pro Flow4 FI, hydraulic roller 351W, E4OD, 4x4, BW1356
92 F150 RCLB 351W E40D BW1356 mostly stock |
|
|
Cool! Sounds great!
Dane
1986 F250HD SC XLT Lariat 4x4 460 C6-Sold 1992 Bronco XLT 4x4 351W E4OD 1998 GMC Sierra SLE K1500 350 4L60E Arizona |
|
Administrator
|
In reply to this post by Pete Whitstone
Congrat's!!! That is such a good feeling when they come to life that way.
Gary, AKA "Gary fellow": Profile
Dad's: '81 F150 Ranger XLT 4x4: Down for restomod: Full-roller "stroked 351M" w/Trick Flow heads & intake, EEC-V SEFI/E4OD/3.50 gears w/Kevlar clutches
|
| Edit this page |