Dad's Truck Build


Administrator
|
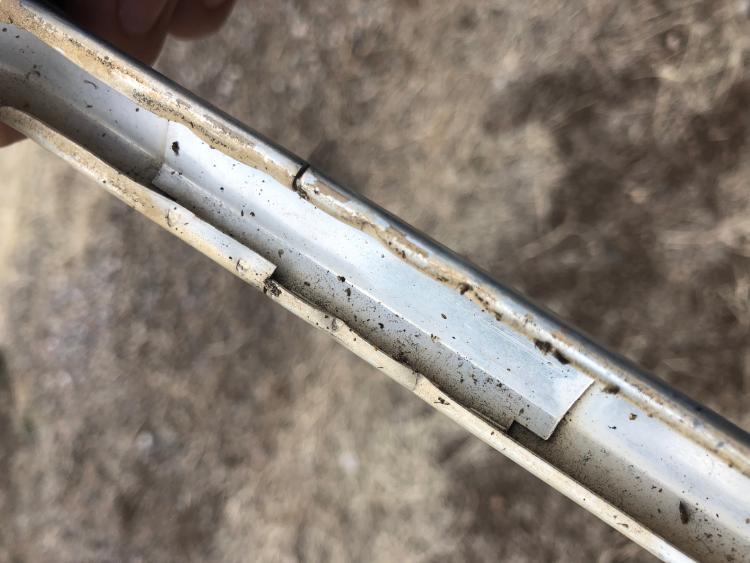
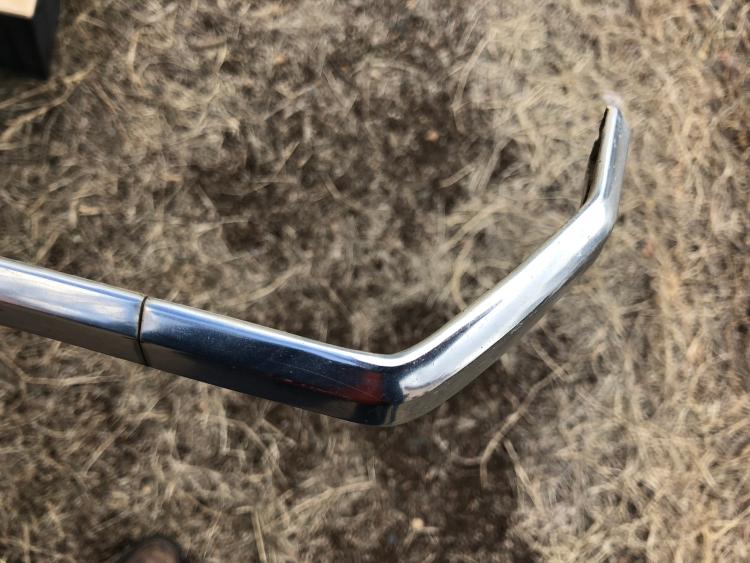
I will have to measure the trim, but that would be extremely tight. I thought the short beds were 6-3/4 feet long? And the trim wraps around the back corners 😬. The corner section actually is a separate piece, but I think the steel bit that bridges it with the long straight side is kind of crimped in there. I don’t know if they can be separated without damaging them. Then there is the issue of the rear doors. I don’t have those trims and planned to make them by grafting the end of a bed trim (with the square tip) to a front door trim. Grafting might mean some kind of filler in the joint area in which case it probably can’t be coated either. There is a set of these crew cab rear door trims on eBay, but at $175 EACH side, no thank you. I’m not that dead set on this theme to spend that kind of money on trim. I might think of something better to do with the outside...
SHORT BED 4-DOOR DIESEL: 1986 F350 4x4 under construction-- 7.3 IDIT ZF5+GVOD
STRAIGHT SIX 4X4: 1981 F150 2wd to 4x4-- 300 I6 close ratio diesel T19, hydroboost brakes, Saginaw steering BIG F: 1995 F-Superduty under construction— converting to 6.9L IDI diesel ZF5+DNE2 |
|
|
In reply to this post by Gary Lewis
"Etch and alodine". That's what my old boss always said when dealing with bare aluminum on aircraft.
It would clean it out then seal it up. I always remember using the Alumaprep brand, which I just learned is now Bonderite. https://www.aircraftspruce.com/catalog/cspages/alumiprep.php?gclid=CjwKCAiAhp_jBRAxEiwAXbniXY5D3hkFvo8-U2-s2VgKNqI_Kn6SjuELov4I9ZJKxnss6XSOVBDfdBoC0nAQAvD_BwE https://m.aircraftspruce.com/catalog/pdf/09-01621tds.pdf
Dane
1986 F250HD SC XLT Lariat 4x4 460 C6-Sold 1992 Bronco XLT 4x4 351W E4OD 1998 GMC Sierra SLE K1500 350 4L60E Arizona |
|
Banned User
|
In reply to this post by Gary Lewis
None of the parts I've had powdered were prepped that way - Aluminum, cast, stainless, chrome, or plain steel. After I delivered them clean & blasted, they were preheated to ~350°F to dry out the water (not really hot enough to cure the powder) for ~20 min, powdered while still warm, and cured at 375-410°F for ~25 min.         What spray gun & oven do you use, and where do you get your powder? BTW Your close-up pic probably looked brown because the gloss was reflecting the walls where you took the pic. |
|
Administrator
|
Steve - I can't speak for other's methods. I just know what works and doesn't work for me. I've been powder coating for maybe 15 years and have had lots of successes - as well as some dramatic failures. I try to learn from the failures so it doesn't happen again, and my reading on aluminum parts said to bake off the stuff in the pits or pores. So I tried and it worked. Given that, I do it each and every time on aluminum.
I use a mix of powders, although it wasn't a powder issue when the out-gassing blew the powder off as any powder would have blown away - see below. Anyway, I use some Sherwin-Williams, some Powder By The Pound, and some Eastwood. And I have an Eastwood gun and a commercially-made 3' x 3' x 6' oven. The recent pics, including the door handle, were using SH PBS4-C0009. That's a 60% gloss black, which may not be what Jonathan wants, but it was what I was coating with so I tried it. And you are probably right that the brown has to do with the walls. But it may be the white-balance function in the camera. I don't know. And, back on the prep, I found this on Fortress Fusion Coatings: The key to achieving good adhesion between powder coatings and aluminum is surface preparation. The surface must be entirely free from aluminum oxides prior to powder coating. Any aluminum, or other metal oxides, that remain on the surface of the product can potentially retain air or moisture. Upon heating during the curing stages of the powder application, the oxides may release water vapor or air, which can expand and penetrate the powder coating, causing blisters or voids.That pretty well explains the problem I had. And then it goes on to explain a very involved process of properly preparing aluminum. Suffice to say that I don't have the facilities to use their process. But, my process of heating the part to 400 degrees for at least an hour works for me, presumably releasing the water vapor and/or air from the oxides. So that's what I do - but it looks like I'd better remember to PC the parts fairly soon after taking them out of the oven or the oxide may re-acquire air or moisture. Grumpin - How hard is it to anodize aluminum? Do you have experience doing that?
Gary, AKA "Gary fellow": Profile
Dad's: '81 F150 Ranger XLT 4x4: Down for restomod: Full-roller "stroked 351M" w/Trick Flow heads & intake, EEC-V SEFI/E4OD/3.50 gears w/Kevlar clutches
|
|
|
It's easy, a chemical process. We used the above etch and the below alodine. My experience is to let it dry well. If you bake it that should do it. I would let it air dry completely before I put it in the oven. We always let it air dry, nothing else. Then apply zinc chromate primer before painting. Which I don't think you can get anymore, at least like it was back in the day. It worked good, so it has to be bad for us! We would get it down to bare aluminum, etch it, rinse thoroughly, let it dry. Alodine it, rinse thoroughly, let it dry. I did repair, never painted an entire airplane. Edit: We came close to painting the entire airplane though, on the ones that were bellied in. Usually from a stripe down, and usually white paint. Lots of sheet metal work on those! The floatplanes and seaplanes were always a challenge. http://www.chiefaircraft.com/aircraft/chemicals/alodine-alumniprep.html
Dane
1986 F250HD SC XLT Lariat 4x4 460 C6-Sold 1992 Bronco XLT 4x4 351W E4OD 1998 GMC Sierra SLE K1500 350 4L60E Arizona |
|
Administrator
|
In reply to this post by Ford F834
Gary, I don’t know about that bed trim... it would have to come apart and even then it would be a crazy tight fit. The whole piece is 85.5” long. If the corner is removed, the straight piece is 81.5” long. If your oven is a full, true 3’ x 6’ inside then the 2 dimensional diagonal should be 80.5” the 3 dimensional diagonal might accommodate the extra 1” plus a way to suspend it from touching but it would be extremely tight if it worked at all... then there would be putting the corner back on without damaging the finish:
SHORT BED 4-DOOR DIESEL: 1986 F350 4x4 under construction-- 7.3 IDIT ZF5+GVOD
STRAIGHT SIX 4X4: 1981 F150 2wd to 4x4-- 300 I6 close ratio diesel T19, hydroboost brakes, Saginaw steering BIG F: 1995 F-Superduty under construction— converting to 6.9L IDI diesel ZF5+DNE2 |
|
Administrator
|
In reply to this post by grumpin
Grumpin - My question is how hard it would be to anodize black the aluminum trim? I know nothing about anodizing, so am just wondering if that might be the way to treat the trim. Or, did you answer that question and I didn't understand?
All - Time for today's update. And what a day! I got the right side suspension all buttoned up, torqued down, and touched up. Here's a pic of the right side:  As for the touch-up, I do that to all of the bolts as the nuts take some of the powder off. And, a word of advice if you are going to do what I'm doing - use the same color of powder/paint on both bolts and nuts. That's so you can touch things up and not worry whether you get some on the nut as well as the bolt. Here's an example. This body bolt had been PC'd some time ago and then John, my paint/body man used it to mount the cab. But, as you can see, tightening the bolt up caused the powder to be peeled away and allowed the bolt to rust. But a bit of rusty-metal primer and semi-gloss black fixed that right up. 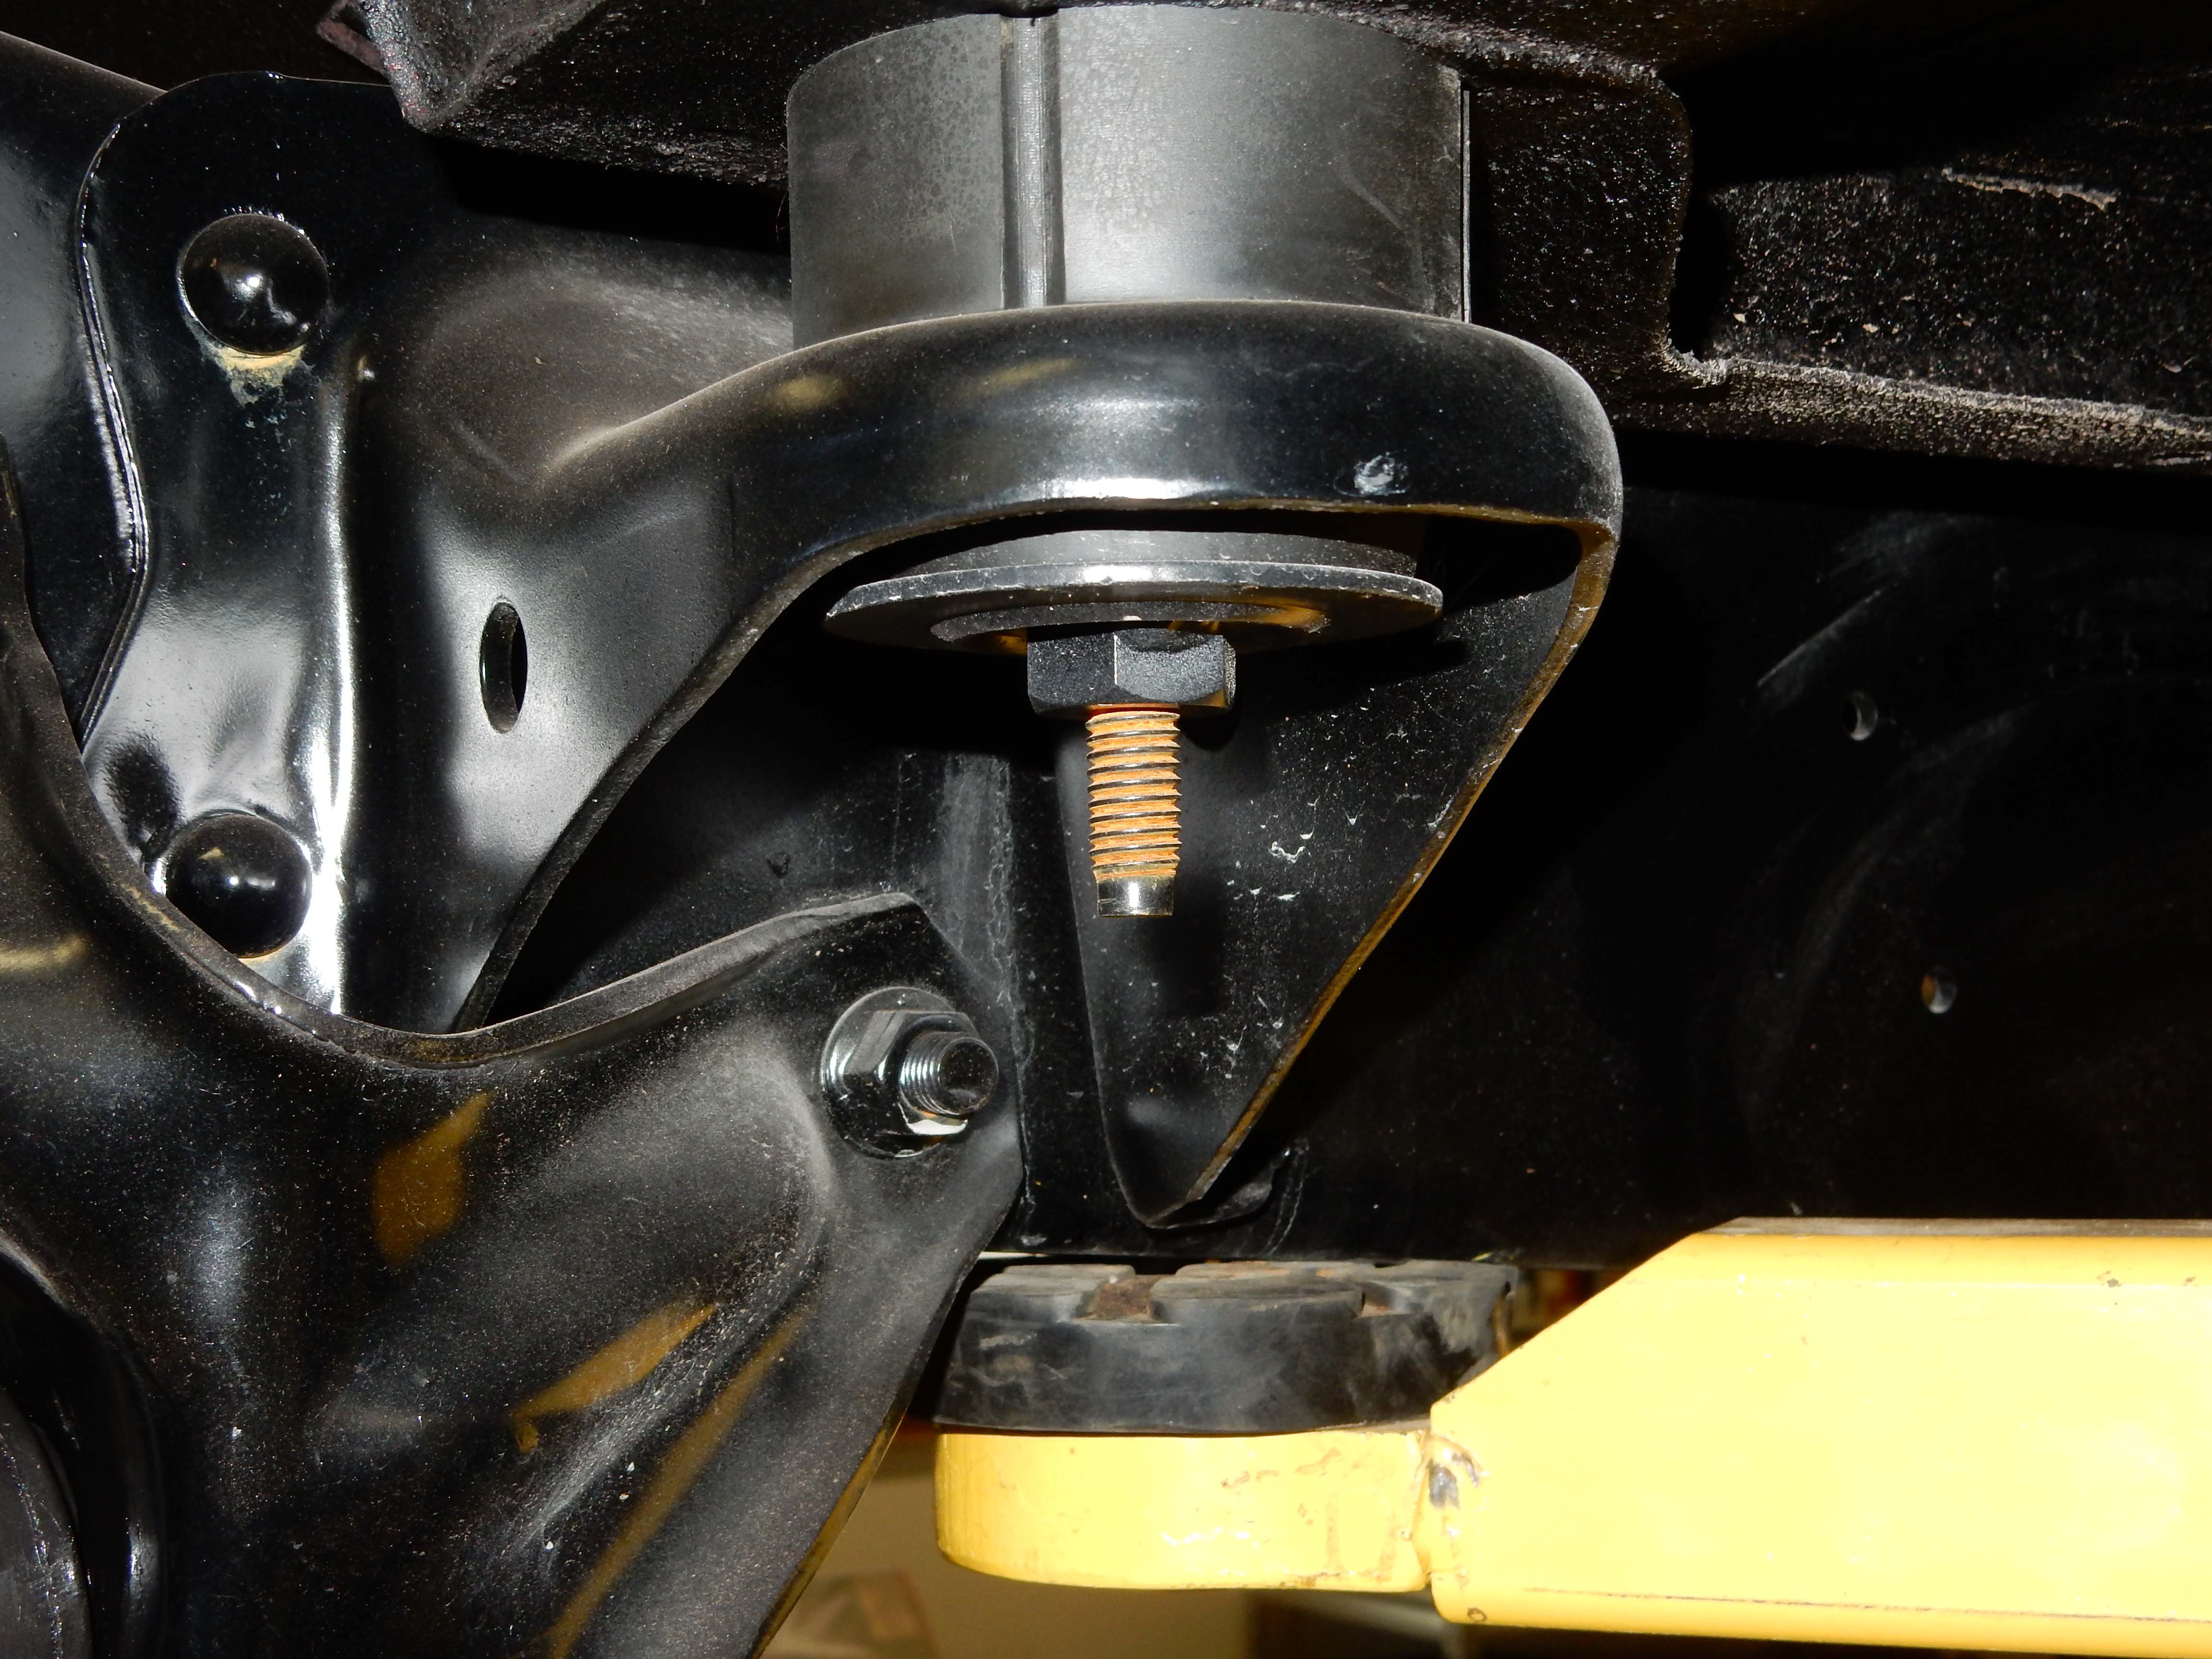 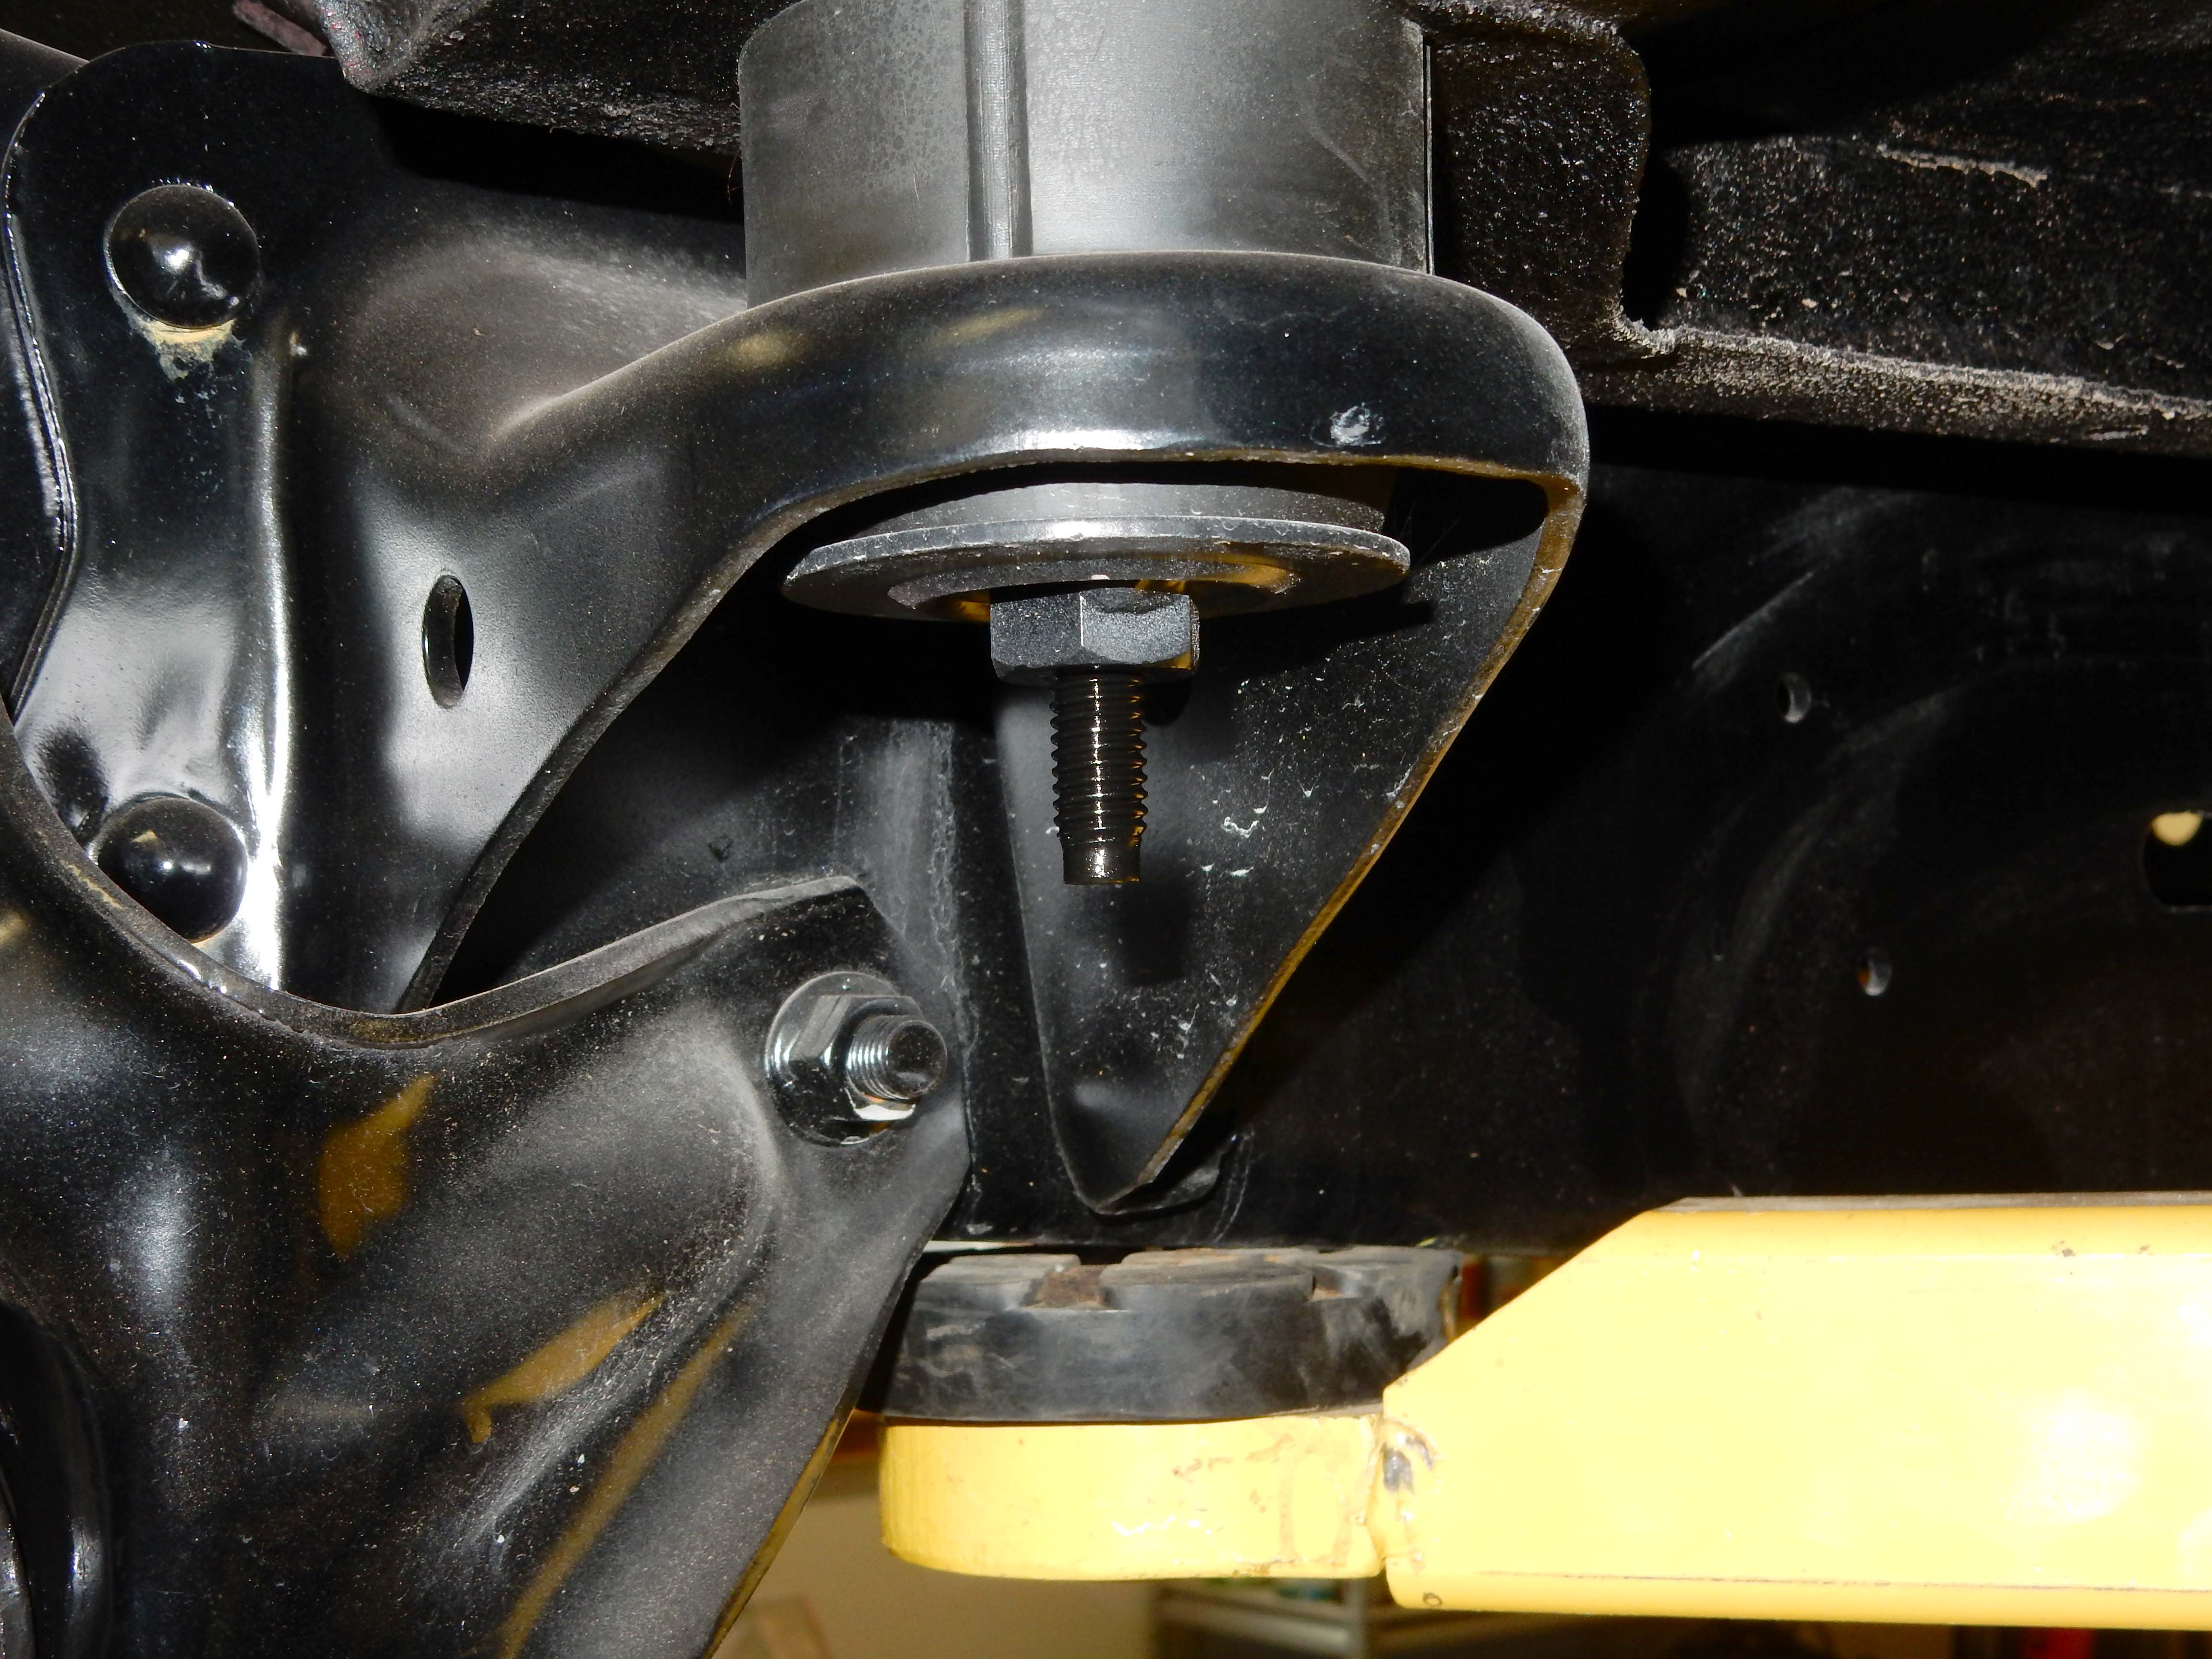 Then, with the torquing and touching-up done I moved onto the ball joints. Or, more specifically, I went to O'Reilly's to rent/borrow their ball joint installer kit. Its one of those one-size-fits-all, which usually means it won't fit what you have. Yep. The "C" part of the press was much too small to use the necessary adapter to fit over the ball joint's stud and allow the needed receiver to fit on the other side.  For the bottom ball joint I was able to use my hydraulic press. But for the top ball joint I couldn't use the press, so I made an adapter that would fit. I found a piece of thick-wall tubing just the right diameter and cut a piece off and squared it up in the lathe. I was just barely able to get that in, and was then able to press the top ball joint home. Man, that was work!  And, here's a shot of the steering knuckle in place, although not torqued down. Hopefully tomorrow I can get the right knuckle populated with ball joints and torque both sides down. 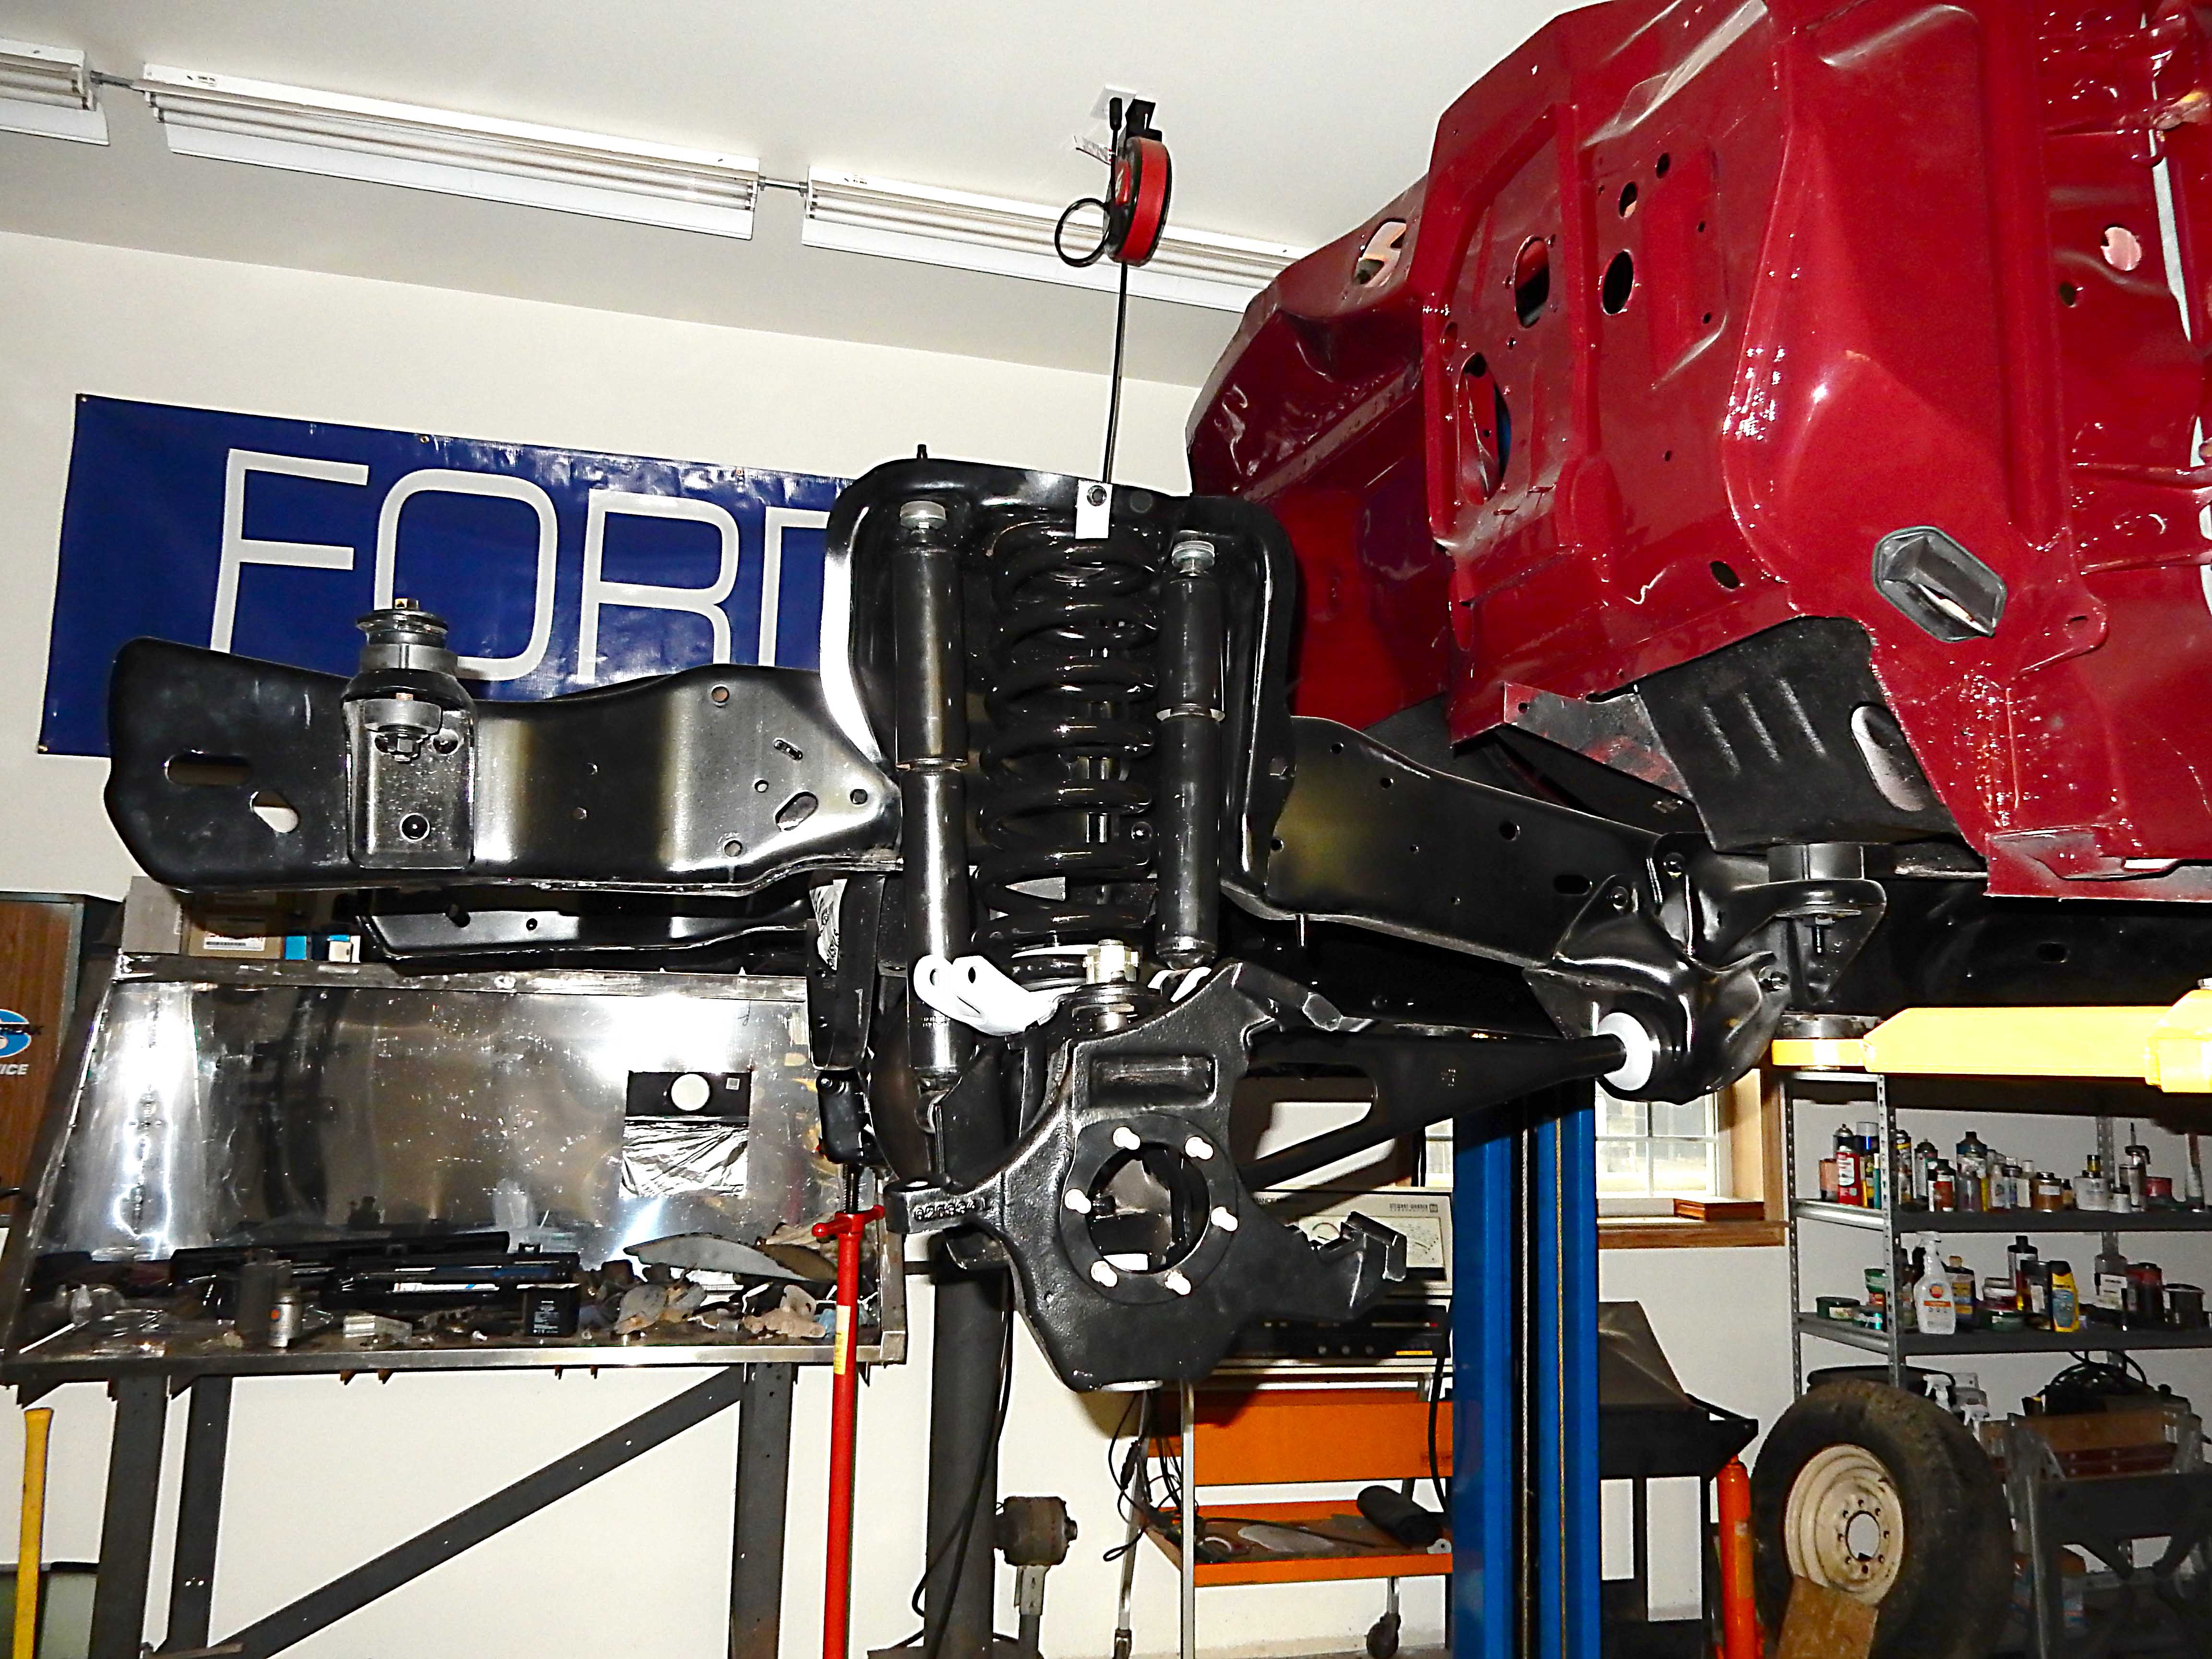
Gary, AKA "Gary fellow": Profile
Dad's: '81 F150 Ranger XLT 4x4: Down for restomod: Full-roller "stroked 351M" w/Trick Flow heads & intake, EEC-V SEFI/E4OD/3.50 gears w/Kevlar clutches
|
|
Administrator
|
In reply to this post by Ford F834
Jonathan - I don't think we could fit that in. It is just too tight. Sorry.
Gary, AKA "Gary fellow": Profile
Dad's: '81 F150 Ranger XLT 4x4: Down for restomod: Full-roller "stroked 351M" w/Trick Flow heads & intake, EEC-V SEFI/E4OD/3.50 gears w/Kevlar clutches
|
|
Administrator
|
No need to apologize Gary, I have been under the assumption that it would have to be painted, and I may reconsider using it at all...
Your progress for today is impressive! So did Dad’s truck come from the factory with the handling package? Dual shocks/sway bars? I’ve mostly seen that on Broncos and Freewheelers. My F150 sure rides nice, but does not handle as well as the mono beam crew cab. I’ve not driven a handling package half ton to compare it with. Chris McGaugh says adding the sway bar to his Bronco made a huge improvement.
SHORT BED 4-DOOR DIESEL: 1986 F350 4x4 under construction-- 7.3 IDIT ZF5+GVOD
STRAIGHT SIX 4X4: 1981 F150 2wd to 4x4-- 300 I6 close ratio diesel T19, hydroboost brakes, Saginaw steering BIG F: 1995 F-Superduty under construction— converting to 6.9L IDI diesel ZF5+DNE2 |
|
Administrator
|
The progress this morning was good. But this afternoon things slowed to a crawl. Or, maybe it was me that slowed to a crawl? I didn't use the impact as I wasn't sure things were lined up well enough, so did it by "arm". And I may not be as young as I used to be. It took everything I could do to seat the top ball joint.
 But, tomorrow afternoon I hope to get the right side done, which shouldn't take nearly as much time since I think I figured out how to do it. But, were I to do it again I'd probably buy the Harbor Freight kit. This one from O'Reilly's isn't adequate. Anyway, Dad's truck came with quad shocks and the sway bars. So, either the handling package or the snow plow package, I guess. Probably the handling package. And it has always driven well. Much better than the other F150's I've had w/o the sway bar. So the new everything, including a Red Head steering box, should make for a tight steering truck.
Gary, AKA "Gary fellow": Profile
Dad's: '81 F150 Ranger XLT 4x4: Down for restomod: Full-roller "stroked 351M" w/Trick Flow heads & intake, EEC-V SEFI/E4OD/3.50 gears w/Kevlar clutches
|
|
|
In reply to this post by Gary Lewis
Gary, I don't know about anodizing aluminum. We used alodine, which is a protective coating.
My apologies, I misread your post. I'm no help there. Good job! That truck is looking nice!
Dane
1986 F250HD SC XLT Lariat 4x4 460 C6-Sold 1992 Bronco XLT 4x4 351W E4OD 1998 GMC Sierra SLE K1500 350 4L60E Arizona |
|
Banned User
|
This post was updated on .
In reply to this post by Gary Lewis
I don't use paint or powder on the chassis or any of its fasteners for that reason. I clean them up, install them (often with threadlocker), and then apply rubberized undercoating when it's all put together. It protects from gravel & water without chipping or peeling (when applied to clean metal), and it's cheap & easy to touch up when I go rock-crawling. It protects the threads from rust without binding them during disassembly like paint & powder can. But it comes off with common automotive solvents. For removal, I've learned that a simple hammer is quick & effective; with a pipe scrap drift for the upper. For installation, I got sick of cheap presses, bit the bullet, and got a Snap-On with a few cups.   If I didn't already have most of what's in it, I'd jump on this right now: https://www.ebay.com/itm/192822910480 It's close enough to half price: https://store.snapon.com/Ball-Joint-Presses-Set-Master-Ball-Joint-Universal-Joint-Press-22-pc-P644058.aspx |
|
Administrator
|
Grumpin - No prob. Was just wanting to make sure I understood.
Steve - Yesterday I might have given that much money to have that Snap-On press. But, I got to thinking last night that I might actually have a ball joint press. So a search on here found a thread where I said Brandon/Bruno2 was coming by to return my ball joint press. I guess I'll find out this afternoon.  I think it is the HF unit, but if the frame of the press is longer that will make all the difference as that was the problem with the rented one. It was just too short to work with the adapters sent. All - I forgot to tell you that I added the General Suspension Service section (14-21) to the Suspension & Steering/Front Suspension page. The reason was that I was searching for the instructions on installing the ball joints on a 4wd vehicle and thought they must be there. This is a strange thing, but the ball joint write-up for the 2wd vehicles is in the Twin I-Beam instructions, but not so for the 4wd. Instead, there's a statement in the 4wd section that says: Refer to Section 15-34, Front Driving Axle under Steering Knuckle, Removal and Installation for spindle replacement on 4-wheel drive front axles.Fortunately that section was already on the site: Driveline/Axles & Differentials, so I added a link and an explanation, as shown below. Does that make sense? Better ideas 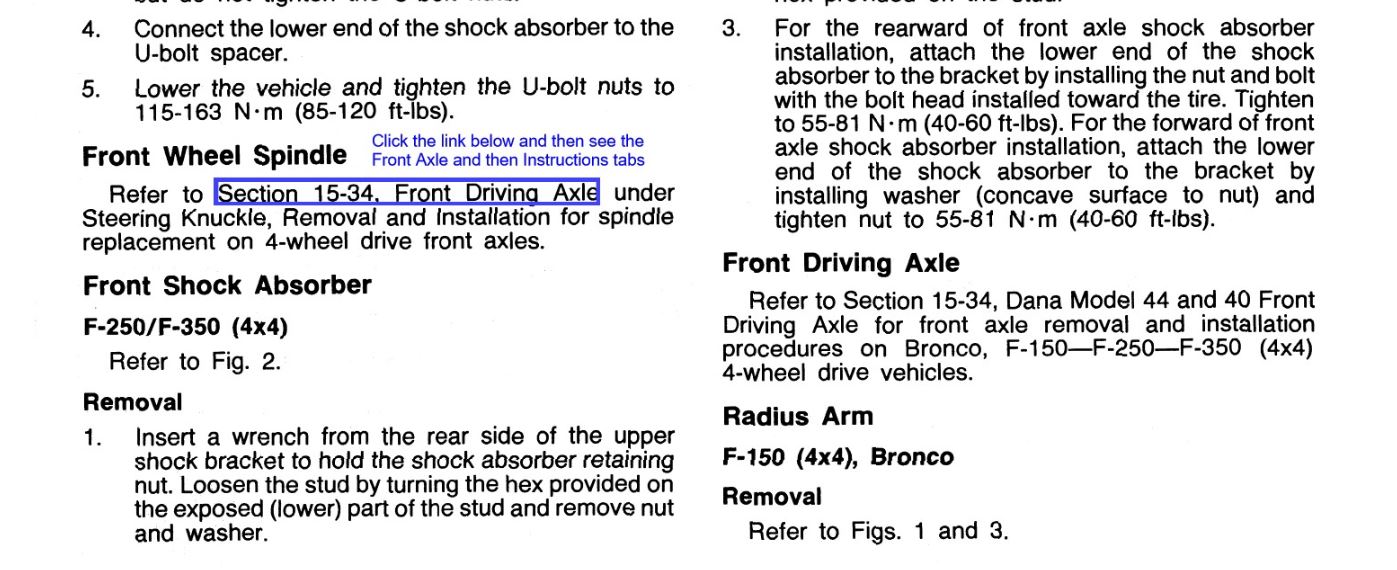
Gary, AKA "Gary fellow": Profile
Dad's: '81 F150 Ranger XLT 4x4: Down for restomod: Full-roller "stroked 351M" w/Trick Flow heads & intake, EEC-V SEFI/E4OD/3.50 gears w/Kevlar clutches
|
|
|
In reply to this post by Gary Lewis
Remember the line from "The Boxer" by Simon and Garfunkel: "I'm older than I was, but younger than I'll be. That's not unusual." :-)
Bob
Sorry, no '80 - '86 Ford trucks "Oswald": 1997 F-250HD crew cab short box, 460, E4OD, 4.10 gears "Pluto": 1971 Bronco, 302, NV3550 5 speed, Atlas 4.3:1 transfer case, 33" tires "the motorhome": 2015 E-450-based 28' class C motorhome, 6.8L V-10 "the Dodge": 2007 Dodge 2500, 6.7L Cummins |
|
Administrator
|
From memory: "In a clearing stands a boxer, and a fighter by his trade...." "Taps him 'til he cries out, in his anger and his pain..." And another one: "I do declare, I took some pleasures there", although I won't say where.
Yep, I have it on my phone. And on a CD. And even an LP that I gave to my son. Remember it well. Boy, my knees are telling me about it today. I originally had the knuckle, press, etc on the bench, but needed to put my weight on it so put it on the floor. That worked, but I'm feeling it today. Hopefully this afternoon will be better.
Gary, AKA "Gary fellow": Profile
Dad's: '81 F150 Ranger XLT 4x4: Down for restomod: Full-roller "stroked 351M" w/Trick Flow heads & intake, EEC-V SEFI/E4OD/3.50 gears w/Kevlar clutches
|
|
|
Where? 7th Ave. How? I won't say either. You? I won't believe!
Bob
Sorry, no '80 - '86 Ford trucks "Oswald": 1997 F-250HD crew cab short box, 460, E4OD, 4.10 gears "Pluto": 1971 Bronco, 302, NV3550 5 speed, Atlas 4.3:1 transfer case, 33" tires "the motorhome": 2015 E-450-based 28' class C motorhome, 6.8L V-10 "the Dodge": 2007 Dodge 2500, 6.7L Cummins |
|
Administrator
|
No, not I. No way. Just the lyrics from a long-ago song - which you obviously remember as well.
Gary, AKA "Gary fellow": Profile
Dad's: '81 F150 Ranger XLT 4x4: Down for restomod: Full-roller "stroked 351M" w/Trick Flow heads & intake, EEC-V SEFI/E4OD/3.50 gears w/Kevlar clutches
|
|
Administrator
|
I do have the HF ball joint press! And, it worked a treat as I got the ball joints into the right steering knuckle easily.
Then I installed the right knuckle on the axle, following the instructions in the shop manual: Install new nut on bottom socket finger tight.Install and tighten nut on top socket finger tight.Tighten
|
|
Administrator
|
I don't know which is a bigger pain, ball joints on a 4WD or king pins in a 2WD. I do have a king pin press, bought it when I had the 1958 F100.
Bill AKA "LOBO" Profile
"Getting old is inevitable, growing up is optional" Darth Vader 1986 F350 460 converted to MAF/SEFI, E4OD 12X3 1/2 rear brakes, traction loc 3:55 gear, 160 amp 3G alternator Wife's 2011 Flex Limited Daily Driver 2009 Flex Limited with factory tow package Project car 1986 Chrysler LeBaron convertible 2.2L Turbo II, modified A413 |
|
Administrator
|
Haven't done a king pin, but the ball joints aren't too bad if you know how. #1 was a pain and #2 was easy to get them into the knuckle. But getting the knuckle on the axle was the other way 'round: #1 was easy and #2 a pain - but I think that was because I didn't follow the process.
We will see on the 'morrow.
Gary, AKA "Gary fellow": Profile
Dad's: '81 F150 Ranger XLT 4x4: Down for restomod: Full-roller "stroked 351M" w/Trick Flow heads & intake, EEC-V SEFI/E4OD/3.50 gears w/Kevlar clutches
|
| Edit this page |