Search Forum
How To Install A Pormido PR998 Mirror/Camera System In A 1985 F250

How To Install A Pormido PR998 Mirror/Camera System In A 1985 F250

Administrator
|
The following shows how I installed Pormido's PR998 mirror/camera system in my 1985 F250 - aka Big Blue. But first I need to explain why I wanted such a system and why I chose that one. In addition, this is the condensed version. But if you want to read all of my trials and errors you can do so here.
Most, if not all, of these trucks need a rear camera as it is really difficult to see behind them. But my truck is built to take off the beaten path, including overlanding and 'wheeling, and on a recent trip to Ouray we discovered that as we crested ridges we couldn't see anything ahead of us. So we'd frequently stop and get out to make sure which way we wanted the wheels pointing. But a friend that was with us had a front camera on his vehicle and he could see what was over the ridge and never had to get out to see the way ahead. So when I got home I started looking for a camera system. Unfortunately most of the systems have the front camera integrated into the mirror itself, and the view from there won't come close to seeing over the ridge when the vehicle is pointed up. But the PR998 has a divorced camera, and while it isn't waterproof so can't be put on the front bumper w/o protection, Pormido has committed to me that they will come out with a waterproof front camera for this unit. Speaking of commitment, I must say that the support I've gotten from Pormido has been fantastic. I have way over 100 messages to/from Melissa of Pormido's support organization and I can't say enough about how helpful she and the people behind her have been. We discussed my need for the waterproof front camera and they promised to come out with one. And then there was the need for longer wiring to the front and they had the 2 meter extensions. And I suggested using a rear camera in front, but one of their engineers pointed out that the cameras are different and cannot be interchanged. The capabilities of the system and the support I got even before the sale was enough for me, so I bought the unit and a waterproof box, and started the installation. The first thing I found was that the way Pormido has you mount the mirror to your existing mirror is less than "clean", with the original mirror peaking out when viewed from the side. 
So I made the plate shown below and modified the mount from an old mirror and married the two. (Note: Pormido has also committed to me to come up with a much cleaner mounting arrangement so we don't have to make a plate and hack up an old mirror.) 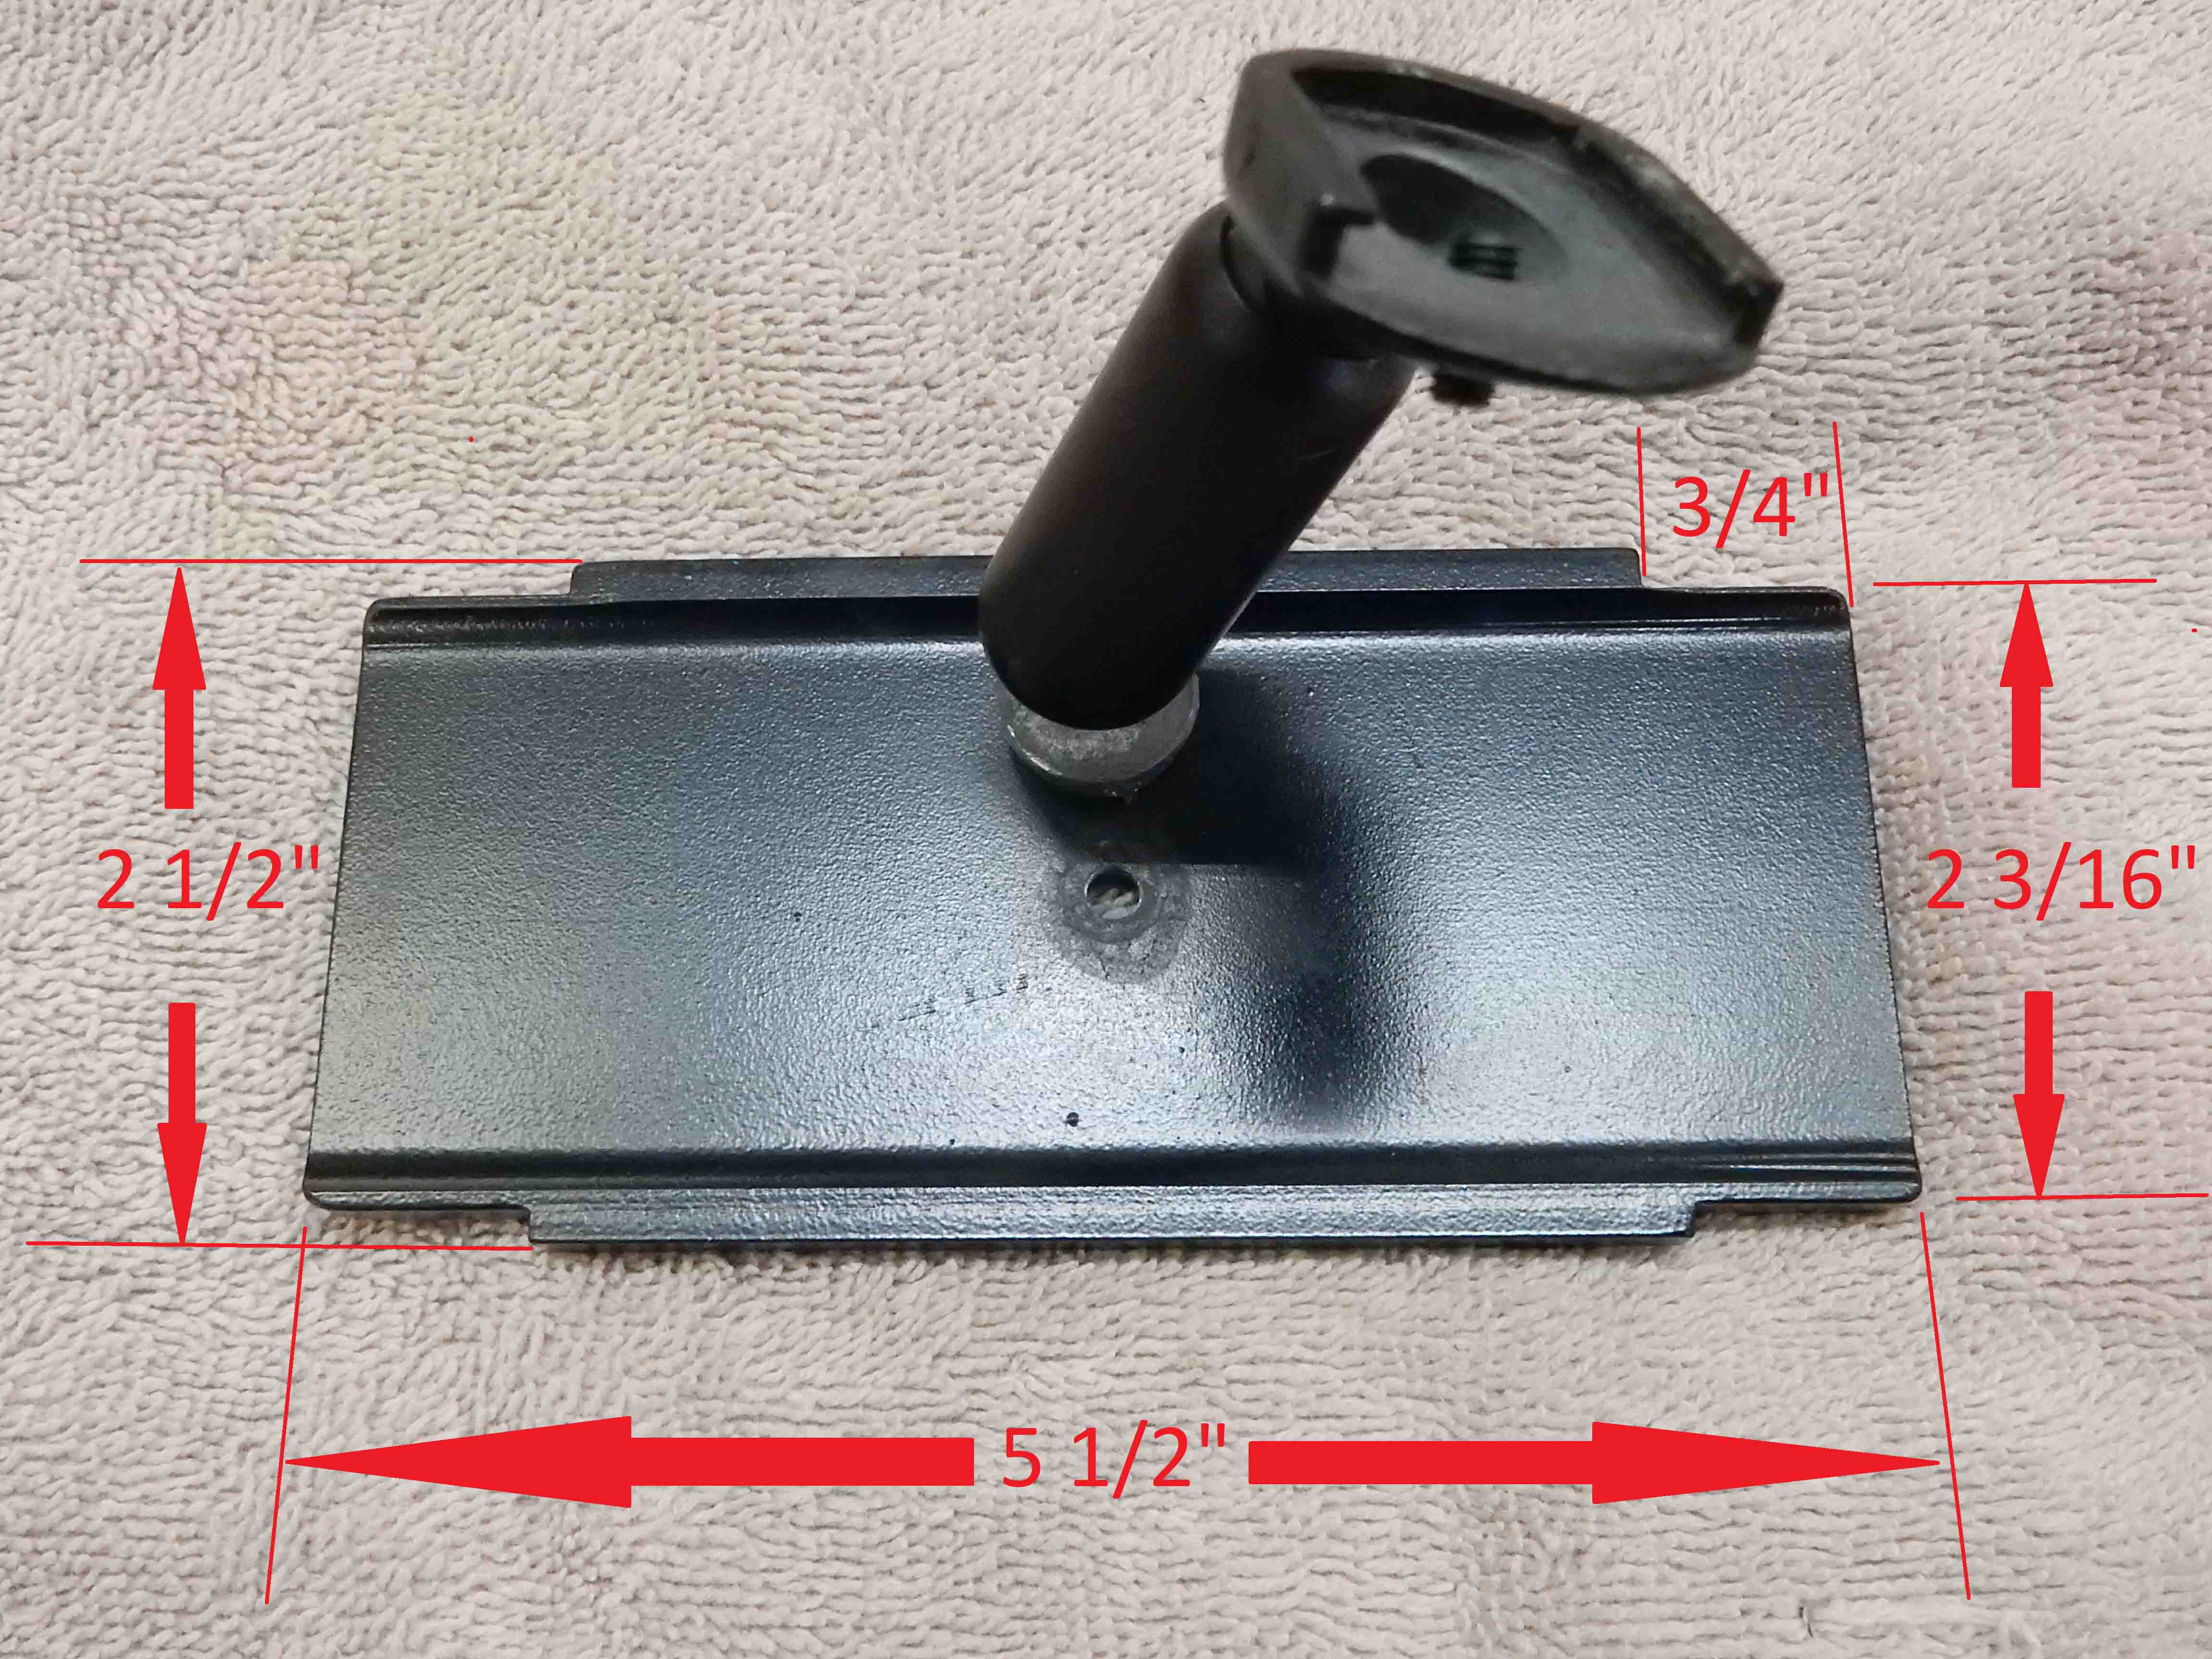 Here's how I modified the mount from the old mirror. I tapped it 5mm and drilled and countersunk the plate to take a countersunk/flat-head screw, and ensured the screw would stay in by using Orange Loctite. But, note the extra hole in the plate. It is in the center, but I discovered that the mirror was a bit too high so drilled another hole 3/4" down from the top edge.  And that gave me a much cleaner look. Here's the mirror mounted. And while it may not look secure it really is. I've had the truck off the road with some serious bounces and the mirror never moved.  Also visible in the picture above is the GPS antenna. I wasn't sure I really needed it but installed it anyway, and boy am I glad I did! I love being able to see the direction and speed on the mirror. The ability to know which way you are headed at a glance is a huge help. And it turns out that the speedometers on these old trucks aren't all that accurate, so I can easily tell exactly how fast I'm going. And the GPS system provides an accurate source of time, which can also be shown on the display. Plus, if you use Pormido's application on your computer you can play back the videos that are taken as you travel, and a map shows exactly where you were. That came in really handy recently as we wanted to know which road we'd taken and the map showed us precisely which one. But we need to talk a bit about how and where I mounted the front camera. As said, I bought a box with a clear cover and mounted it on the front bumper and put the camera in it. But the wire that came with the original system was far too short to get to the front bumper. So I purchased two of Pormido's 2 meter extension cables and that was just enough to reach the front bumper. But the connectors don't look all that weatherproof so I slipped a peace of adhesive-lined heat shrink tubing over the connectors that are outside the cab and shrank it. I'm sure that waterproofed them. So now I have a waterproofed front camera, but it really looks like a wart on the front of the truck. And the cover on the box is not truly optically clear so there's some distortion of the view to the front. Given that, I'm hoping to be Customer #1 of the to-be waterproof front camera. (Note: The front and rear cameras are quite different and you cannot put a rear camera in front and get it to work. Trust me.) Anyway, here's what the front camera installation looks like. The camera is stuck to the top of the box as it needs to be turned down to be able to see the top of the trailer ball and if stuck to the bottom of the box it is then shooting through the thick edge of the "clear" cover and there's a lot of distortion. But by sticking it to the top of the box it works well. And even when turned down enough to see the trailer ball you can still see slightly above level and it works out well. But I did discover that if I tried to mount the camera higher, like on the grille, it had to be turned down enough to see the trailer ball that you couldn't see the horizon. So this position worked out well.  As for the rear camera, here's where it is mounted. It is adhered to the back of the bumper using the supplied double-stick tape, and hasn't moved. And like the front camera, this position was chosen to see the trailer ball as well as seeing the horizon, and it is working well. 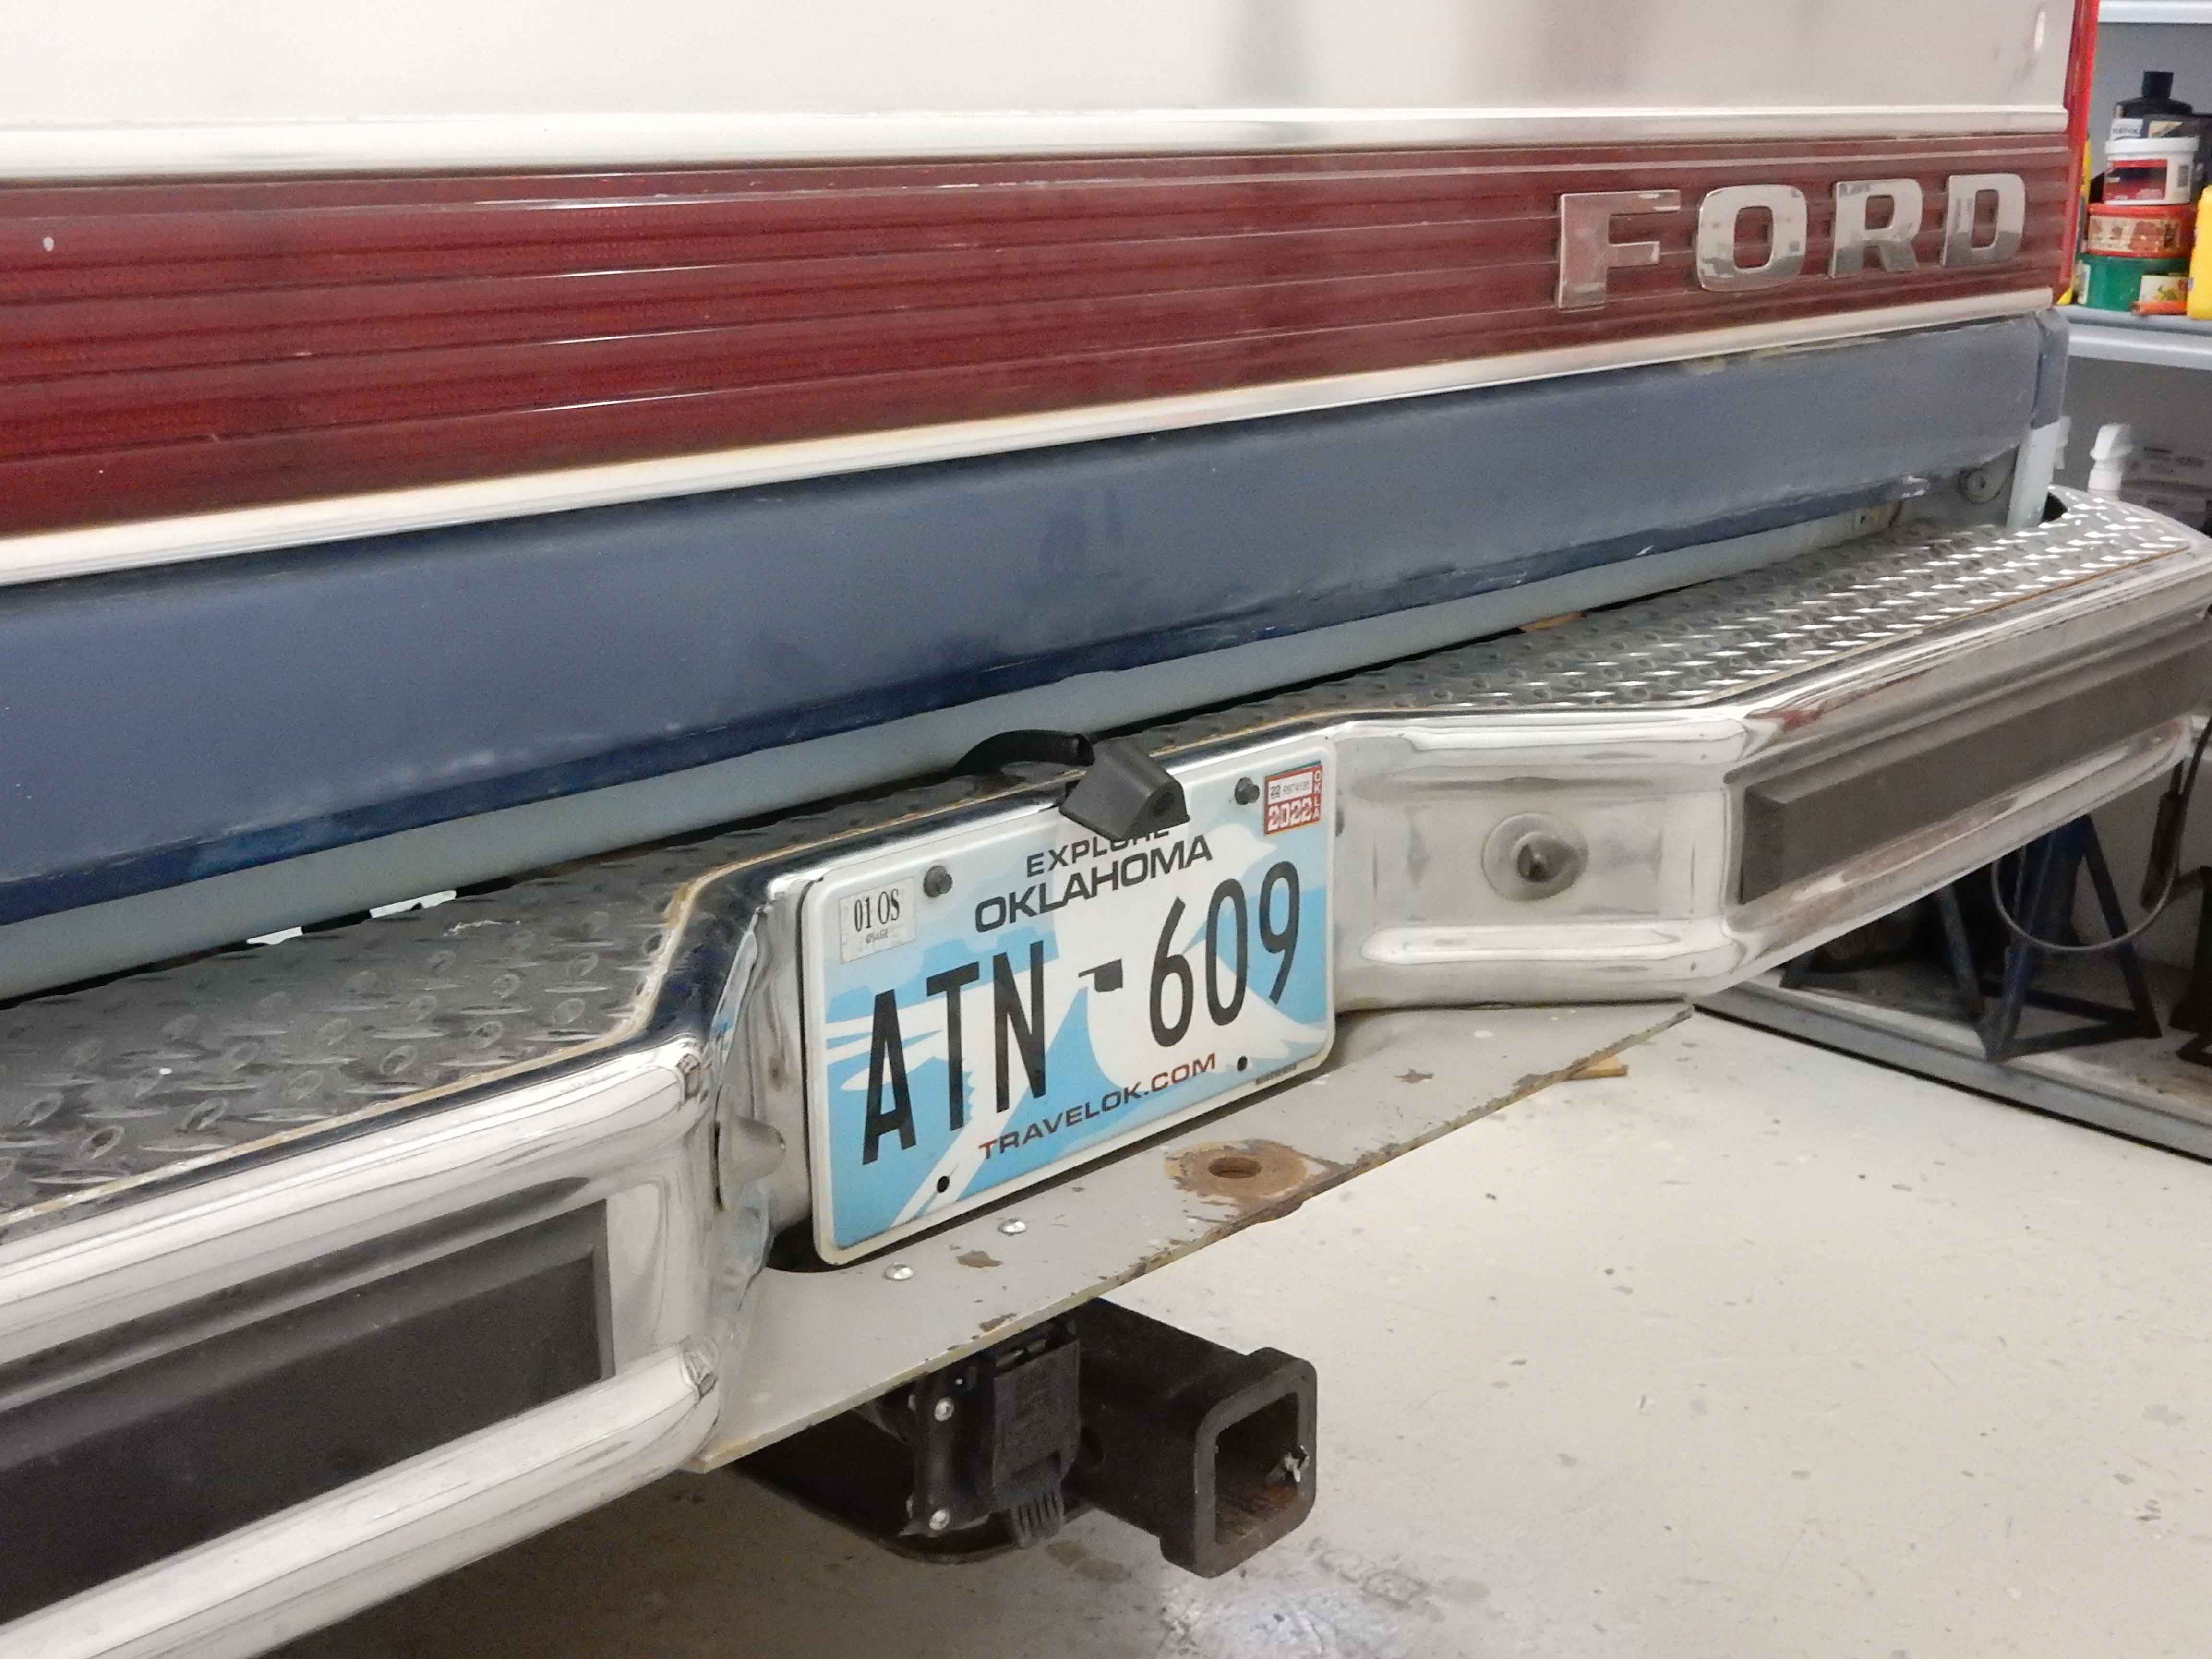 And here's another shot of the mirror itself. I think it turned out well and I'm very pleased with how it works.  However, I should point out that initially I had trouble seeing the camera display under some lighting conditions. There was just way too much light in the cab, which is a regular cab, meaning that the rear window is directly behind the occupants' heads. I tried the diffuser sheet that came with the unit, but that made the display sort of milky and fuzzy. So I had tinting installed on the side and rear windows and that did the trick. I went with tint that only allows 30% on the sides and 20% on the rear, and that worked out well. Now there's no need for the diffuser sheet. Last, let's talk about power and wiring. I used the "hardware kit" that Pormido sells instead the power supply that comes with the unit and plugs into the cigarette lighter port, and that's for a couple of reasons. First, on these trucks the cigarette lighter is hot at all times so the system wouldn't know when to shut off. Second, while the system doesn't pull much power it would eventually drain the battery if the truck wasn't driven every once in a while. But the hardware kit connects to both always-hot as well as switched power. That way the system knows when the truck is started and it boots up within 4 seconds, ready to go. Plus, the hardware kit will turn the power off if the battery gets to one of three pre-set voltages (11.3, 11.8, & 12.1V) so it won't drain the battery. I checked the power draw on the unit. At max display brightness it pulls 888 ma, but at a reasonable brightness it pulls 650 ma. And while the truck is off it pulls 7 ma - unless you have it recording snapshots all the time, which I turned off. However, even while the system is "off" the g-force sensor is always active, so if it senses a hit it'll turn the system on and record for 30 seconds, during which time it'll pull the 650 - 888 ma. When I was connecting the system up I found that the hardware kit comes with its own fuses on the ends of the wires. But try as I might I couldn't get those fuses out of the holders. In fact, I'm not sure they are supposed to come out, and the owner's manual doesn't mention them. I came to the conclusion that I'd not be able to change those fuses out if they ever blew, so I cut them off and supplied my own fuses and fuse holders. But while the original fuses appear to be 15 amp units, given the less than 1 amp draw I measured I used 2 amp fuses. And at this point I have probably 20 hours on the unit and haven't blown the fuses. Last, when recording 3 minute videos I'm seeing the front camera's files to be routinely 227 Kb. But the rear camera's files vary from 318 Kb to 677 KB over the same period. But on a drive of about 6 hours we recorded about 60 Gb of video, so about 10 Gb/hour. And supposedly the maximum microSD card the system will handle is a 128 Gb, so in theory you may get 12 hours of recording on one card.
Gary, AKA "Gary fellow": Profile
Dad's: '81 F150 Ranger XLT 4x4: Down for restomod: Full-roller "stroked 351M" w/Trick Flow heads & intake, EEC-V SEFI/E4OD/3.50 gears w/Kevlar clutches
|
Bullnose Enthusiasts Forum
› Resources & How-To's
›
How-To's
|
1 view|%1 views
| Edit this page |