Installation Of A Pormido 998 Mirror/Camera System

classic Classic list List threaded Threaded
111 messages Options
123456
Reply | Threaded
Open this post in threaded view
|

Re: Installation Of A Pormido 998 Mirror/Camera System

Gary Lewis
Administrator
Well, funny that you mention the Warn tag.  I'm meeting John/Machspeed at a chrome shop on Friday, and amoung other things I'm going to ask the owner what he would charge to re-chrome that bumper.  (I doubt I'll have it done, but I do want to ask.)  And just today I was thinking that if I do have him do that I'll need to contact Warn to see if I can get another tag.

I'm not sure that covering up the tag is enough of a reason to put the thing up on top of the bumper.  But the main question is which position offers the best view of the ground ahead and the trailer hitch.  And I'll bet that it is the one on top of the bumper as it will be higher and potentially shoot over the "thimble" that's hard up against the fairlead.  We shall see.  

Gary, AKA "Gary fellow": Profile

Dad's: '81 F150 Ranger XLT 4x4: Down for restomod: Full-roller "stroked 351M" w/Trick Flow heads & intake, EEC-V SEFI/E4OD/3.50 gears w/Kevlar clutches
Blue: 2015 F150 Platinum 4x4 SuperCrew wearing Blue Jeans & sporting a 3.5L EB & Max Tow
Big Blue: 1985 F250HD 4x4: 460/ZF5/3.55's, D60 w/Ox locker & 10.25 Sterling/Trutrac, Blue Top & Borgeson, & EEC-V MAF/SEFI

Reply | Threaded
Open this post in threaded view
|

Re: Installation Of A Pormido 998 Mirror/Camera System

Gary Lewis
Administrator
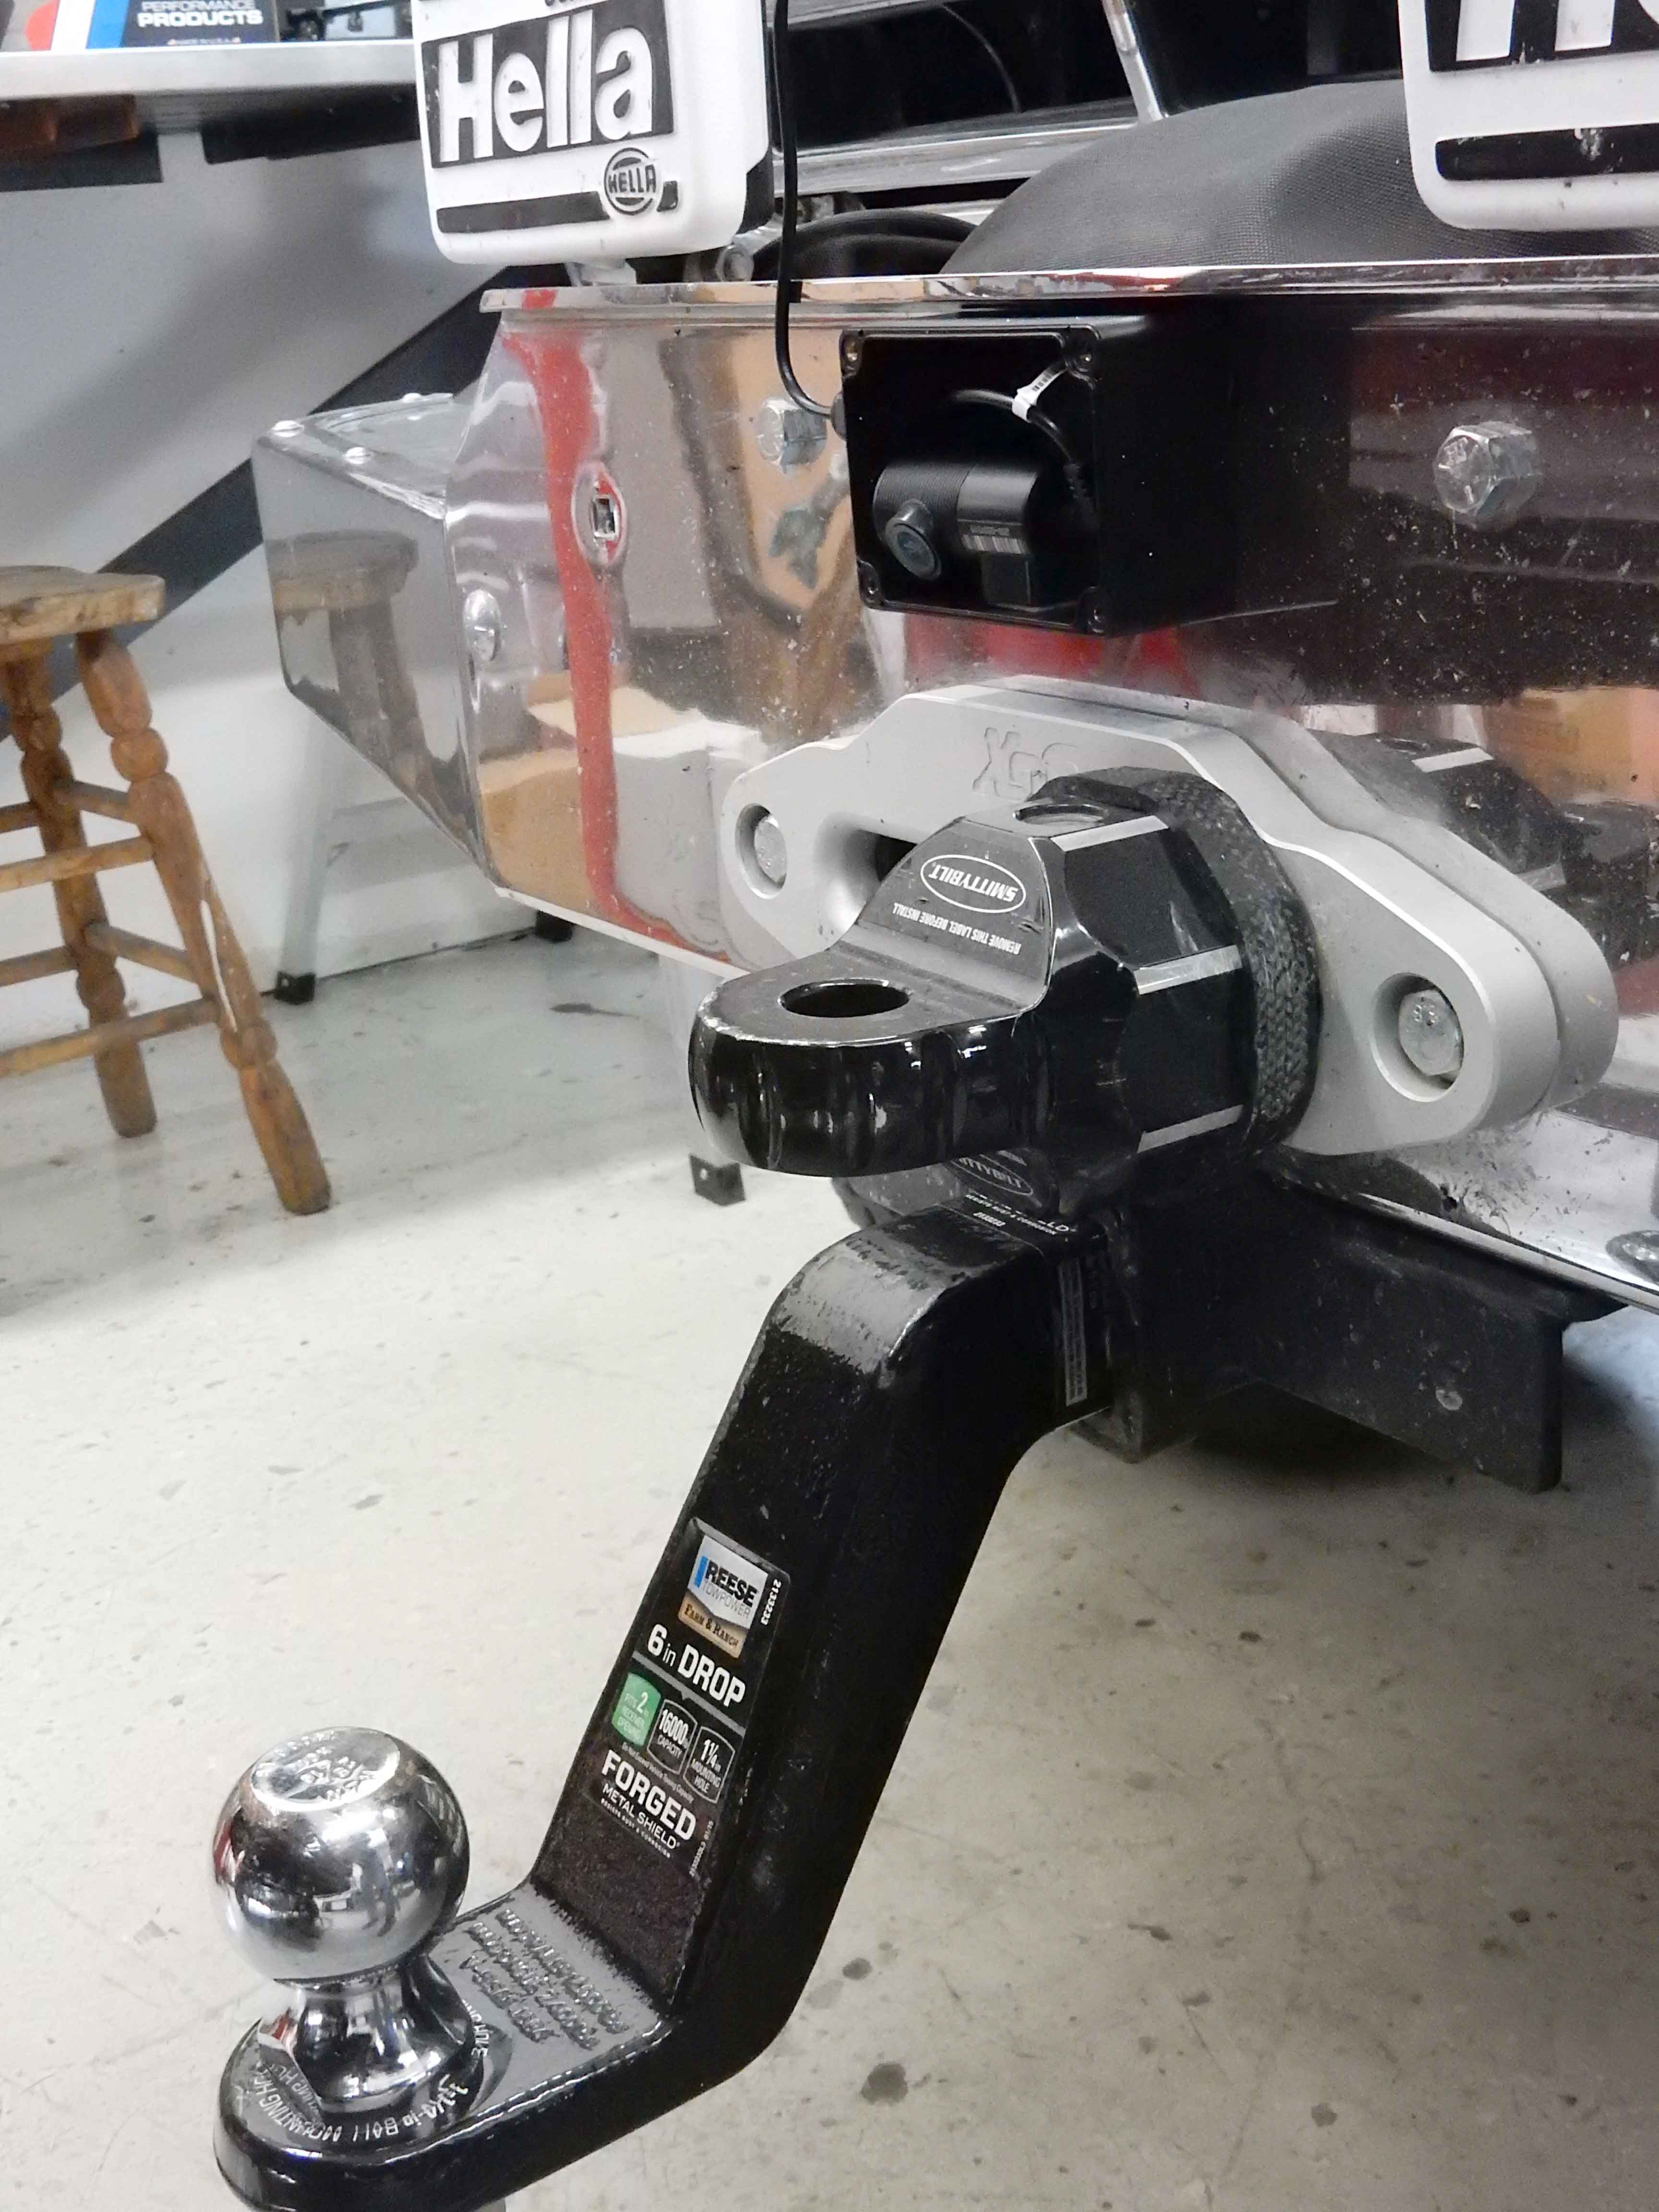
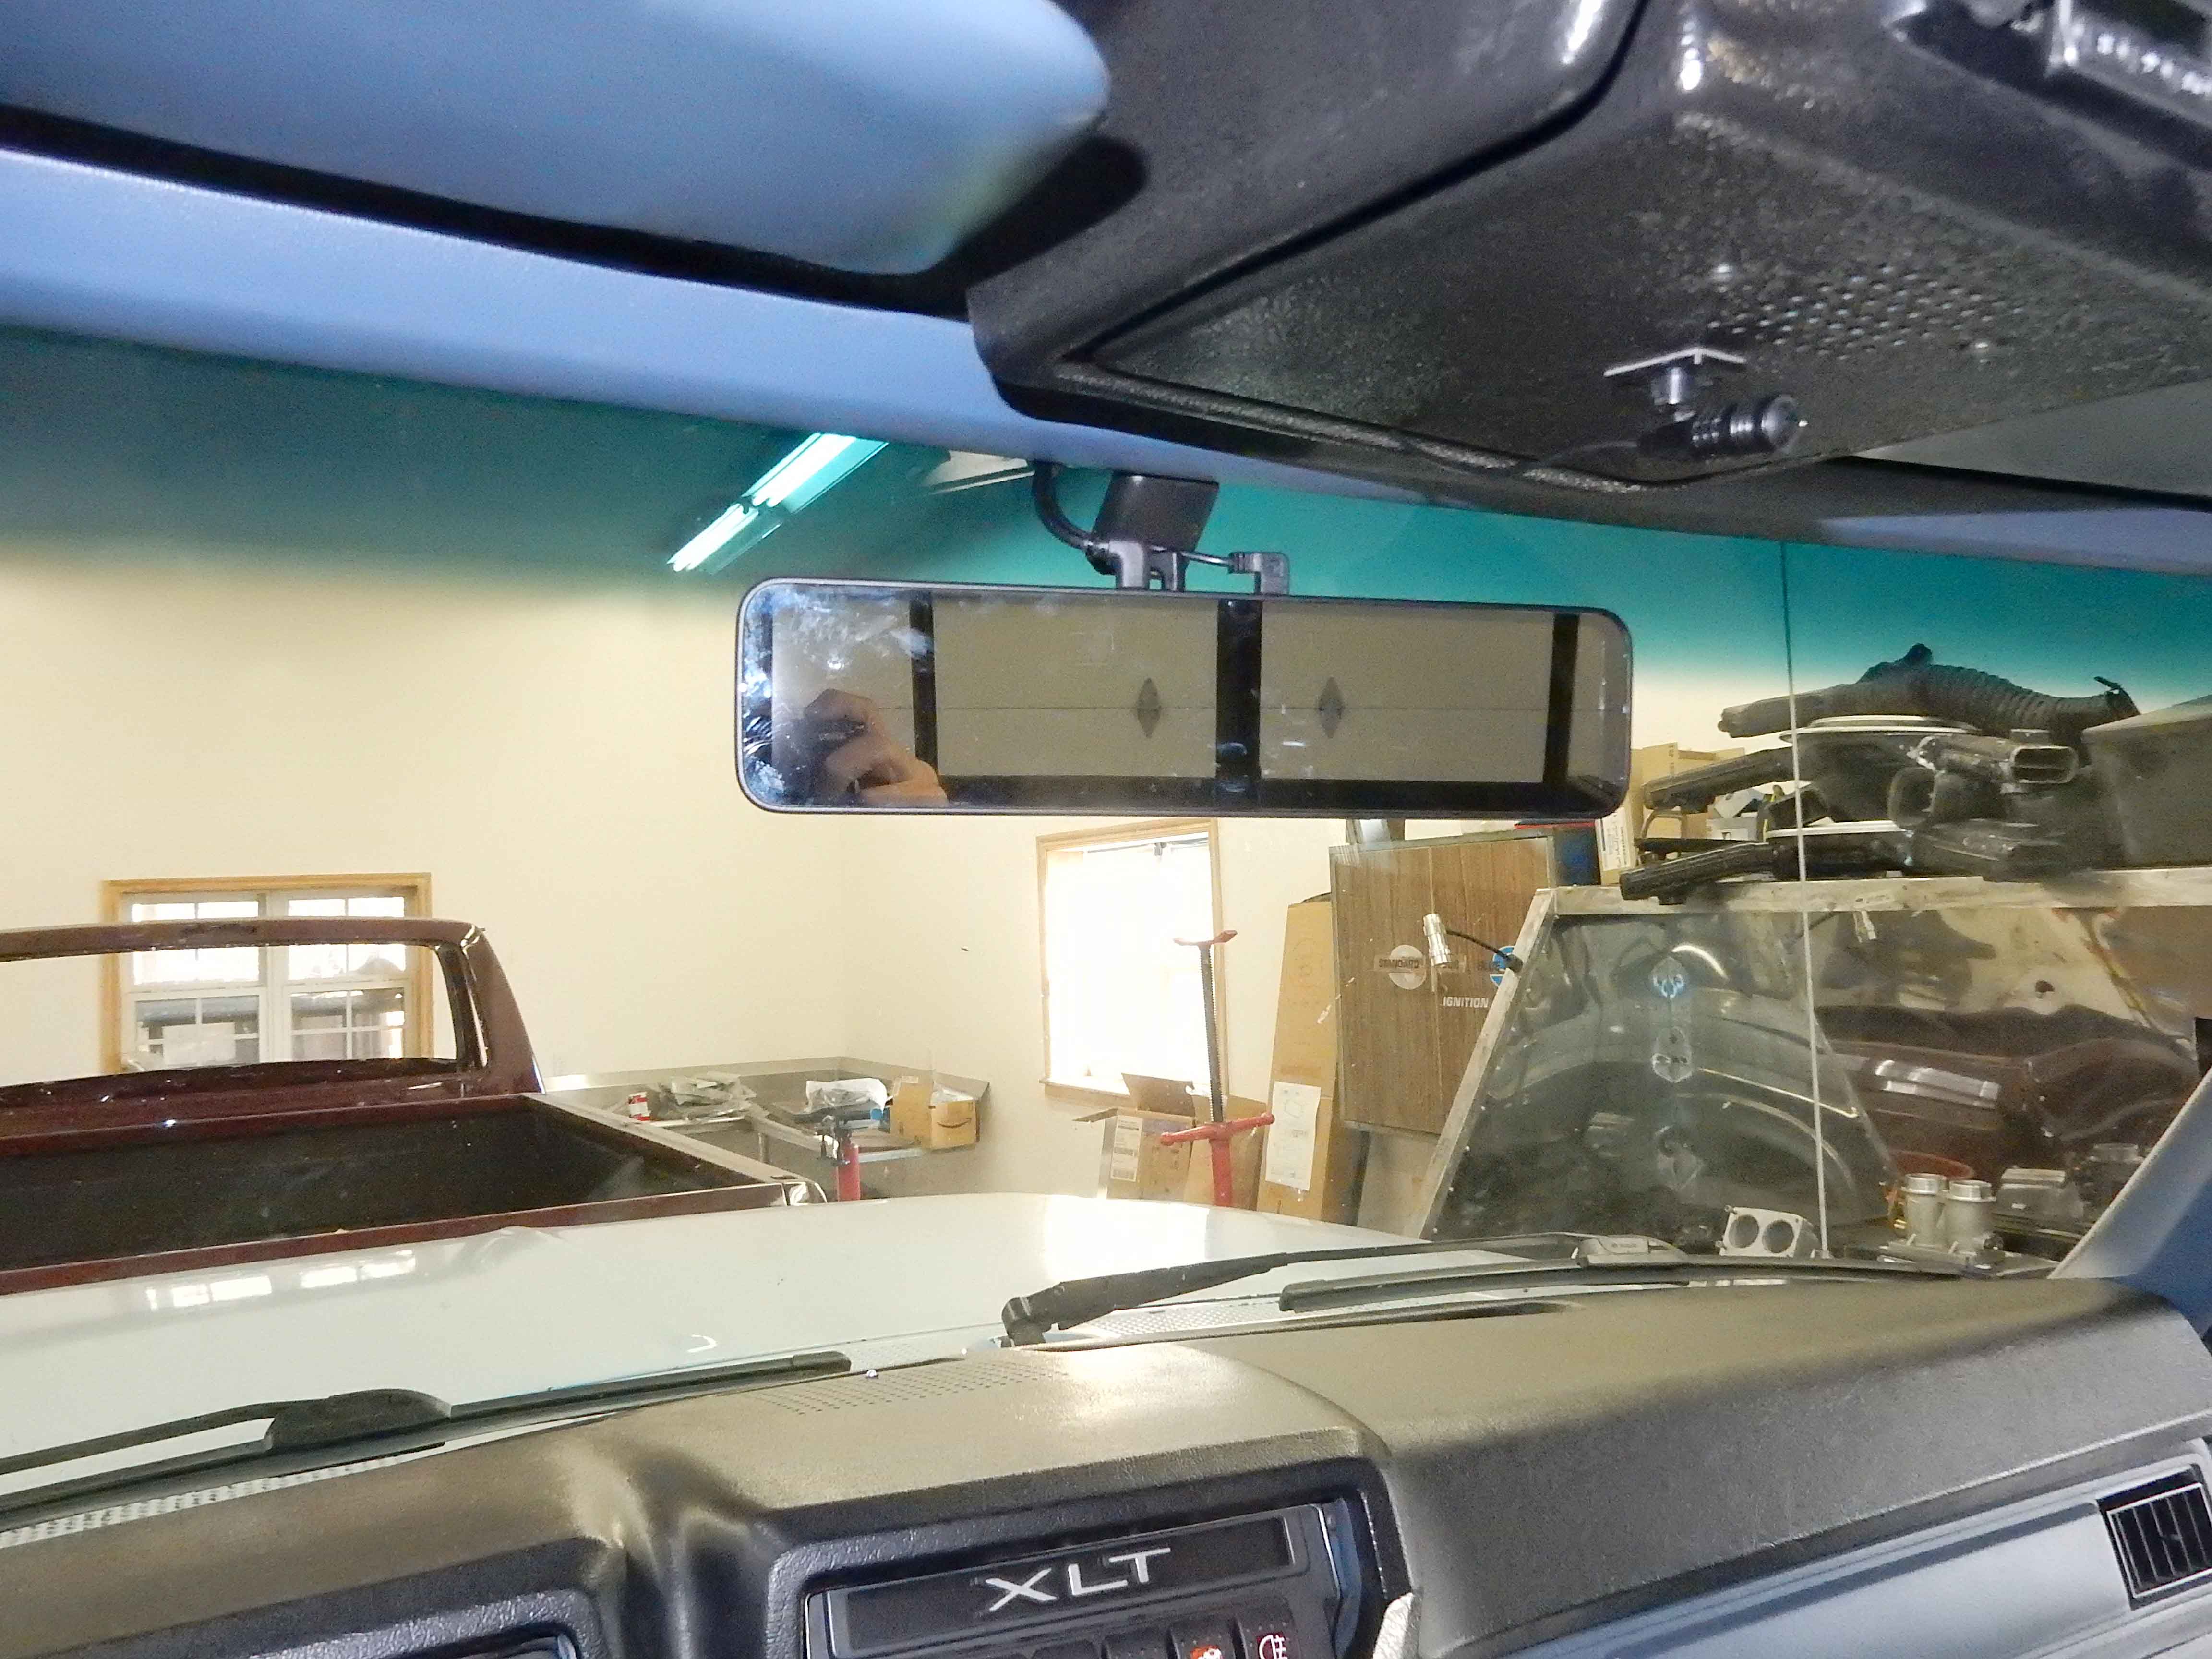
Got a bit done on the mirror/camera installation today.

First, I milled off the tabs on the box as I think I'm going to mount it with double-stick tape to the front of the bumper and don't need or want the tabs.  But, if I do decide to mount it on top of the bumper I'll glue nutserts into the recesses in the corners where the inserts are that the cover screws into.

Unfortunately, during the milling process the box jumped out of the vise and got a nick, so I filled that with JB Weld and will have to clean that up tomorrow.  And I hope to paint the box using SEM's black.

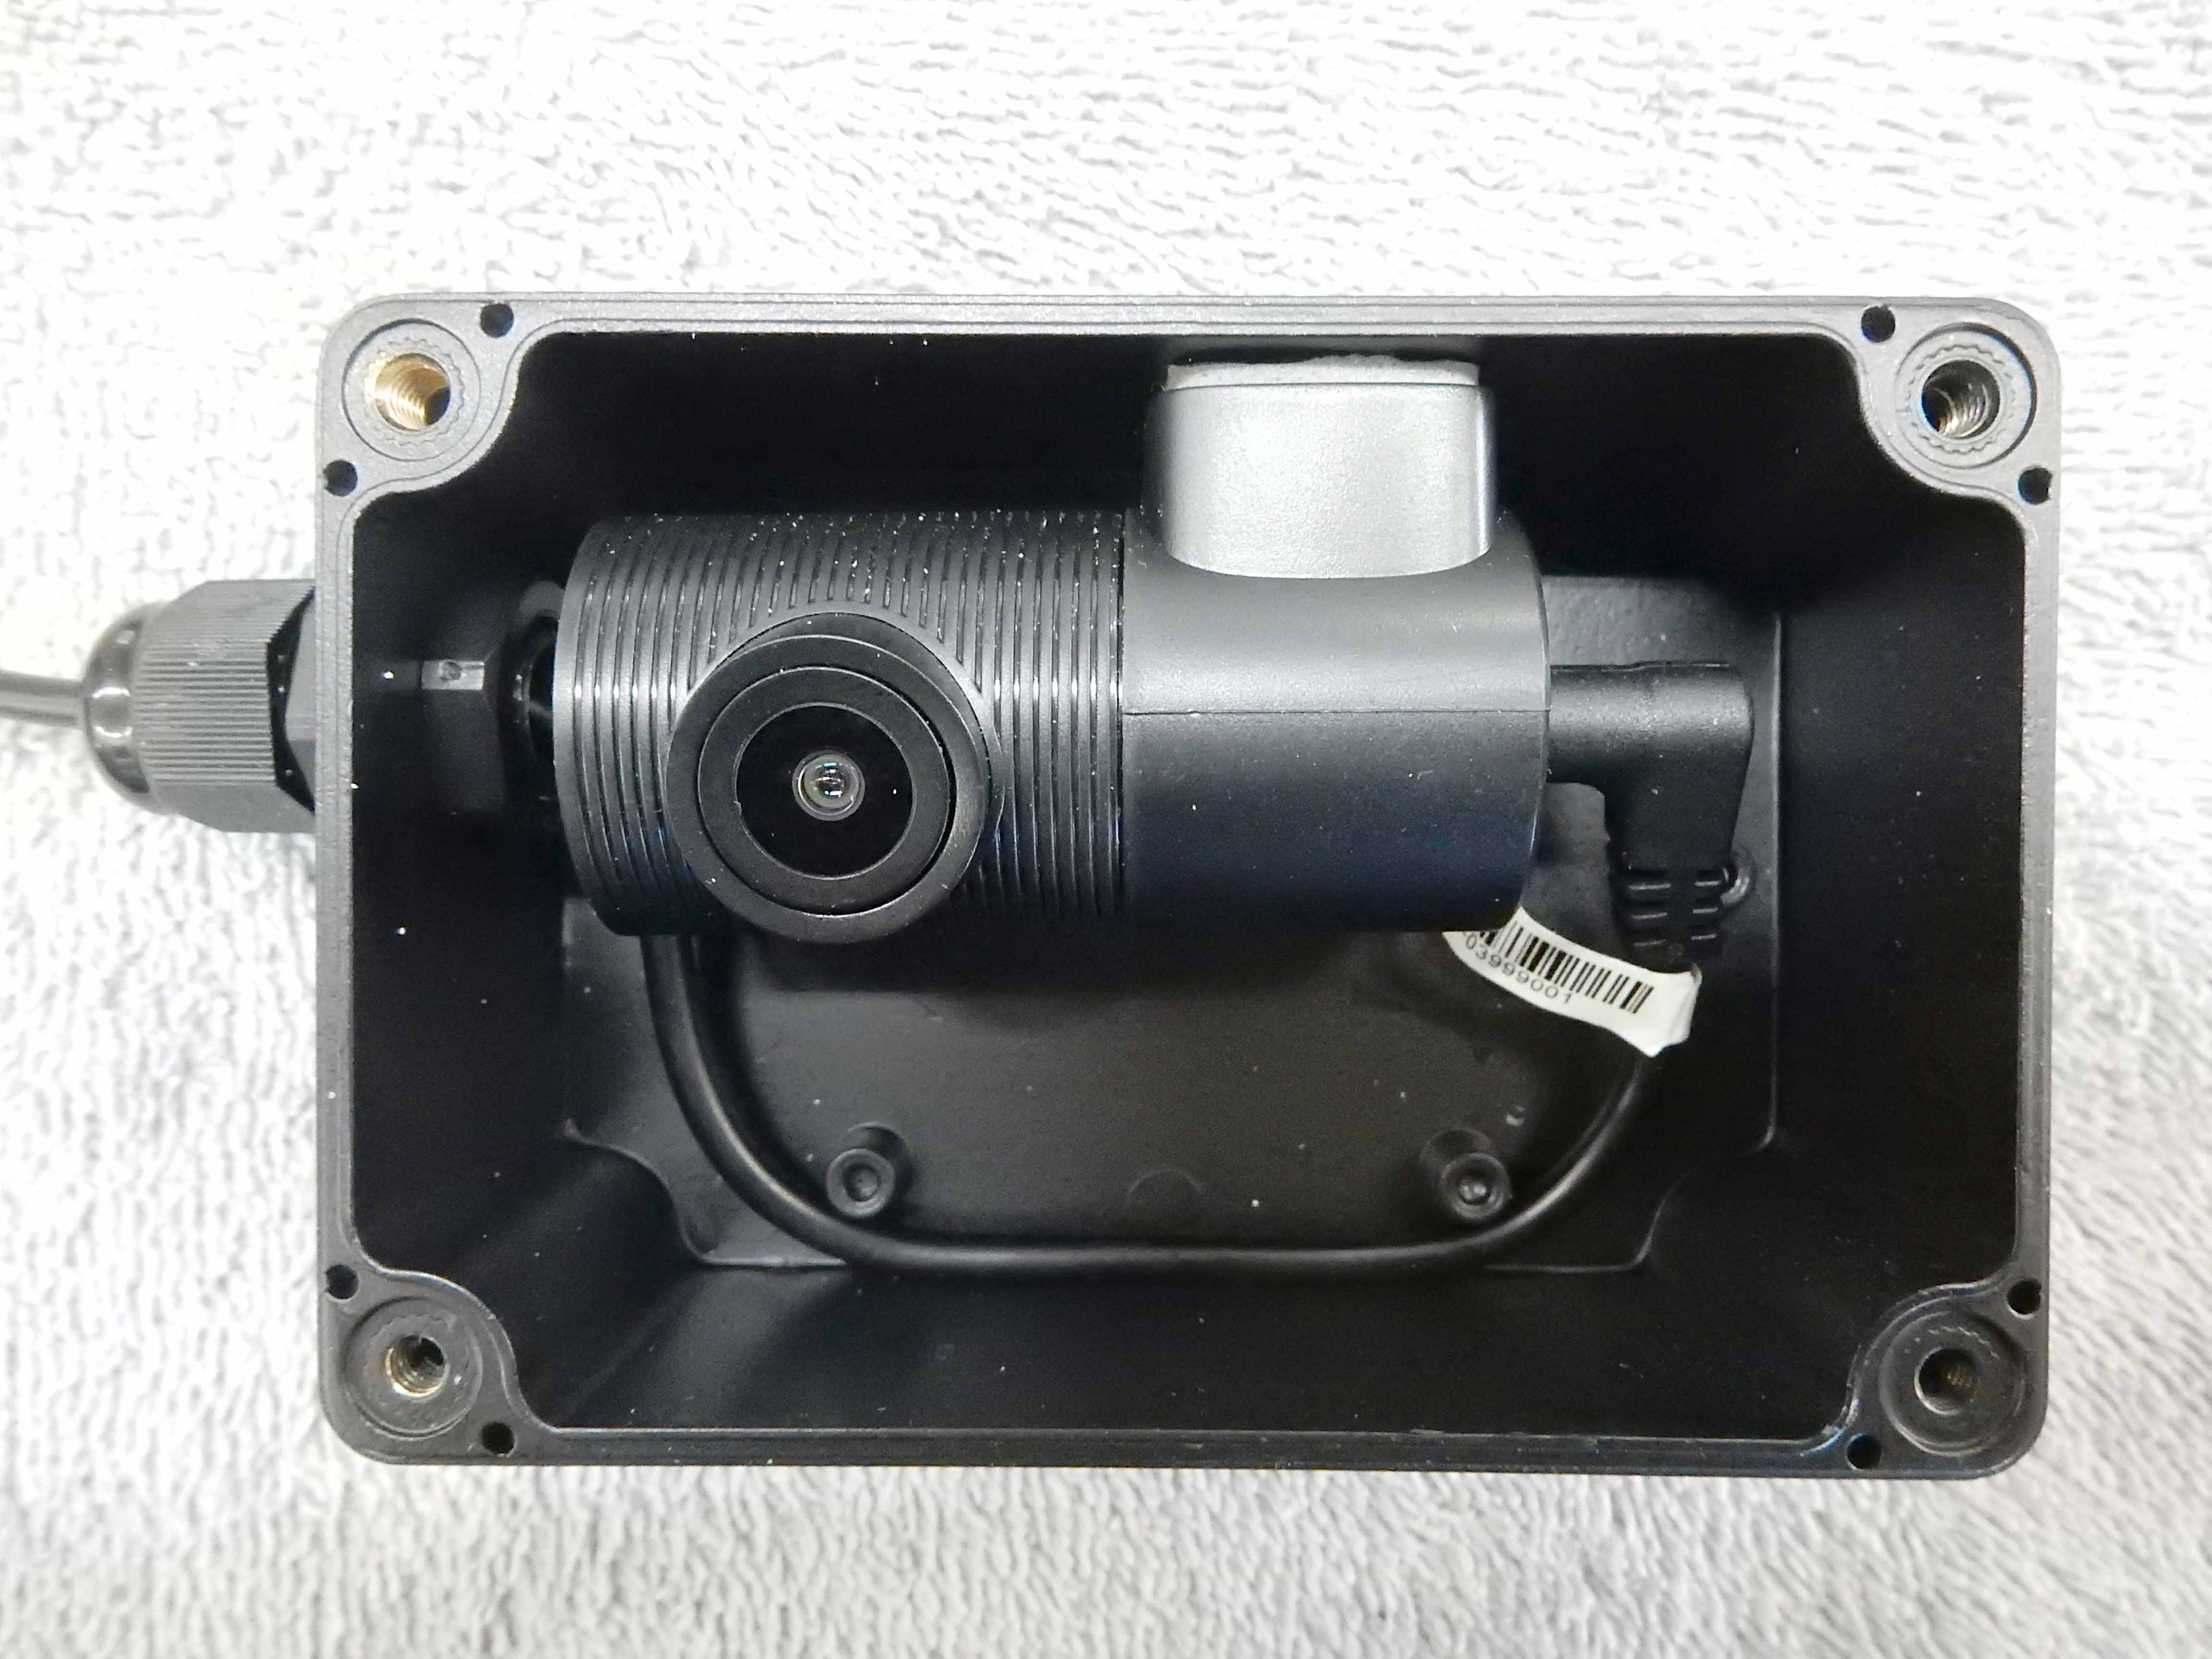
Also, I drilled the 1/2" hole for the waterproof gland that the cable to the camera will go through.  Unfortunately the connector on the cable plugging directly into the camera won't go through the gland.
Fortunately the connector that goes into the wye cable coming out of the mirror will go through the gland.  

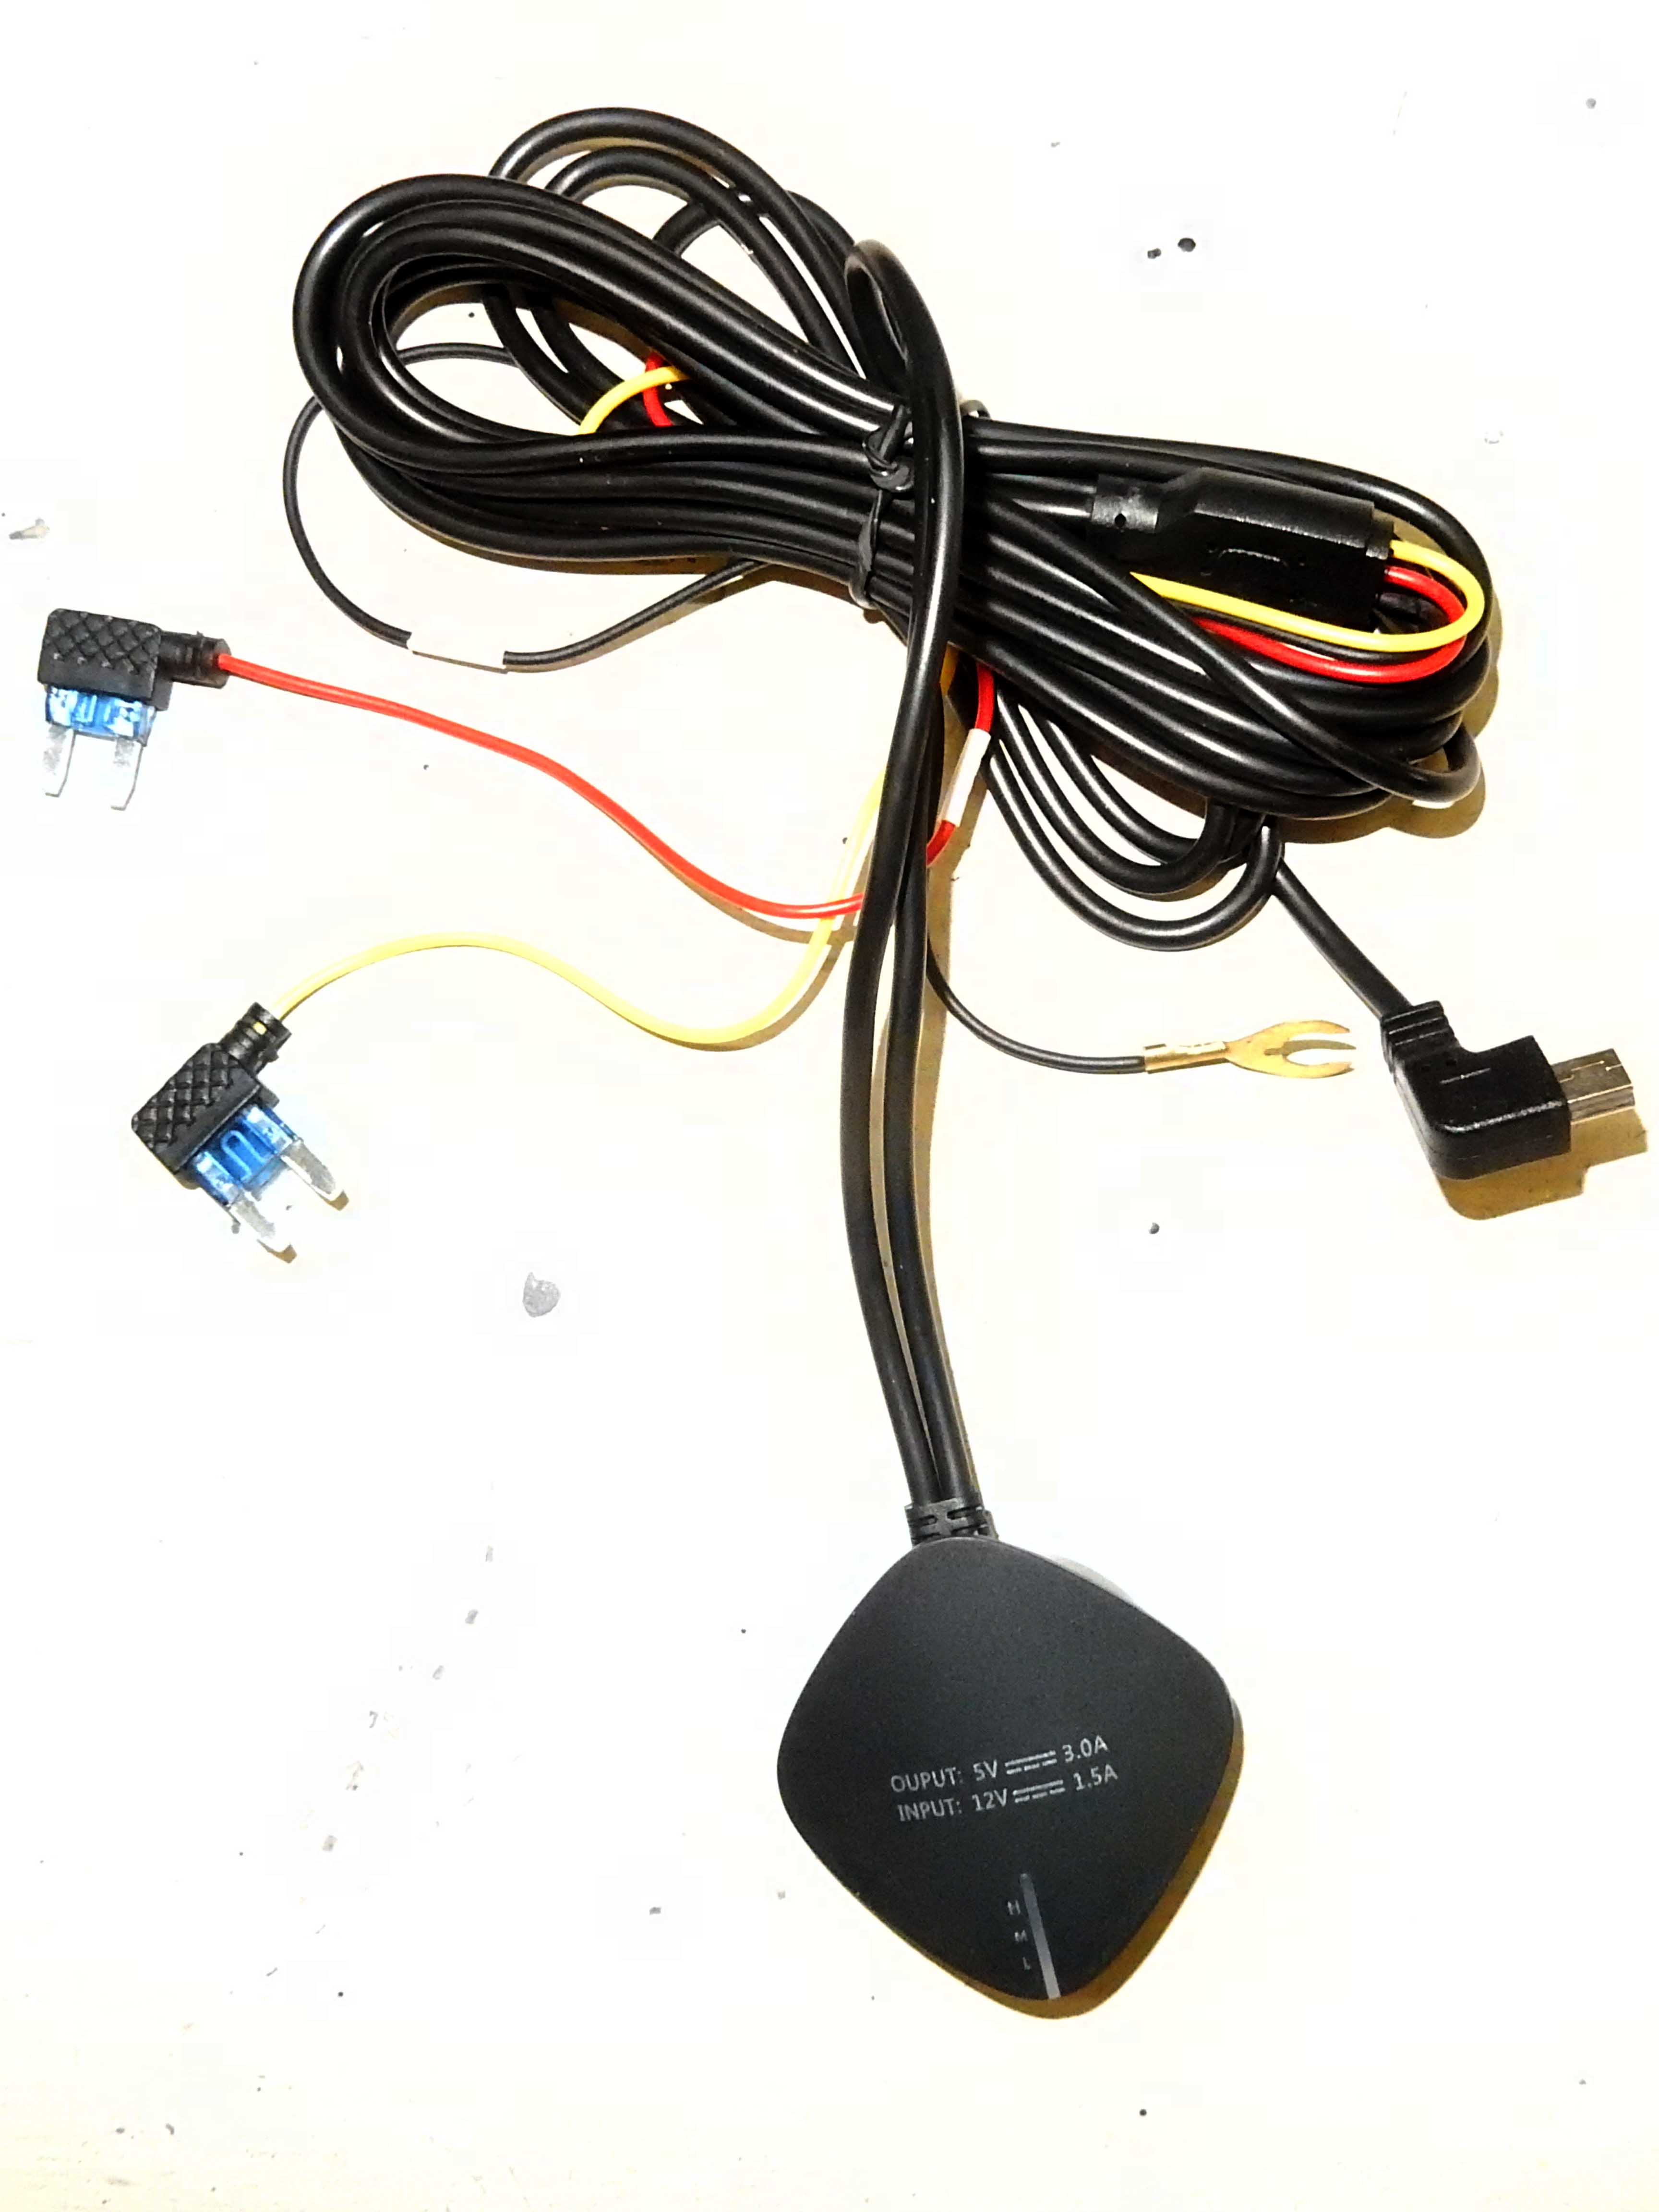
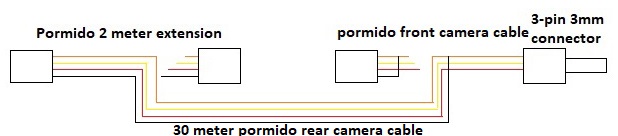
So, when I spliced about 30' of Pormido's rear camera cable into the run to the front camera I cut off the connector that wouldn't go through the gland and spliced directly into the cable going to the camera.

In the diagram below I show the Pormido 2 meter front camera extension on the left, the Pormido front camera cable with the 3mm 3-pin connector on the right, and the 30' Pormido rear camera cable in the middle connecting those cables.  And as you can see, I cut off the Pormido connectors on the ends of the extension and camera cables in order to splice in the long cable.

However, there's something I discovered along the way - the front camera cable has only three wires: the red power; yellow video; and copper drain/ground.  As it turns out, the white wire, which is shown as black in the drawing, is connected to the copper drain/ground wire in the connector.  I missed that initially and the camera didn't work since I'd cut that connector off.  But after discovering it and connecting white to ground the camera did work - sorta.  Keep reading.


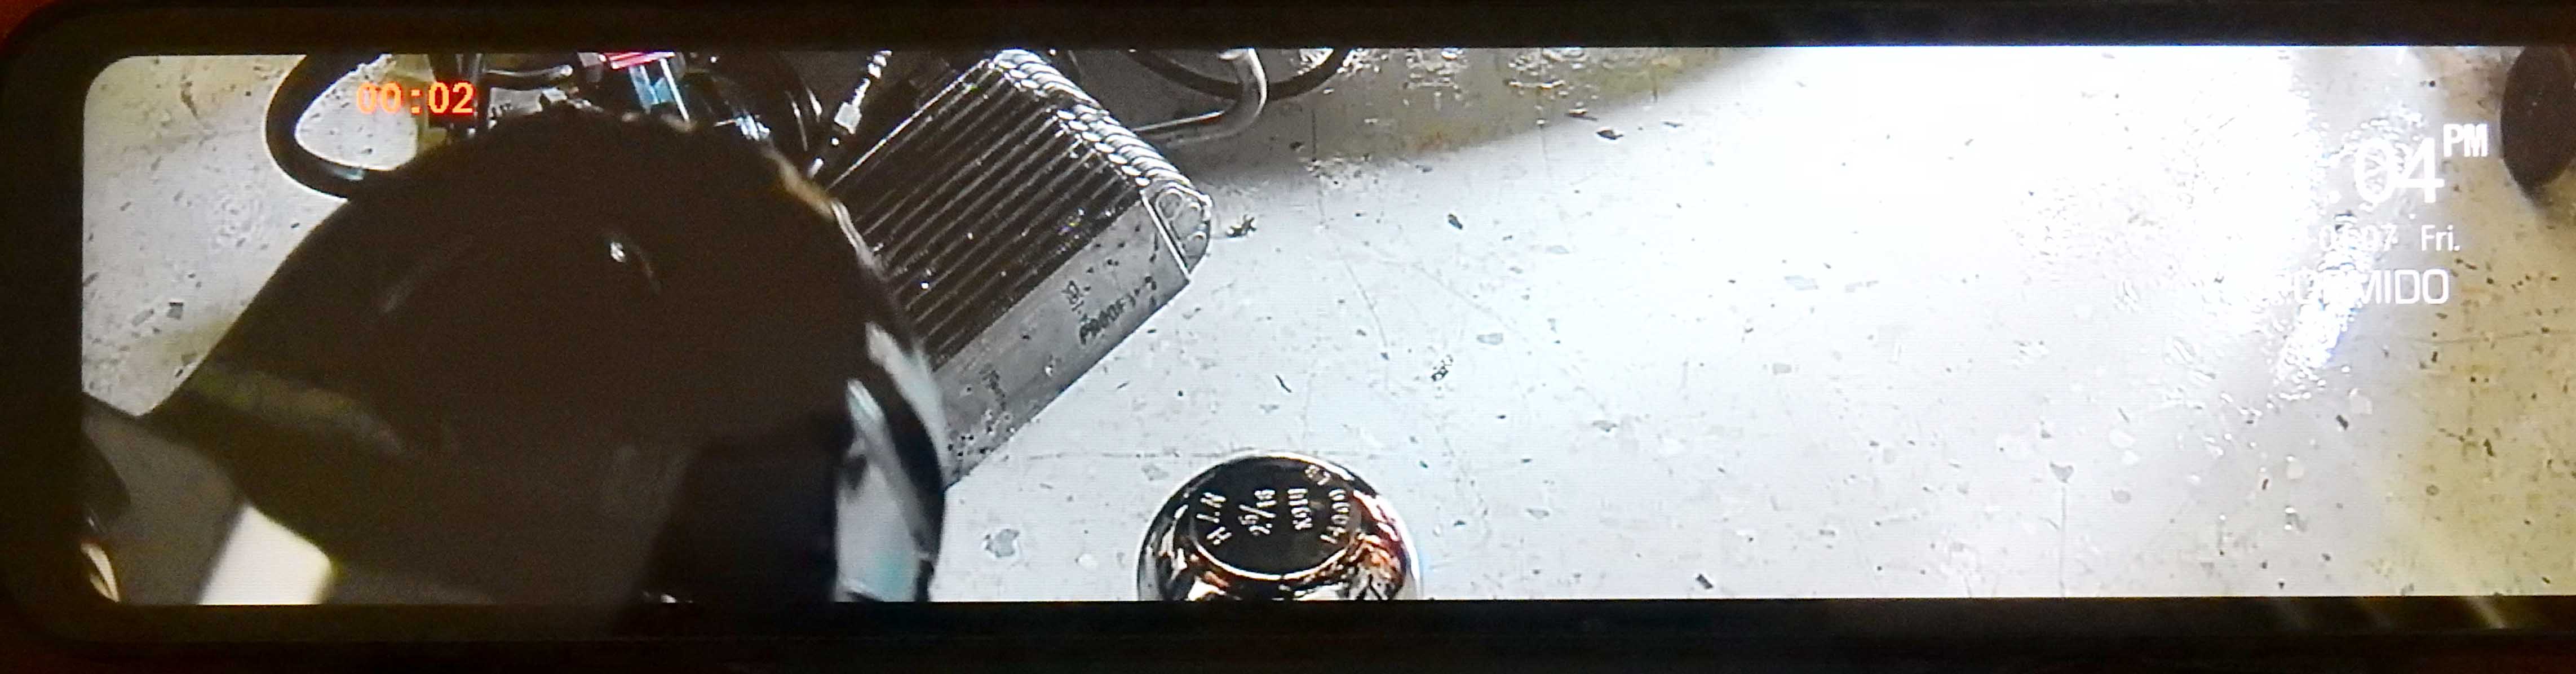
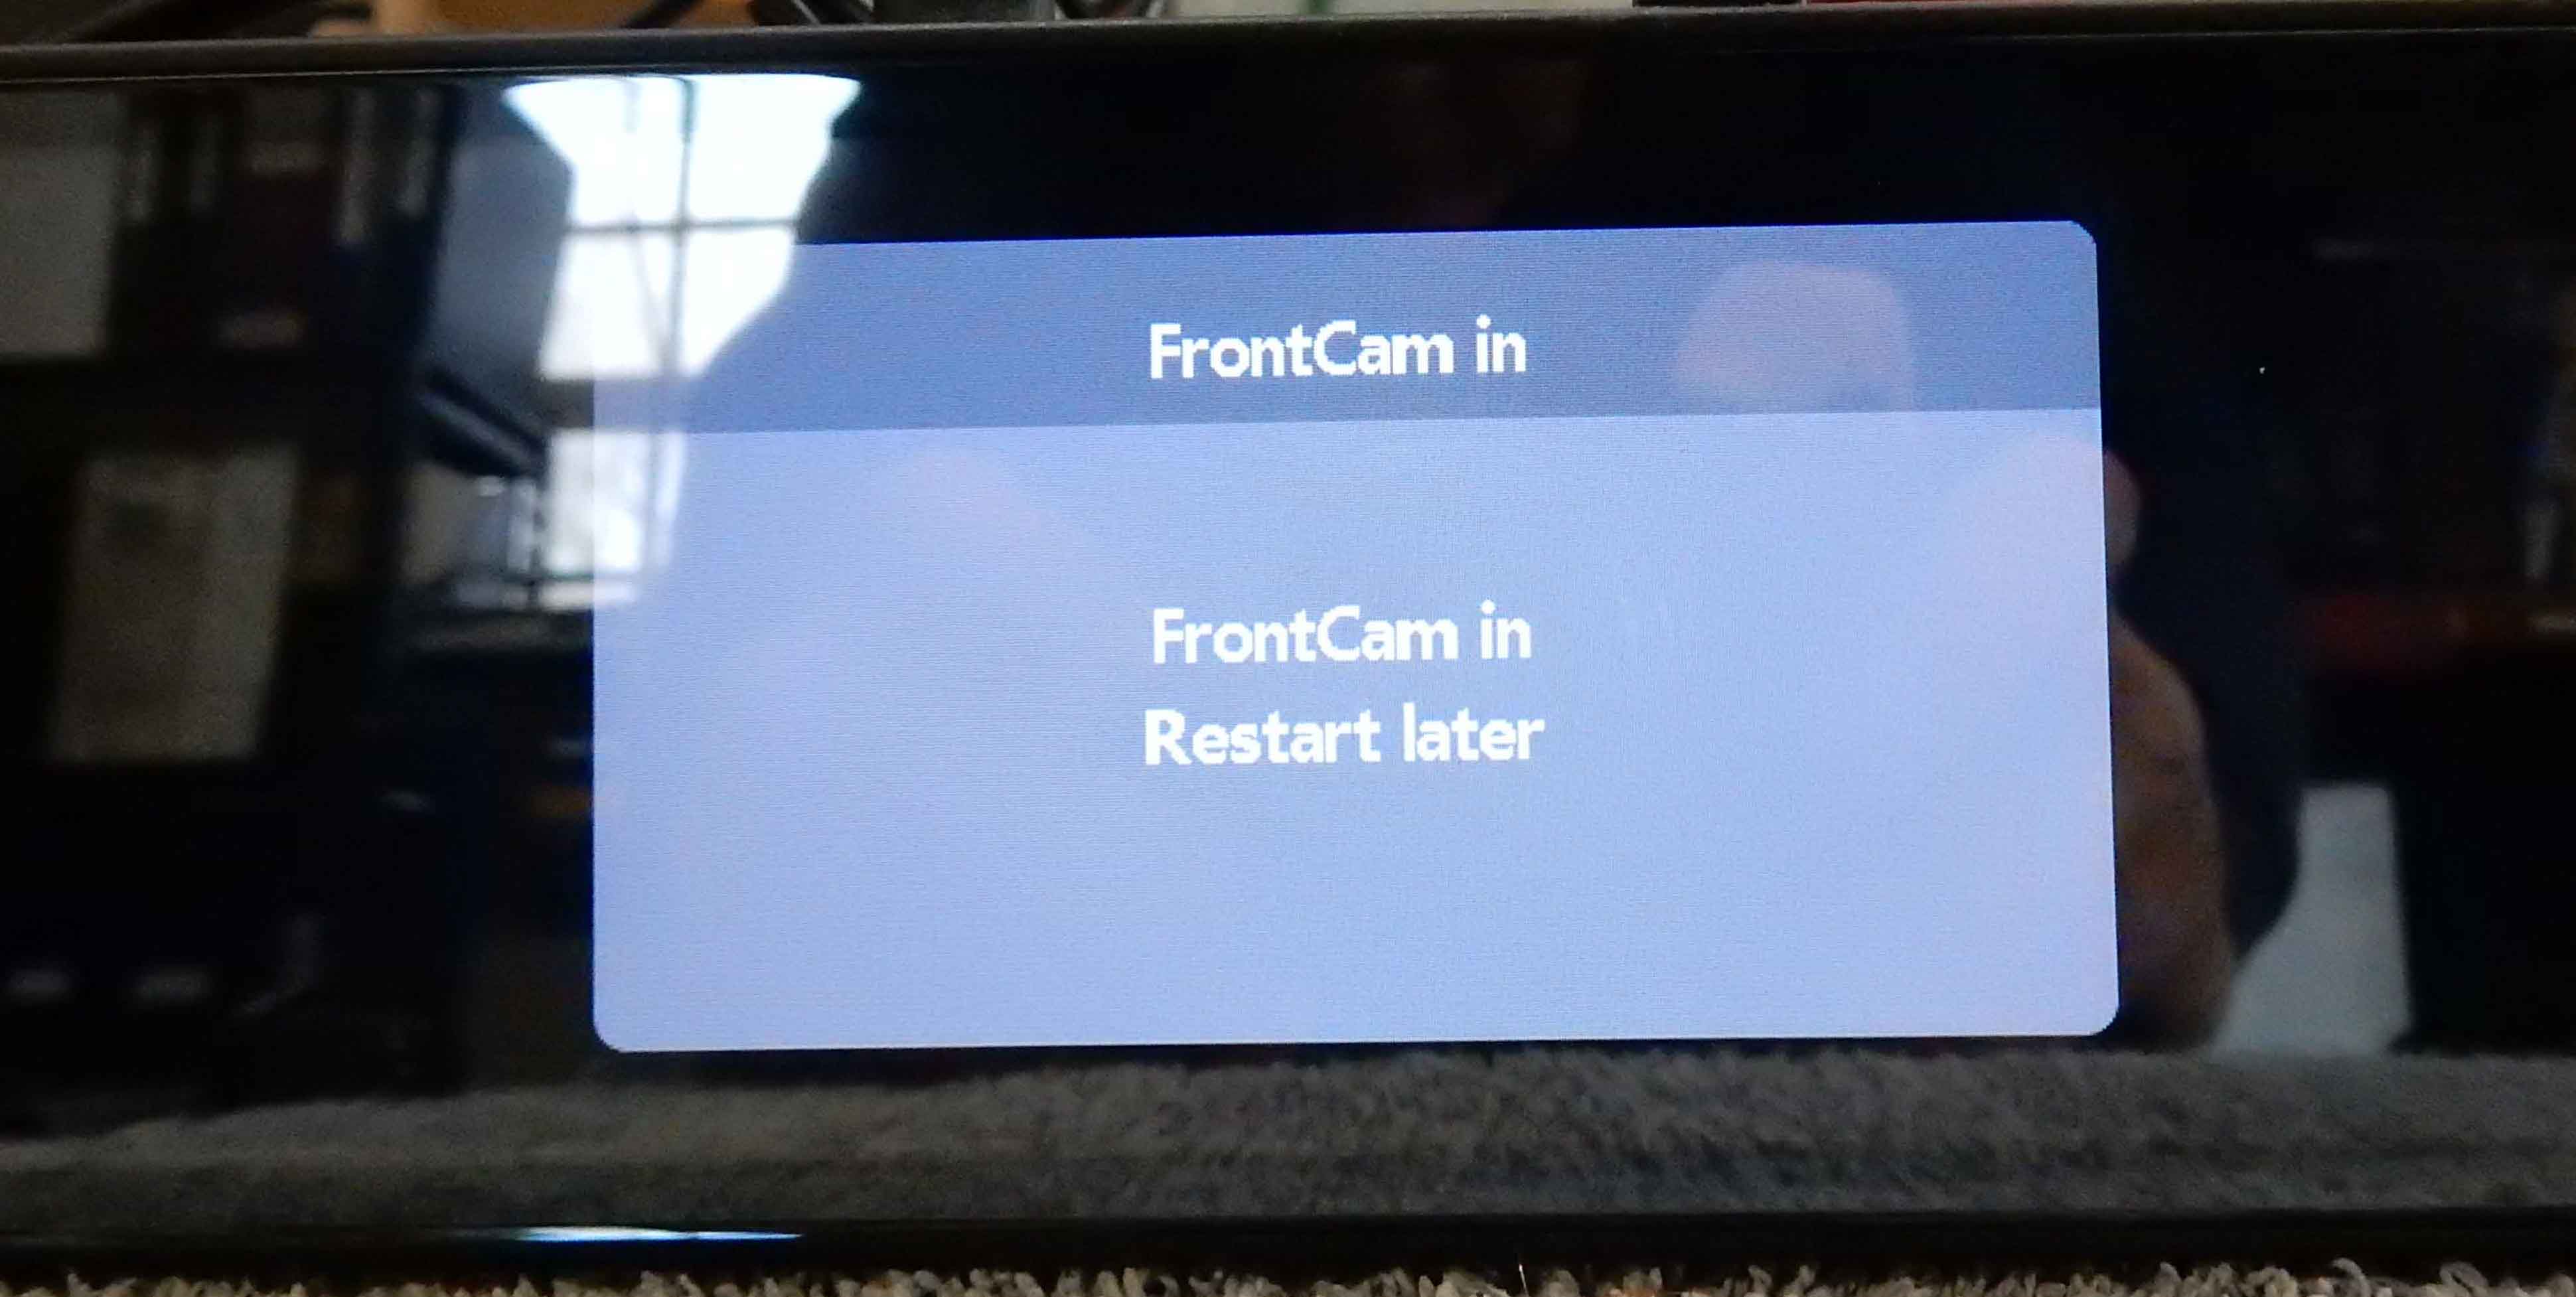
Once I connected the white wire to ground the camera showed up, but then about once a minute I got the error message shown below and the system rebooted.  I'm guessing that the 30' of extra cable is the problem as Melissa at Pormido had previously said I could use up to three of their 2 meter extensions to put the camera on the front bumper.  But I didn't want all of those connectors out in the breeze, and I had the 30' rear cable, so used it.  Given that I'll bet that I'm at about twice as far as I should be.  I've sent a note to Melissa asking for a ruling by the engineer and hope to have an answer tomorrow.


Last, just to document things, here are some pics of my connections.  In this first one you can see the white wire tied to the drain/ground wire:


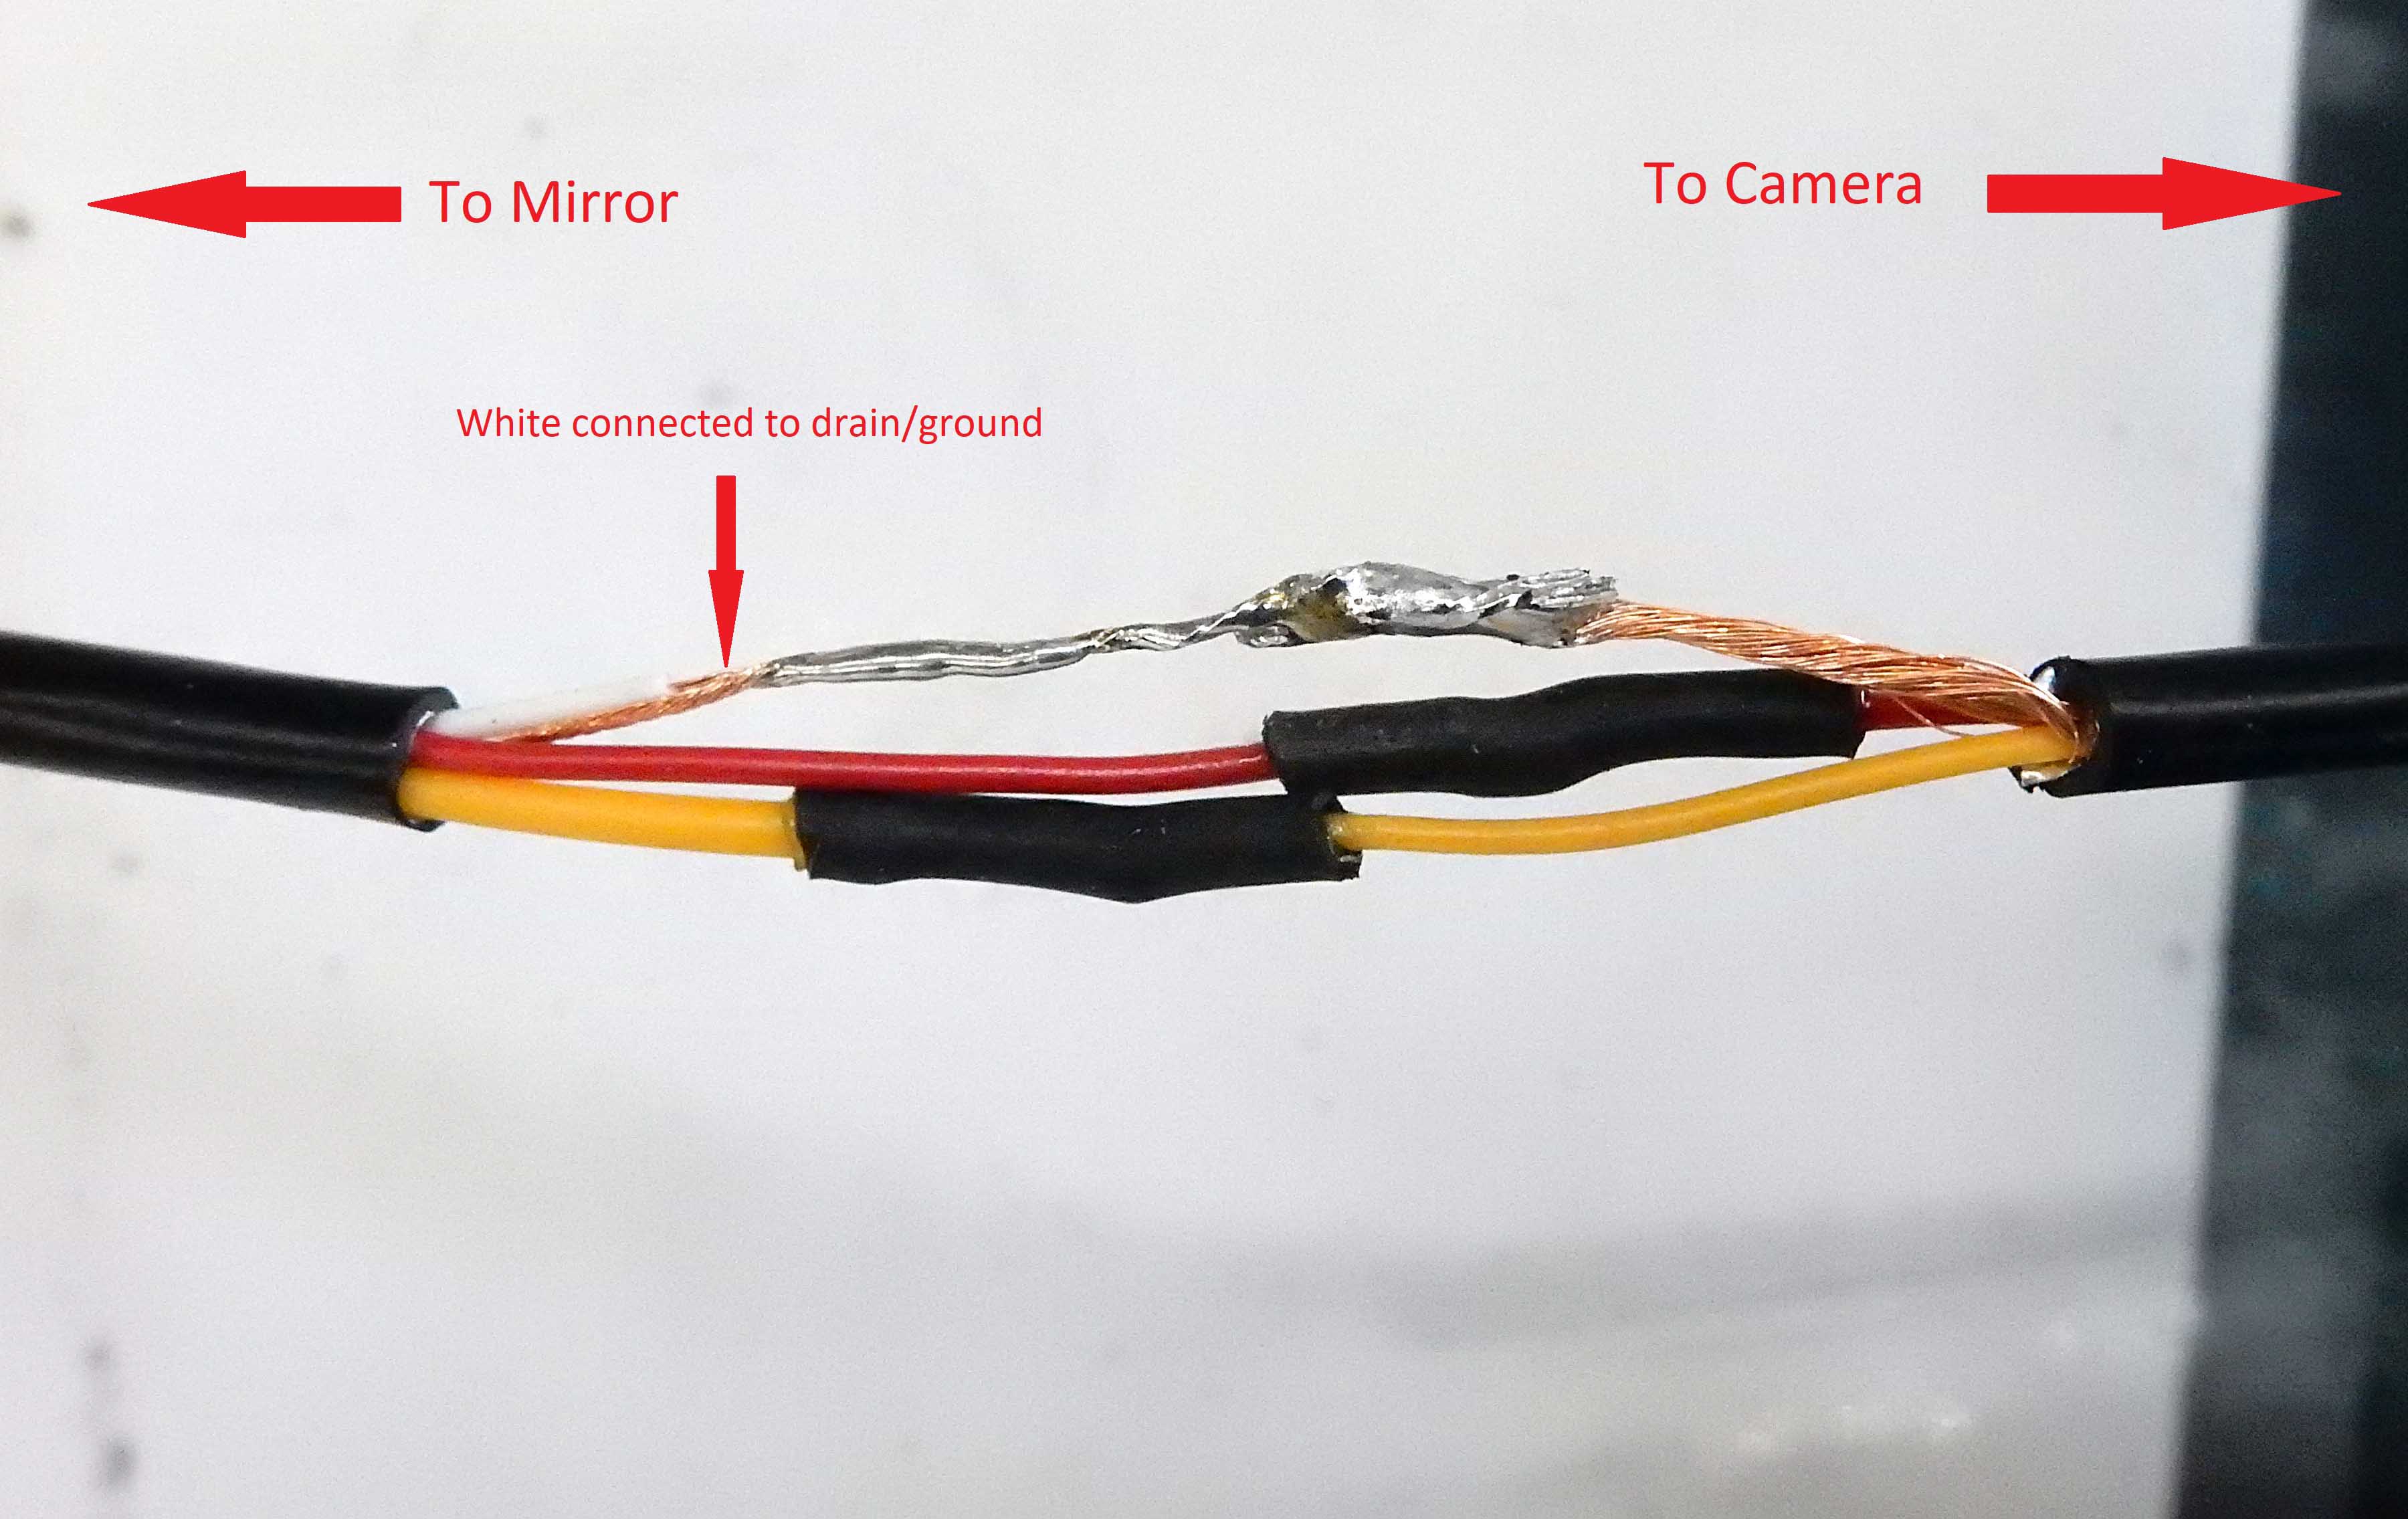
In this one you can see the aluminum foil wrapped around the splice.  The foil will be in contact with the bare copper drain/ground wire and provide a shield effect, taking the place of the mylar shield that got cut away during splicing.


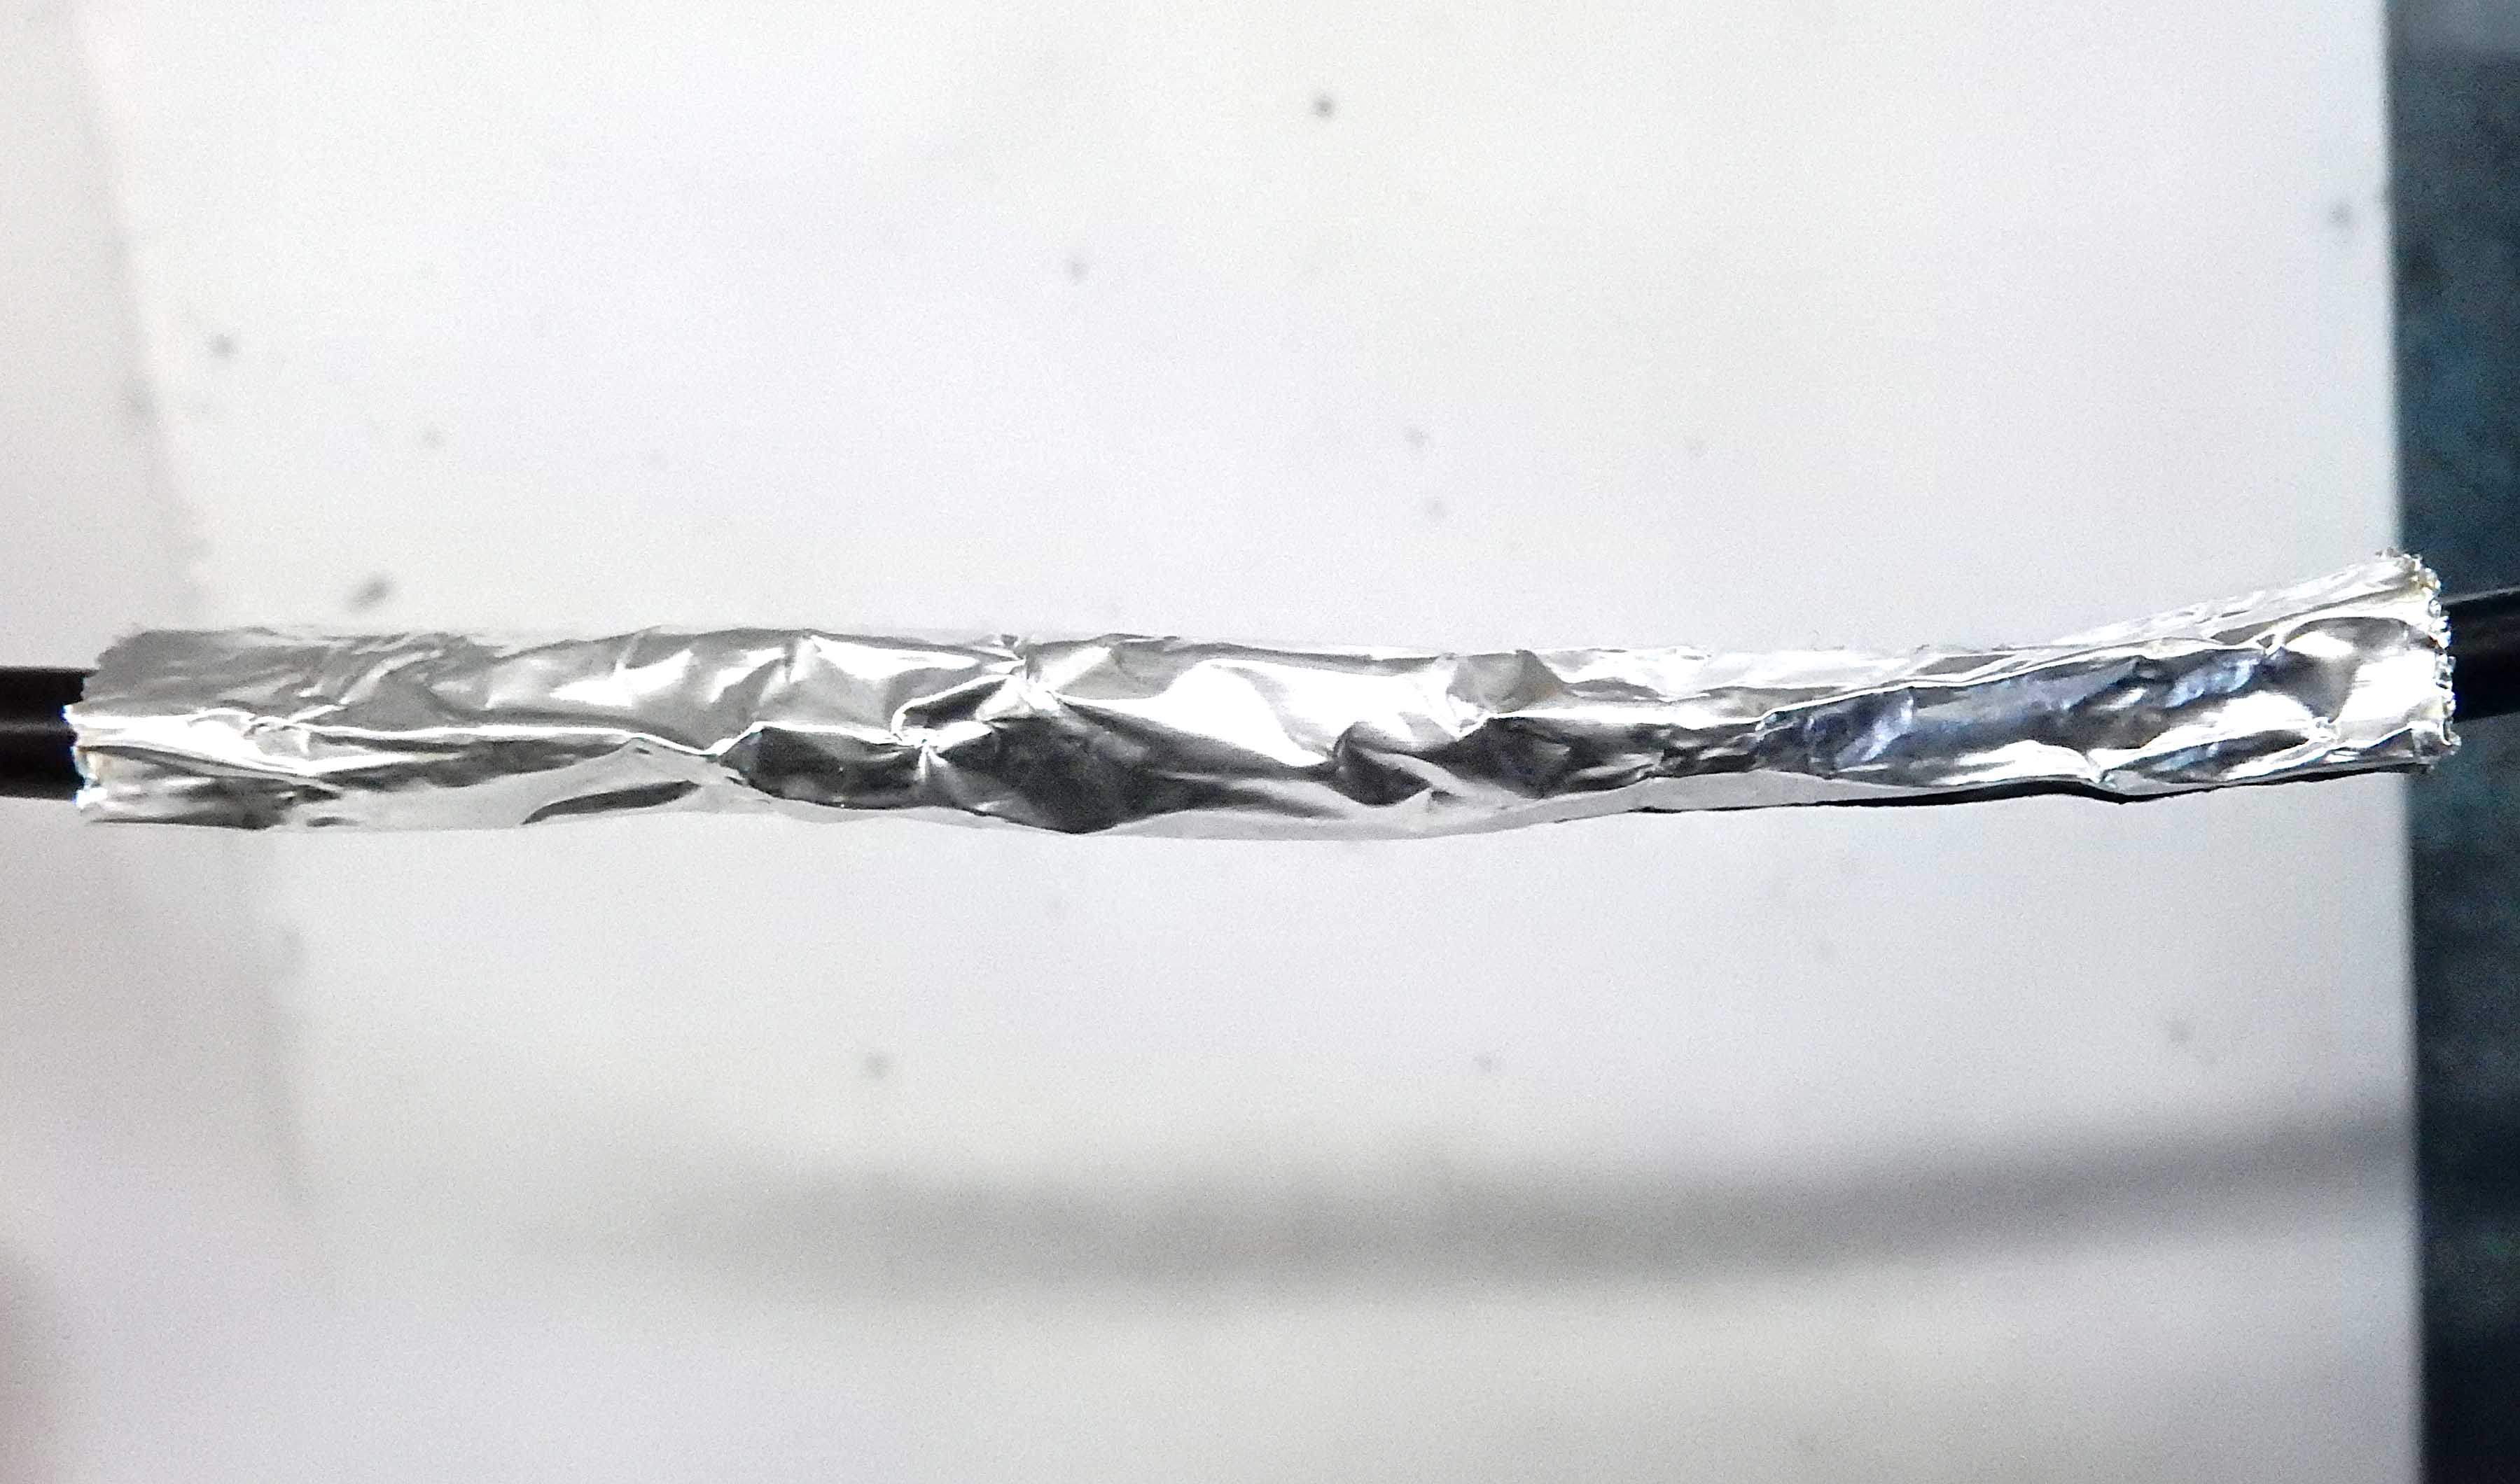
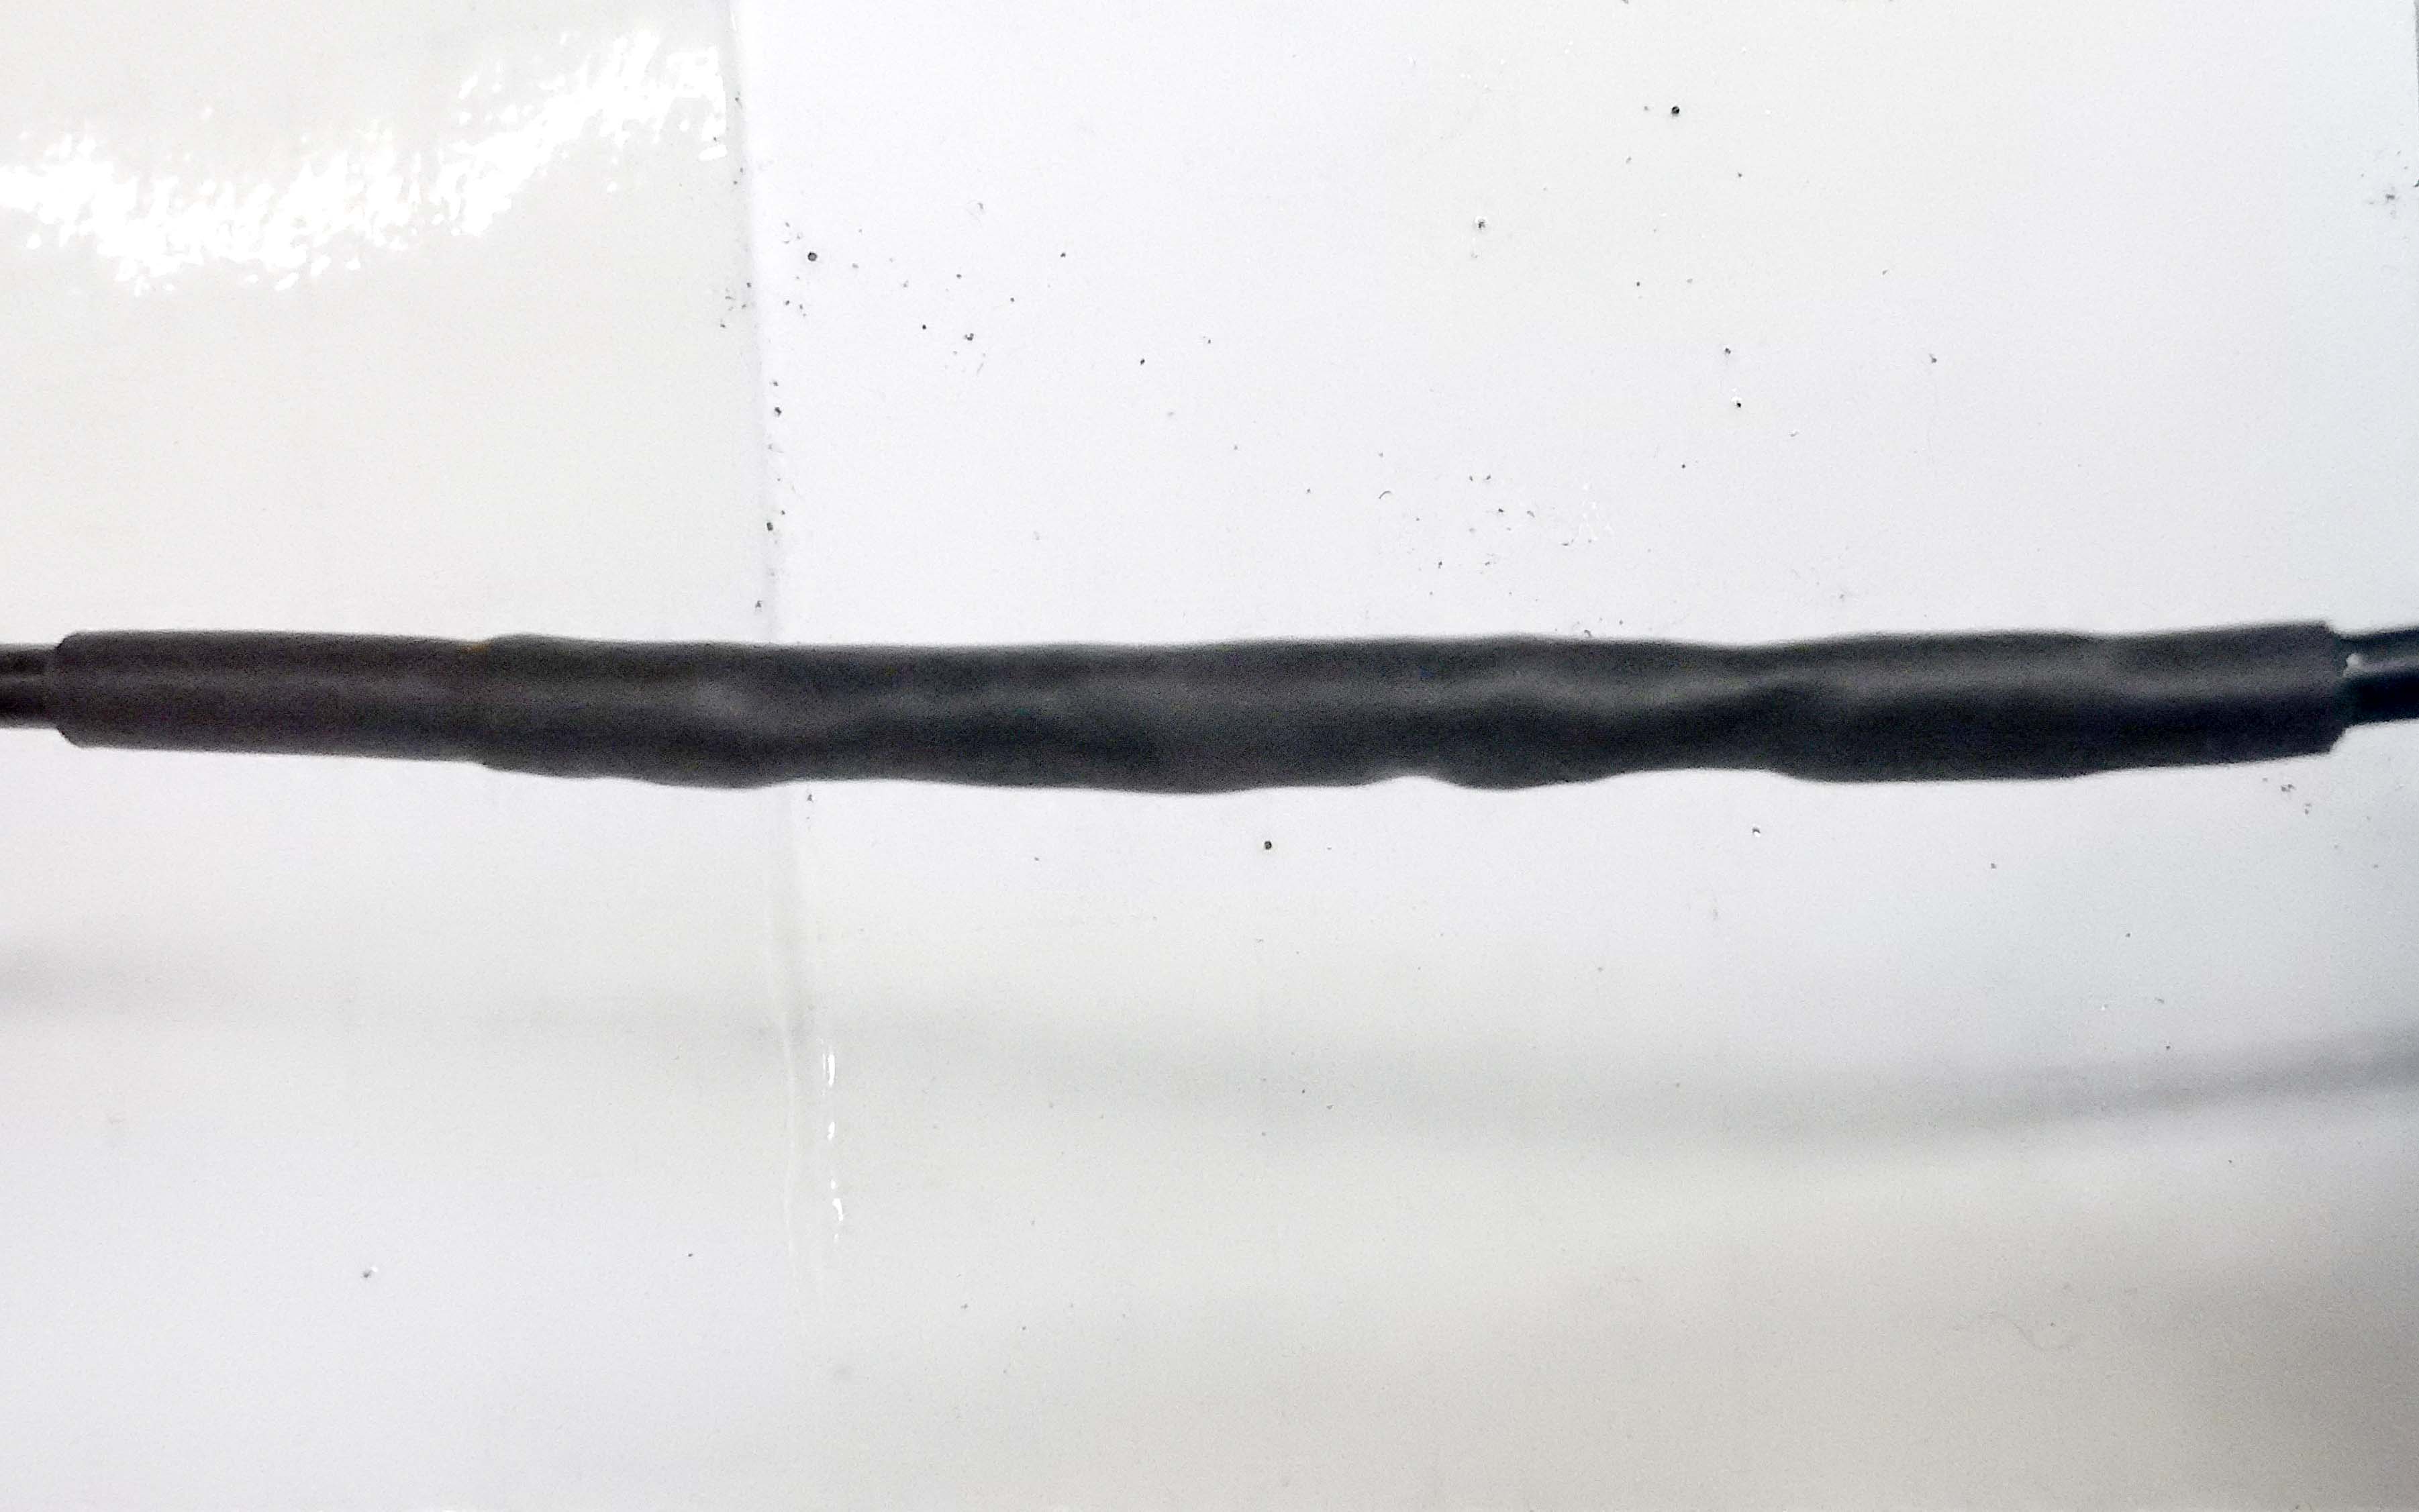
And finally the completed splice with the adhesive-lined heat shrink covering the whole joint as well as the foil:

Gary, AKA "Gary fellow": Profile

Dad's: '81 F150 Ranger XLT 4x4: Down for restomod: Full-roller "stroked 351M" w/Trick Flow heads & intake, EEC-V SEFI/E4OD/3.50 gears w/Kevlar clutches
Blue: 2015 F150 Platinum 4x4 SuperCrew wearing Blue Jeans & sporting a 3.5L EB & Max Tow
Big Blue: 1985 F250HD 4x4: 460/ZF5/3.55's, D60 w/Ox locker & 10.25 Sterling/Trutrac, Blue Top & Borgeson, & EEC-V MAF/SEFI

Reply | Threaded
Open this post in threaded view
|

Re: Installation Of A Pormido 998 Mirror/Camera System

Gary Lewis
Administrator
I did get a response from Melissa, but she or the engineer thought my problem was a bad connection rather than too much wire.  I tested everything by bending and stretching the connections but that was inconclusive.  So I redid my connections and still had the problem.

Given that I put the original connector back on the cable to the camera, and spliced the 2 meter extension back together.  And it worked fine.  So I measured the run and it looks like I need about 3' more than what the cable and 2 meter extension gives, so I ordered another 2 meter extension.  It'll be here Sunday.

Then I decided to pull the mirror mount off and drill a new hole to lower it as much as I could.  My fear had been that the orange Loctite wouldn't let me remove the screw, but I hit it with my small impact and it came right out.  And with a bit of measuring I determined that I could move the mounting hole up about 3/4" w/o either machining a flat on the plate that I have or making a new plate, both of which would then require powder coating.  So I moved it up and reinstalled the mirror and it is certainly better.  But if I were to make another adapter I'd move it up even more.

With that done I decided I'd test the front camera in different locations to see where I want to put it.  As it turns out that is on the bumper right above the fairlead.  And the reason for that, beyond the way it looks, is because that position requires the least amount of down-angle on the camera in order to see the trailer ball.

Here's a shot of where I'm planning on mounting it.  But, in this pic the camera is mounted to the bottom of the box, and with the camera turned down as it is to be able to see the ball it "shoots" through the edge of the cover, which causes a bunch of distortion.  So later I pulled the camera off the bottom of the box and mounted it to the top of the box so it won't shoot through the edge of the cover.  (The box is painted with SEM black and I was pleasantly surprised that the 3M adhesive, which held the camera on very tightly, didn't peel the paint off.  But I did follow SEM's directions on how to prep it, including using the right adhesion promoter.)


And here's what you see in the display with the camera in that position.  Note that I've scrolled all of the way down in this pic, but you can scroll up and the top of the field of view is then going up at a slight angle from horizontal, which I think will work out ok.  Also note that with the camera mounted this way it can see the ground 24" in front of the front bumper, which is a whole lot better than the 144" when the camera is mounted at the top of the windshield.


Here's what the camera now looks like in the box:


Next I have to remove the dash cover and the windshield and A-pillar trim to run switched power to the mirror and the camera leads out to the cameras.  I'm not really looking forward to this, but it needs to be done.  
Gary, AKA "Gary fellow": Profile

Dad's: '81 F150 Ranger XLT 4x4: Down for restomod: Full-roller "stroked 351M" w/Trick Flow heads & intake, EEC-V SEFI/E4OD/3.50 gears w/Kevlar clutches
Blue: 2015 F150 Platinum 4x4 SuperCrew wearing Blue Jeans & sporting a 3.5L EB & Max Tow
Big Blue: 1985 F250HD 4x4: 460/ZF5/3.55's, D60 w/Ox locker & 10.25 Sterling/Trutrac, Blue Top & Borgeson, & EEC-V MAF/SEFI

Reply | Threaded
Open this post in threaded view
|

Re: Installation Of A Pormido 998 Mirror/Camera System

BigBrother-84
Nice job Gary!


Hopefully, you can see the light from the cam lens (as well as the light at the end of the tunnel)!


Thanks for keeping us informed!
Jeff / 1984 F350 Crew Cab 4x4/5.8L w351 4V/ T18/ D50 4.10 front/ 8' bed.
Restored 2019-2022.
Nicknamed «Big Brother 1984», due to its soooo-looong shape & nod to George Orwell's 1984 famous novel.
Reply | Threaded
Open this post in threaded view
|

Re: Installation Of A Pormido 998 Mirror/Camera System

Machspeed
Administrator
In reply to this post by Gary Lewis
You need to pull the windshield? Why?
John

"Blackie" - 1986 F150 4x4 - Mildly warmed over 351W HO - Original owner
Reply | Threaded
Open this post in threaded view
|

Re: Installation Of A Pormido 998 Mirror/Camera System

Gary Lewis
Administrator
Thanks, Jeff.  I like to document everything.  But, I'm not sure if the light I'm seeing is another locomotive or the end of the tunnel.

John - By "windshield and A-pillar trim" I meant the windshield trim and the A-pillar trim.  I don't have to pull the windshield.
Gary, AKA "Gary fellow": Profile

Dad's: '81 F150 Ranger XLT 4x4: Down for restomod: Full-roller "stroked 351M" w/Trick Flow heads & intake, EEC-V SEFI/E4OD/3.50 gears w/Kevlar clutches
Blue: 2015 F150 Platinum 4x4 SuperCrew wearing Blue Jeans & sporting a 3.5L EB & Max Tow
Big Blue: 1985 F250HD 4x4: 460/ZF5/3.55's, D60 w/Ox locker & 10.25 Sterling/Trutrac, Blue Top & Borgeson, & EEC-V MAF/SEFI

Reply | Threaded
Open this post in threaded view
|

Re: Installation Of A Pormido 998 Mirror/Camera System

Gary Lewis
Administrator
Well, I think the light I'm seeing is the end of the tunnel!  

Not a lot of progress, but I pulled the dash cover, interior windshield trim, A-pillar trim, and GMRS radio.  Then I ran a white/purple wire to extend the switched power from the clock to the area where the GMRS radio is in the Highliner.  That plus the always-hot power feeds the Pormido power module.

That module is a disc about 2" in diameter and 1" thick, and turns the 12v into 5v for the mirror.  But it also has a battery monitor which turns the power to the mirror off if the battery voltage drops below one of three preset values: 11.3V, 11.8V or 12.1V.  That's so you can leave it on 24/7 if you want in case you park in a questionable area and want the cameras to be taking snapshots at 2 frames/second.  Anyway, that module has an adhesive patch on the back and I'll mount it in the radio cavity of the Highliner.

Then I ran the power to the mirror, added the GPS antenna above the mirror, and started running the camera leads.  The camera leads will be stuffed up above the Highliner, with the front lead going down the A-pillar and the rear camera then going down the B-pillar.

So the plan for tomorrow after church is to finish the power wiring and then run the camera leads.  
Gary, AKA "Gary fellow": Profile

Dad's: '81 F150 Ranger XLT 4x4: Down for restomod: Full-roller "stroked 351M" w/Trick Flow heads & intake, EEC-V SEFI/E4OD/3.50 gears w/Kevlar clutches
Blue: 2015 F150 Platinum 4x4 SuperCrew wearing Blue Jeans & sporting a 3.5L EB & Max Tow
Big Blue: 1985 F250HD 4x4: 460/ZF5/3.55's, D60 w/Ox locker & 10.25 Sterling/Trutrac, Blue Top & Borgeson, & EEC-V MAF/SEFI

Reply | Threaded
Open this post in threaded view
|

Re: Installation Of A Pormido 998 Mirror/Camera System

Gary Lewis
Administrator
Well, "the plan for tomorrow after church is to finish the power wiring and then run the camera leads" didn't really come to fruition.  Steve/Foxford33 has built a shop and is trying to get the tools he needs to restore his Grand Wagoneer.  He needed heat, so an unused kerosene heater is finally getting some use.  He needs to be able to pull the engine, so the extra 2" tubing I've had taking up space in the attic is going to a good cause - an A-frame engine hoist.  And the extra engine stand I've been tripping over is going to hold the Chrysler engine that the engine hoist will pull out.

So I feel like I had a productive day in spite of not getting much done on Big Blue as I now have more space in the shop.  And, a buddy is getting to work on his projects.  Plus, he helped me carry a blue seat that is in "excellent condition" up to the attic out of the back of Big Blue.    (To be fair, I robbed the hinge cover off of it to replace the one on Big Blue that I put a screw through to hold it on.)

But then I did do a teeny bit of work on the camera system.  As you can see in the pic below of the "hardware kit", the power feeds are through two small fuses that are intended to plug into some fuse holder.  But I don't have any holders that size, and even if I did I wouldn't want to use them 'cause I cannot get those fuses out of the connectors they are in.  So if I blew a fuse at some point I'd be stuck.

Given that I've ordered several in-line fuse holders and will use them to shorten the wiring to the "snake head" shown at the bottom of the pic.  That's the brains of the power supply, and it both converts 12v to 5v as well as monitors battery voltage and shuts the system down if the voltage goes low.

The best laid plans...

Gary, AKA "Gary fellow": Profile

Dad's: '81 F150 Ranger XLT 4x4: Down for restomod: Full-roller "stroked 351M" w/Trick Flow heads & intake, EEC-V SEFI/E4OD/3.50 gears w/Kevlar clutches
Blue: 2015 F150 Platinum 4x4 SuperCrew wearing Blue Jeans & sporting a 3.5L EB & Max Tow
Big Blue: 1985 F250HD 4x4: 460/ZF5/3.55's, D60 w/Ox locker & 10.25 Sterling/Trutrac, Blue Top & Borgeson, & EEC-V MAF/SEFI

Reply | Threaded
Open this post in threaded view
|

Re: Installation Of A Pormido 998 Mirror/Camera System

kramttocs
Administrator
Anytime you can get shop space and the items previously occupying that space are put to good use is a good day

Those fuses don't come out?? Well, that's not a very forward thinking setup they put together. Clean fusetaps, yes, but what good is one that can't be replaced. Unless they are wedged in there really, really tight and they are using the test point for power?

When you were playing contortionist and soldering on the fusebox, didn't you make some of the blank spots into active spots with dead leads coming out? Are any of those still free, and hot at the right times, for these?
Scott
'Camano' 1986 F250 Supercab XLT Lariat 460/C6
'Chanute' 1980 F350 C&C 400/NP 435 - Gin Pole

But there ain't nothin' wrong with the radio
Reply | Threaded
Open this post in threaded view
|

Re: Installation Of A Pormido 998 Mirror/Camera System

Gary Lewis
Administrator
Yes, it was a good day.  I feel good about it and I know Steve does.

As for the fuses, I don't dare pull any harder.  They surely are connecting to the test point, and they'd have to be in there tightly so the test point would make a good connection, but they are in so tightly that I'm not sure they are intended to come out.

I've complained to Pormido about the instructions, which don't provide any guidance whatsoever on those fuses, and they've just come back saying:

About the hardwire instruction, we don't know how to make better one because the fuse box in various model are different, it would be appreciated if you have any suggestion to improve it, just leave it if it's too bothering:)

I fully agree the fuse boxes in various vehicles are surely quite different, and these would work as taps.  But my complaint is they they don't tell whether or not the fuses come out to be replaced.  And, they are the small fuses that not all vehicles use.  So I'll provide some feedback, but after I tap into their wiring to shorten things so I don't have oodles of wire in that radio cavity.

As for power from the fuse box, I tapped into the power that was intended for the digital clock.  I'm using that for various things in the Mission Control switches, so I just ran a wire to the right, up the right A-pillar, across the windshield header under the Highliner, and then into that radio cavity.  There was already always-on power there, so I'm set.
Gary, AKA "Gary fellow": Profile

Dad's: '81 F150 Ranger XLT 4x4: Down for restomod: Full-roller "stroked 351M" w/Trick Flow heads & intake, EEC-V SEFI/E4OD/3.50 gears w/Kevlar clutches
Blue: 2015 F150 Platinum 4x4 SuperCrew wearing Blue Jeans & sporting a 3.5L EB & Max Tow
Big Blue: 1985 F250HD 4x4: 460/ZF5/3.55's, D60 w/Ox locker & 10.25 Sterling/Trutrac, Blue Top & Borgeson, & EEC-V MAF/SEFI

Reply | Threaded
Open this post in threaded view
|

Re: Installation Of A Pormido 998 Mirror/Camera System

kramttocs
Administrator
At least they are straightforward about why they did what they did.
Scott
'Camano' 1986 F250 Supercab XLT Lariat 460/C6
'Chanute' 1980 F350 C&C 400/NP 435 - Gin Pole

But there ain't nothin' wrong with the radio
Reply | Threaded
Open this post in threaded view
|

Re: Installation Of A Pormido 998 Mirror/Camera System

Gary Lewis
Administrator
Pormido has been great to work with.  I have way over 100 messages to/from Melissa, and she is quite helpful.  If she doesn't know she'll tell me and then go talk to an engineer.  For instance, she recently said they've not tested to see how long the cable can be to the front camera since they expected it to be installed inside the vehicle.  I think my 30' of cable was well over the limit.

Gary, AKA "Gary fellow": Profile

Dad's: '81 F150 Ranger XLT 4x4: Down for restomod: Full-roller "stroked 351M" w/Trick Flow heads & intake, EEC-V SEFI/E4OD/3.50 gears w/Kevlar clutches
Blue: 2015 F150 Platinum 4x4 SuperCrew wearing Blue Jeans & sporting a 3.5L EB & Max Tow
Big Blue: 1985 F250HD 4x4: 460/ZF5/3.55's, D60 w/Ox locker & 10.25 Sterling/Trutrac, Blue Top & Borgeson, & EEC-V MAF/SEFI

Reply | Threaded
Open this post in threaded view
|

Re: Installation Of A Pormido 998 Mirror/Camera System

Gary Lewis
Administrator
Got a bit done today.  First, I drilled a hole in the right back corner of the cab and installed a gland nut in the hole with the rear camera cable running through it.  Then I got the front & rear camera cables as well as the switched-power wire routed under the edge of the Highliner, down the A & B-pillars, and across the top of the windshield to the mirror.  And then I got the trim and dash pad back on.  

You can see how it worked out in the pic below, but I think it turned out nicely.  The right-angle connectors from Pormido prevent going straight up with the wires, so that's about the best I could do.  And the square thing above the mirror on the windshield is the GPS antenna.

Gary, AKA "Gary fellow": Profile

Dad's: '81 F150 Ranger XLT 4x4: Down for restomod: Full-roller "stroked 351M" w/Trick Flow heads & intake, EEC-V SEFI/E4OD/3.50 gears w/Kevlar clutches
Blue: 2015 F150 Platinum 4x4 SuperCrew wearing Blue Jeans & sporting a 3.5L EB & Max Tow
Big Blue: 1985 F250HD 4x4: 460/ZF5/3.55's, D60 w/Ox locker & 10.25 Sterling/Trutrac, Blue Top & Borgeson, & EEC-V MAF/SEFI

Reply | Threaded
Open this post in threaded view
|

Re: Installation Of A Pormido 998 Mirror/Camera System

taskswap
Looks good! I like that the Pormido is more rectangular than others, it's definitely more "in the style" of the bullnose era. Is that stalk just top right in your photo the microphone?
--
1981 F-250 Custom. 6.6L V8, 4 barrel Holley carb, ARA aftermarket A/C.
Reply | Threaded
Open this post in threaded view
|

Re: Installation Of A Pormido 998 Mirror/Camera System

Gary Lewis
Administrator
Thanks.  Yes, I like the rectangular style.

And yes, that's the mike for the hands-free part of the Sony radio.  Works well.
Gary, AKA "Gary fellow": Profile

Dad's: '81 F150 Ranger XLT 4x4: Down for restomod: Full-roller "stroked 351M" w/Trick Flow heads & intake, EEC-V SEFI/E4OD/3.50 gears w/Kevlar clutches
Blue: 2015 F150 Platinum 4x4 SuperCrew wearing Blue Jeans & sporting a 3.5L EB & Max Tow
Big Blue: 1985 F250HD 4x4: 460/ZF5/3.55's, D60 w/Ox locker & 10.25 Sterling/Trutrac, Blue Top & Borgeson, & EEC-V MAF/SEFI

Reply | Threaded
Open this post in threaded view
|

Re: Installation Of A Pormido 998 Mirror/Camera System

mat in tn
 caught me snooping. guilty! i noticed the parts on the shelf in the background like throttle bodies and air cleaners. your secrets safe with me
Reply | Threaded
Open this post in threaded view
|

Re: Installation Of A Pormido 998 Mirror/Camera System

Gary Lewis
Administrator
LOL!  Yes, there is a BBK throttle body for Big Blue awa the upper plenum, powder coated of course.  And the fuel distribution manifold is there, and powder coated as well.  Plus twin-snorkel air cleaners.  
Gary, AKA "Gary fellow": Profile

Dad's: '81 F150 Ranger XLT 4x4: Down for restomod: Full-roller "stroked 351M" w/Trick Flow heads & intake, EEC-V SEFI/E4OD/3.50 gears w/Kevlar clutches
Blue: 2015 F150 Platinum 4x4 SuperCrew wearing Blue Jeans & sporting a 3.5L EB & Max Tow
Big Blue: 1985 F250HD 4x4: 460/ZF5/3.55's, D60 w/Ox locker & 10.25 Sterling/Trutrac, Blue Top & Borgeson, & EEC-V MAF/SEFI

Reply | Threaded
Open this post in threaded view
|

Re: Installation Of A Pormido 998 Mirror/Camera System

mat in tn
i love this stuff! each has their spin. each has their favorite color, format or whatever. I myself am blessed with a wife who likes me better because I'm happy with a purpose rather than miserable with a "job". So, I like old trucks. what about it?
Reply | Threaded
Open this post in threaded view
|

Re: Installation Of A Pormido 998 Mirror/Camera System

Gary Lewis
Administrator
I'm blessed with a wife that enables me to do this stuff.  In fact, as I type she's looking for a hotel room on our next jaunt in Big Blue - the Ouachita Trail.  And I hope to have the mirror and cameras fully operational then.
Gary, AKA "Gary fellow": Profile

Dad's: '81 F150 Ranger XLT 4x4: Down for restomod: Full-roller "stroked 351M" w/Trick Flow heads & intake, EEC-V SEFI/E4OD/3.50 gears w/Kevlar clutches
Blue: 2015 F150 Platinum 4x4 SuperCrew wearing Blue Jeans & sporting a 3.5L EB & Max Tow
Big Blue: 1985 F250HD 4x4: 460/ZF5/3.55's, D60 w/Ox locker & 10.25 Sterling/Trutrac, Blue Top & Borgeson, & EEC-V MAF/SEFI

Reply | Threaded
Open this post in threaded view
|

Re: Installation Of A Pormido 998 Mirror/Camera System

mat in tn
i must admit after watching the recent four wheeling videos, I'm struggling with the desire to pull my custom built bronco2 off the sales floor since it has not sold and get back out there.
123456